Hey there, retro-futurists and DIY enthusiasts! Remi here, ready to zap some life into your kitchen with a groovy lighting makeover. You know, back in the day, folks thought we’d all be eating pills for dinner by now. But here we are, still gathering around the kitchen table, and boy, does the right lighting make a difference! Whether you’re digging that Jetsons-esque vibe or going for more of a “Leave It to Beaver” cozy feel, I’ve got the lowdown on how to illuminate your dining space without breaking the bank. And hey, if you’re feeling a bit nervous about diving into the world of DIY kitchen lighting installation, don’t sweat it! I’ll walk you through it step-by-step, just like my pop taught me to fix up our old Philco radio. So, grab your toolbelt, and let’s get ready to shine a new light on your kitchen table!
Key Takeaways
Welcome to the control panel of our lighting adventure! Before we flip the switch, let’s review our mission objectives:
- Discover how DIY kitchen table lighting can turn your dining area from drab to fab, making every meal feel like you’re dining with the Bradys or the Robinsons (your choice!).
- Get the 411 on planning your lighting project – we’ll make sure you’re not left in the dark about sizing, style, or supplies.
- Follow our step-by-step guide that’s clearer than the instructions for assembling a 1960s TV stand (and way more fun).
- Explore lighting ideas so cool, they’ll make your lava lamp jealous.
- Learn how even small changes can make your kitchen pop like the first color TV on the block.
- Stay safe, folks! We’ll cover the dos and don’ts faster than you can say “electric boogaloo.”

Benefits of DIY Kitchen Table Lighting
Let’s rap about why DIY lighting is the bees’ knees, shall we?
Cost Savings
Alright, cats and kittens, let’s talk turkey about saving some green. DIY kitchen table lighting is like finding a vintage Eames chair at a yard sale – it’s a steal! By channeling your inner handyman (or handywoman), you’re bypassing those hefty installation fees faster than you can say “shag carpet.” Most of these projects are easier than programming your old VCR, requiring just basic tools and a can-do attitude. And here’s a fun fact: Did you know that the first dimmer switch was invented in 1959? Speaking of which, by choosing energy-efficient bulbs, you’ll be saving on your electric bill too. It’s like getting a two-for-one special at the drive-in!
Customization Options
Now, dig this – customization is where DIY grooves. It’s your chance to make your kitchen lighting as unique as your lava lamp collection. Want a pendant light that looks like a UFO? Go for it! Dreaming of a chandelier made from old vinyl records? That’s far out, man! The sky’s the limit when you’re the designer and the installer. You can mix and match styles faster than changing channels on a remote-less TV. Remember, in the world of DIY, there’s no such thing as “too out there” – only “not out there enough”!

Personal Satisfaction
Let me lay it on you straight – there’s nothing quite like the rush of completing a DIY project. It’s like finally beating that pinball high score you’ve been chasing since ’75. When you flip that switch and see your handiwork illuminating your kitchen table, you’ll feel cooler than the Fonz. Plus, each project you tackle is like leveling up in the game of home improvement. Before you know it, you’ll be the go-to guru for all things DIY in your neighborhood. Who knows? You might even start your home improvement show – “Remi’s Retro Renovations” has a nice ring to it, don’t you think?
Planning Your Lighting Project
Alright, space cadets, before we blast off into DIY land, we need to plot our course. Planning is key – it’s like making sure you have all the right pieces before starting a jigsaw puzzle of the Millennium Falcon.
Measure Existing Fixtures
First things first, we gotta get our measurements down pat. It’s like taking stock of your record collection – you need to know what you’re working with. Grab your tape measure (the cooler, the better – I’ve got one that looks like a lightsaber) and jot down the height, width, and depth of your current fixtures. This isn’t just busy work, folks – it’s crucial intel for your mission. You don’t want to end up with a pendant light that hangs lower than Austin Powers’ chest hair, do you? Compare these numbers with the specs of any new fixtures you’re eyeing. Trust me, it’s easier to adjust your plan now than to realize your new chandelier is playing limbo with your dinner guests’ heads.

Choose Lighting Style
Now for the fun part – choosing your lighting style! This is where you get to let your freak flag fly, baby. Are you feeling mod? Rustic? Maybe you want your kitchen to look like the bridge of the Enterprise. Whatever floats your boat, make sure it jives with the rest of your kitchen’s vibe. You don’t want your lighting to stick out like a Jetsons prop in a “Little House on the Prairie” set. And here’s a groovy tip – consider the light bulb color too. It can make a world of difference in setting the mood. You want your pot roast to look appetizing, not like it’s been beamed down from an alien planet!
Gather Necessary Supplies
Time to gear up, DIY warriors! Make a list of all the goodies you’ll need for your lighting adventure. We’re talking fixtures, bulbs, wiring – the works. Don’t forget the tools either – screwdrivers, pliers, wire strippers, and maybe a hard hat if you’re feeling extra cautious (or just want to look like a member of the Village People). Pro tip: buy everything in advance. There’s nothing worse than being elbow-deep in a project and realizing you’re missing a crucial component. It’s like getting to the drive-in and realizing you forgot the popcorn – a total buzzkill. Oh, and before you start, make sure all your new gear plays nice with your existing electrical system. We want to light up the kitchen, not reenact the finale of “Back to the Future”!
Step-by-Step Instructions
Alright, troops, it’s time to deploy Operation Illumination! Follow these steps, and you’ll be dining under your new lights faster than you can say “TV dinner.”
Remove Old Fixtures
First things first, we gotta ditch the old to make way for the new. It’s like clearing out your garage to make room for that sweet ’57 Chevy you’ve been eyeing.
- Cut the power at the circuit breaker. Safety first, cats and kittens – we don’t want any impromptu light shows!
- Carefully remove the old fixtures. Treat them like vintage vinyl – with respect, even if they’re not your style anymore.
- Keep an eye on the wiring. We’re not playing “Operation” here – no buzzes allowed!
- Dispose of the old fixtures responsibly. Maybe someone else can upcycle them into a retro robot costume.
Fun fact: The first electric light was invented in 1802, but it took another 77 years before Edison made the first commercially successful bulb. Imagine the upgrade those folks felt!
Install New Base
Now we’re cooking with gas! Time to set up the new base for your groovy lighting.
- Mount that new base like you’re hanging a prized lava lamp.
- Use screws that fit snugger than your favorite bellbottoms.
- Make sure it’s level – we’re going for “mod,” not “odd.”
- Double-check the stability. Give it a little shake – if it’s moving more than Elvis’ hips, tighten it up!
Attach New Fixtures
Here’s where the magic happens, daddy-o! We’re bringing your kitchen into the future (or the past, depending on your style).
- Connect the wiring according to the instructions. It’s like following a recipe, but with more sparks.
- Each fixture might have its quirks, so read carefully. It’s not rocket science, but it’s not exactly making Tang either.
- Use the right hardware. This isn’t the time for “close enough.”
- Make those connections tighter than a new pair of go-go boots. We don’t want any loose wires crashing this party.
Test and Adjust
The moment of truth, folks! Time to see if our DIY adventure paid off.
- Flip that switch and let there be light!
- How’s it looking? If it’s not quite right, don’t flip your wig. A little adjustment goes a long way.
- Make sure the light is spread evenly. We want to illuminate your casserole, not create a spotlight for interpretive dance (unless that’s your thing).
- Consider Adding a Dimmer Switch for ultimate mood control. It’s like having Instagram filters for your kitchen!
Popular DIY Lighting Ideas
Get ready to have your mind blown, because these lighting ideas are about to take your kitchen from “meh” to “yeah, baby, yeah!”
Recessed Light Kits
Recessed lights are like the James Bond of lighting – sleek, unobtrusive, and oh-so-cool. They’re perfect for kitchens with low ceilings or if you’re going for that minimalist, space-age look.
- Pro tip: These bad boys are adjustable, so you can direct the light exactly where you need it. It’s like having a spotlight operator for your culinary performances!
- Fun fact: Recessed lighting first gained popularity in the 1960s, right around the time we were dreaming about living on the moon. Coincidence? I think not!
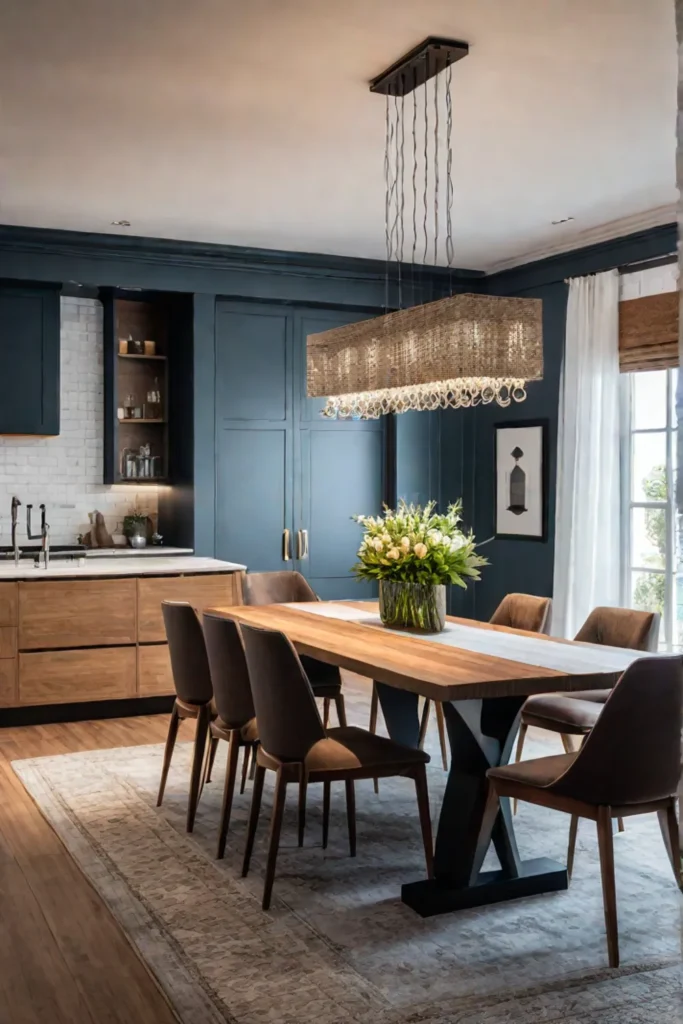
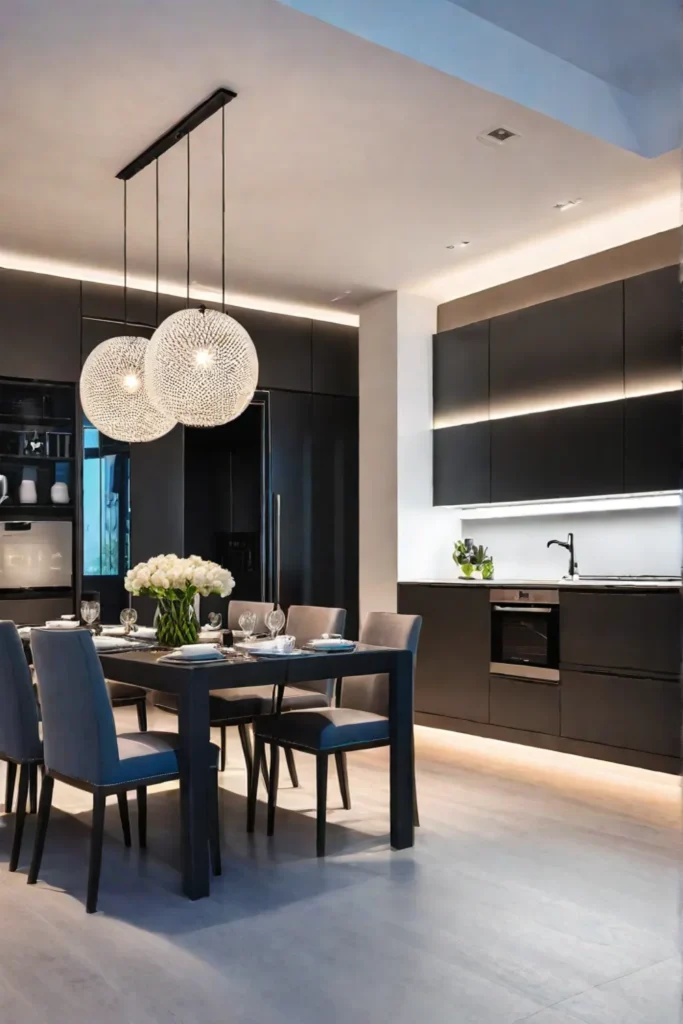
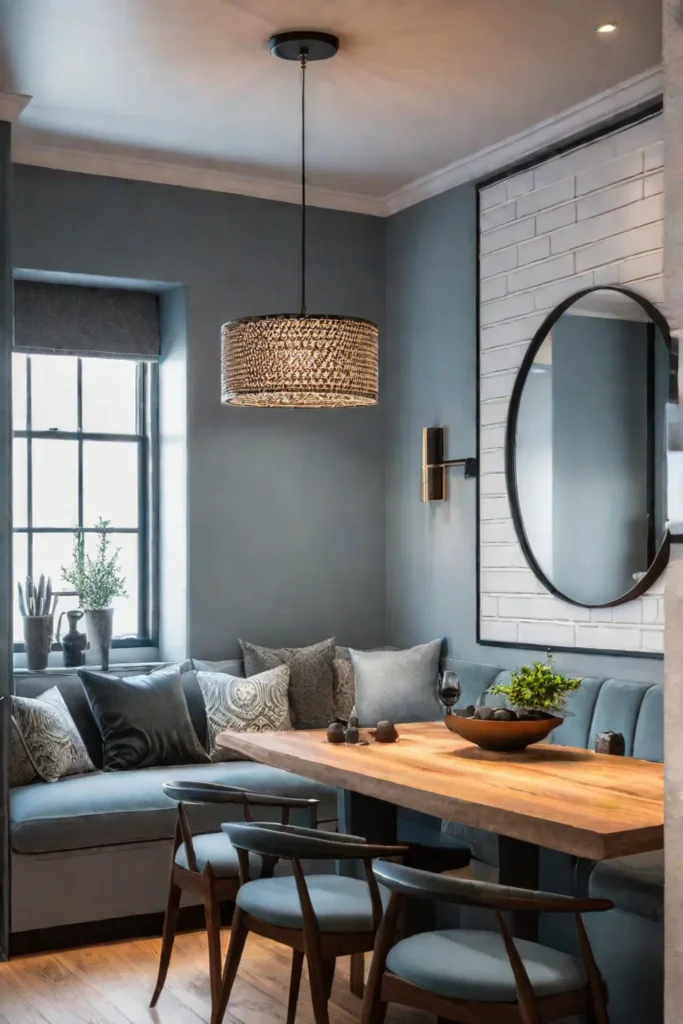
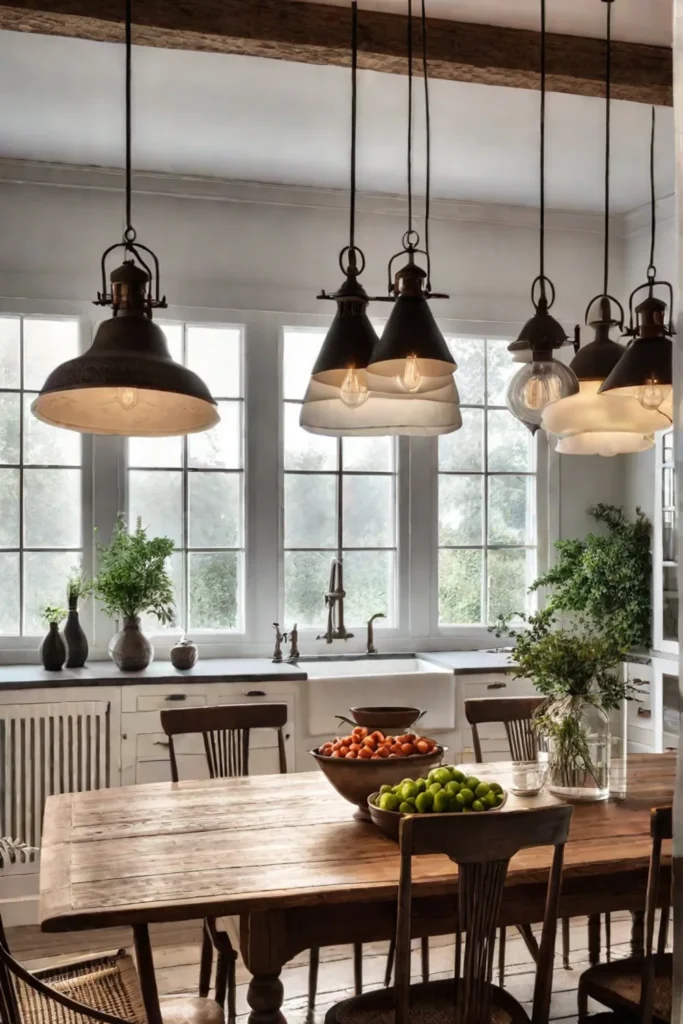
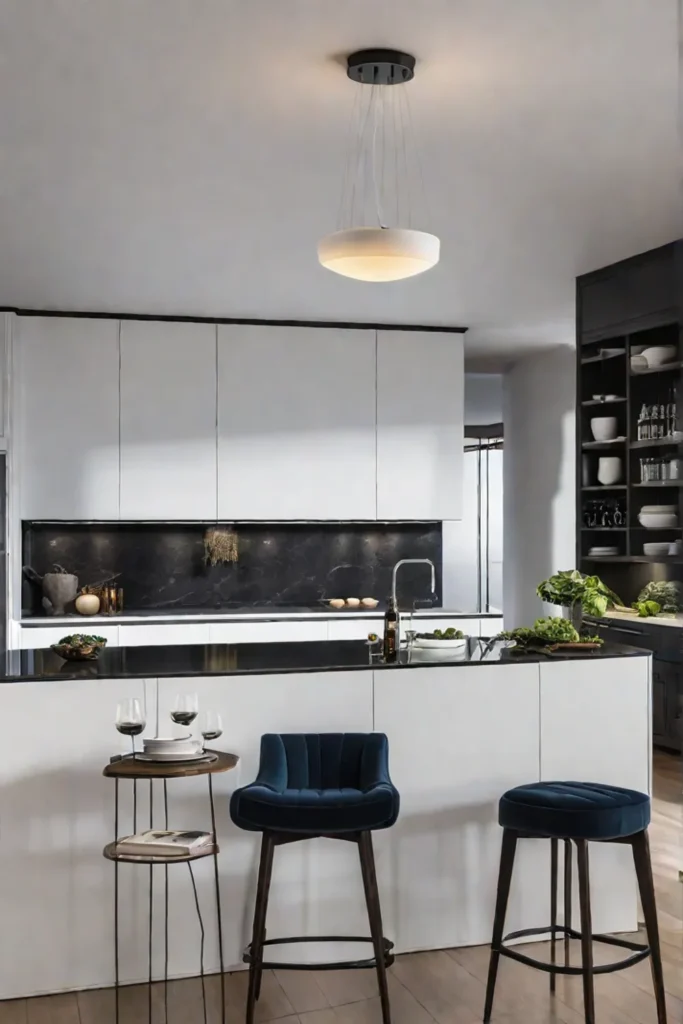
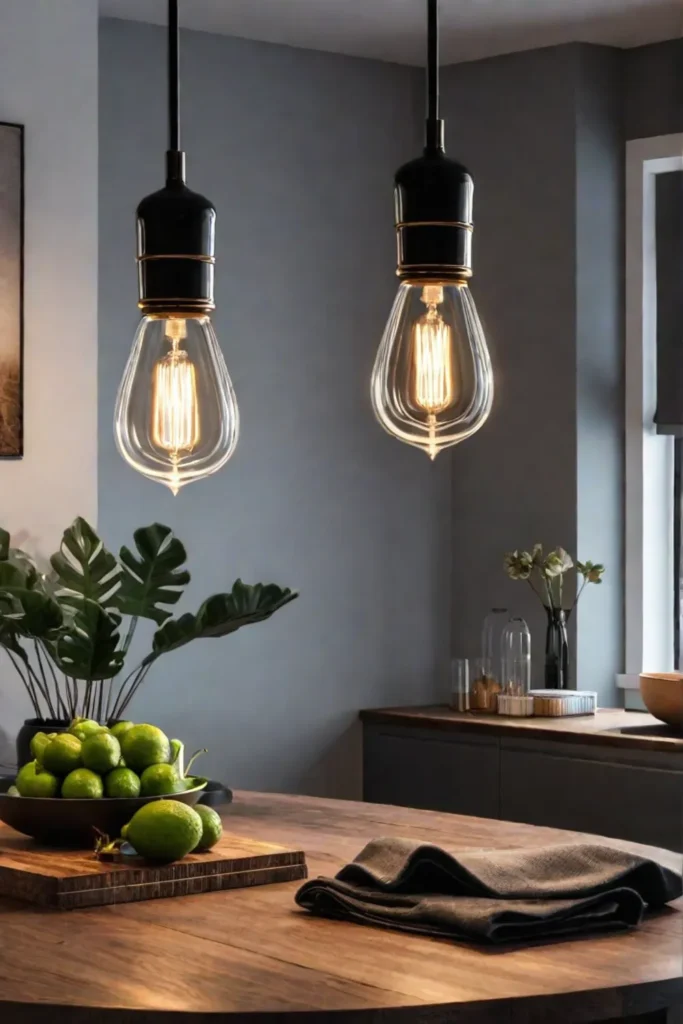
Pendant Lights
Pendant lights are the statement pieces of the lighting world. They’re like the go-go boots of your kitchen – fun, stylish, and impossible to ignore.
- Hang them in odd numbers for that perfect retro-modern balance. Three pendants over an island? That’s the sweet spot, baby!
- Mix and match shapes and sizes for a look that’s groovier than a lava lamp convention.
- Remember: The bottom of your pendant should hang about 30-36 inches above your table. Any lower and your guests might think they’ve wandered onto the set of “Honey, I Shrunk the Kids”!
Track Lighting
Track lighting is like the Swiss Army knife of illumination – versatile, practical, and oh-so-cool. It’s perfect for those who like to change things up more often than David Bowie changed his look.
- You can move and adjust the lights along the track more easily than changing the channel on your remote-controlled color TV.
- Use it to highlight your favorite kitchen features. Do you have a funky backsplash? Let it shine, baby!
- Fun fact: Track lighting was invented in 1961, the same year the first human went to space. Coincidence? Absolutely, but it’s still pretty far out!
Semi-Flush Mounts
Semi-flush mounts are the Goldilocks of lighting fixtures – not too high, not too low, but just right. They’re perfect for kitchens with medium-height ceilings, giving you that modern look without making you feel like you’re dining in an airport hangar.
- These fixtures provide plenty of light without taking up too much visual space. It’s like having your cake and eating it too!
- Choose a fixture with a bit of sparkle to add some pizzazz to your kitchen. It’ll be like having a disco ball, but classy.
- Pro tip: Semi-flush mounts work great with vintage-inspired LED bulbs. You get the look of Edison bulbs with the energy efficiency of the future. It’s the best of both worlds, like a time-traveling DeLorean!
Simple Lighting Makeovers
Alright, cool cats, not everyone’s ready to rewire their entire kitchen. Sometimes, a little nip and tuck is all you need to get your groove back. Here are some quick and easy ways to give your kitchen lighting a facelift faster than you can say “Beam me up, Scotty!”

Update with Paint
Who knew a little paint could pack such a punch? It’s like giving your old fixtures a mod makeover without breaking the bank.
- Choose colors that complement or contrast with your kitchen’s palette. Want to go bold? How about a pop of orange or teal? It’s like bringing the 60s back, one fixture at a time!
- Always use heat-resistant paint. We want your fixtures to look hot, not get hot. Safety first, style second!
- Fun fact: The first heat-resistant paint was developed in the 1940s for use on aircraft engines. Now that’s what I call a high-flying idea!
Add Decorative Elements
Why settle for plain when you can have pizzazz? Adding some flair to your fixtures is easier than teaching your grandma to use a smartphone.
- Swap out boring shades for something with more personality. Crystal beads, colored glass, or even a DIY shade made from an old colander – the sky’s the limit!
- Try adding some groovy decals or stickers to plain fixtures. It’s like giving your lighting a temporary tattoo!
- Pro tip: Use removable elements so you can change up your look faster than a chameleon in a disco.
Use Smart Bulbs
Welcome to the future, baby! Smart bulbs are like having a tiny DJ for your lighting, and they’re easier to install than an 8-track player.
- Control your lights with your smartphone or voice commands. It’s like being Captain Kirk but for your kitchen!
- Change colors and brightness to set the mood. Romantic dinner? Groovy party? Late-night snack raid? There’s a setting for that!
- Program your lights to turn on and off automatically. It’s like having your own Rosie the Robot but for lighting!
- Fun fact: The first smart bulb was introduced in 2012, about 133 years after Edison’s first commercial light bulb. Talk about a bright idea!
Closing Thoughts
Well, folks, we’ve taken quite the trip down Illumination Lane, haven’t we? From swinging pendant lights to smart bulbs that would make George Jetson jealous, we’ve covered it all. Remember, transforming your kitchen table lighting isn’t just about brightness – it’s about creating a groovy atmosphere that makes every meal feel special, whether you’re chowing down on TV dinners or hosting a fondue party.
Now it’s your turn to take the spotlight! Grab those tools, channel your inner DIY superstar, and start brightening up your kitchen. Who knows? You might just discover you have a knack for this whole lighting design thing. And hey, if you run into any snags, just remember – even Edison had a few duds before he lit up the world.

So go forth and illuminate, my friends! Share your rad lighting projects with your pals, spread the DIY love, and let’s make every kitchen table the hippest spot in the house. After all, good lighting is like a great record – it sets the mood, brings people together, and never goes out of style.
Stay groovy, and keep on shining!
Frequently Asked Questions
What are the benefits of DIY kitchen table lighting?
Oh, baby, where do I start? DIY lighting is like adding a cherry to your sundae – it makes everything better! You’ll save more bread than a bakery, get to flex your creative muscles, and end up with a one-of-a-kind look that’ll make your neighbors green with envy. Plus, the satisfaction of doing it yourself? It’s better than finding an original Eames chair at a garage sale!
How do I plan my DIY lighting project?
Planning is key, cats and kittens! Start by scoping out your space like a detective. Measure your table, check out the vibe of your kitchen, and dream up what kind of light show you want. Sketch out some ideas – don’t worry if you’re not Picasso, it’s just for you. Then, make a list of supplies longer than your grandma’s TV antenna. Remember, failing to plan is planning to fail, and we don’t want any DIY disasters!
What materials do I need for a DIY lighting project?
Gear up, space cadets! You’ll need fixtures cooler than the Batmobile, bulbs brighter than Einstein, wiring, and some mounting hardware. Don’t forget tools – screwdrivers, pliers, wire strippers, and maybe a helmet if you’re feeling extra groovy. Oh, and always go for quality stuff – we’re making lighting, not a time machine!