Picture this: You’re standing in your bathroom. Instead of a sterile, generic space, it feels like an extension of your home’s living, breathing ecosystem. Sunlight streams in, illuminating the natural grain of a solid wood surface. A small fern thrives in the humidity, its leaves brushing against a rustic ceramic soap dispenser. This isn’t just a place to brush your teeth; it’s a small sanctuary that grounds you. That feeling—that blend of productivity, nature, and comfort—is what a real farmhouse bathroom vanity is all about.
So many people get this wrong. They see “farmhouse” and think of mass-produced, faux-distressed furniture from a big-box store. That’s just noise. What really matters is choosing materials that are honest, durable, and have a story. It’s about creating a space that is not only beautiful but functional, healthy, and deeply connected to the natural world. I once had a client who was about to buy a cheap particleboard vanity because it “looked the part.” I stopped them and we went to a local salvage yard instead. We found an old oak sideboard that we converted. It cost a bit more in effort, but a year later, it’s the heart of their home, not a peeling, water-damaged box destined for a landfill. I want to give you the shortcuts to get that feeling of satisfaction, to build something that lasts and truly nurtures you.
Laying the Foundation: Planning Your Farmhouse Vanity Vision (Part 1)
Before you even think about wood stains or faucets, we need to talk about the blueprint. This is the part everyone wants to skip, but it’s what separates a vanity you love for a lifetime from one you regret in a year. Getting the foundation right is about understanding your space as it is and imagining how you want it to feel.
1. Assessing Your bathroom layout for Optimal Vanity Placement
Okay, before you fall in love with a giant double vanity on Pinterest, let’s get real about your space. This isn’t just about whether it will physically fit; it’s about flow. How do you move from the door to the shower to the toilet? Your vanity should never be a roadblock. It needs to feel like it has always belonged right there.
A trick I swear by: get some painter’s tape and map out the exact footprint of your potential vanity on the floor. Don’t forget to mark how far the drawers and cabinet doors will swing open. I’ve seen people realize just in time that their new drawer would smack right into the toilet or block the bathroom door from opening fully. This simple five-minute step can save you from a massive, costly mistake.
From there, you can start thinking about how to design for your unique needs. Is there an awkward corner you could embrace with a custom-fit piece, or would a floating vanity make your tiny bathroom feel twice as big by showing more floor?
2. Defining Your Farmhouse Aesthetic: Rustic, Modern, or Shabby Chic?
Can we talk about why so many “farmhouse” bathrooms feel… fake? It’s because people are buying a pre-packaged look instead of building an aesthetic. The word “farmhouse” isn’t a single style; it’s an ethos. Are you drawn to the raw, unfinished feel of rustic reclaimed wood? The clean lines and mixed metals of modern farmhouse? Or the soft, found-object charm of shabby chic?
Don’t just scroll online—look at the rest of your home. The goal is cohesion. Your vanity should feel like a natural extension of your living space, not a random theme room. Create a mood board, but instead of just pinning finished bathrooms, pin textures: aged barn wood, hammered copper, smooth matte black metal, linen fabric. This helps you nail down the feeling you’re after, ensuring the final piece is authentic to you.
Remember, this style is rooted in practicality and using what’s available. Whether it’s a sleek modern take or a truly rustic one, the best results come from honest materials, not fads.
3. Determining the Ideal Vanity Size and Configuration for Your Space
Now that you’ve taped out your layout, let’s talk numbers. Standard vanity depths are around 21 inches, but in a narrow bathroom, choosing a slimmer 18-inch depth model can be an absolute game-changer. It can mean the difference between a comfortable walkway and a cramped shuffle.

This is also where you decide between a single or double sink. Be honest with yourself about your morning routine. A double sink is fantastic for busy couples, but if you have a smaller master bath, a single sink with more uninterrupted counter space might actually be far more functional. More counter space means room for a plant, a tray for your essentials, and a feeling of calm, not clutter.
A client of mine in a tiny apartment was set on having two sinks. I finally convinced them to go with a single, wide trough sink instead. They got the dual-faucet functionality they wanted for their morning rush but ended up with a much sleeker look and more precious counter space for their daily items.
4. Budgeting Smartly for a High-Quality Farmhouse Vanity Project
Let’s reframe “budget” as “investment.” Where you put your money determines how long you’ll love this vanity. The absolute BS is thinking you need to spend a fortune on every single component. The shortcut is knowing where to splurge and where to save.
Invest your money in the things that take the most abuse: the countertop and the base structure. A non-porous quartz or properly sealed stone countertop will resist stains and bacteria for decades. A solid wood base won’t swell and fall apart the first time there’s a small leak. These are your non-negotiables. You can save money on hardware (hello, flea market finds!), mirrors (upcycle an old frame!), and even the finish if you’re willing to do some DIY sanding and painting. Always, always set aside 15-20% of your total budget as a contingency fund. Unexpected plumbing issues happen. It’s just a fact.
By thinking this way, you’re not just buying a vanity; you’re investing in the health and longevity of your home.
Laying the Foundation: Planning Your Farmhouse Vanity Vision (Part 2)
We’re moving past the floor plan and into the heart of the matter: the materials. This is where your vision starts to become a tangible, touchable thing. Choosing the right components isn’t just for looks; it’s about building a piece of furniture that can survive the most demanding room in your house.
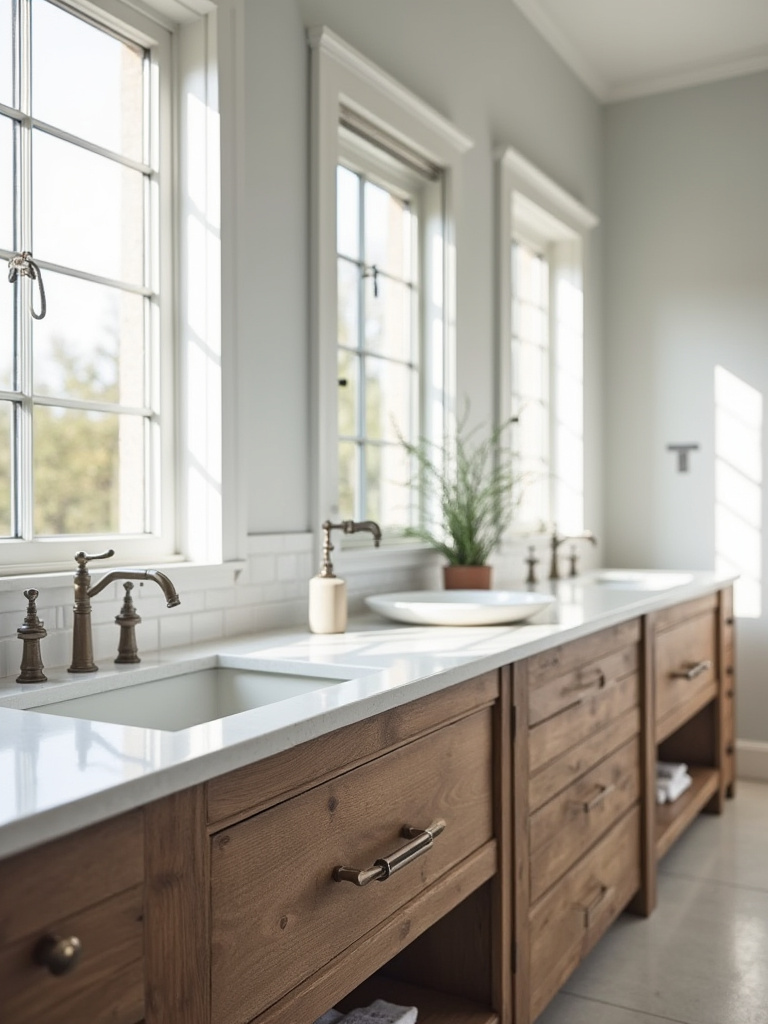
5. Researching Material Durability: Wood Types, Countertops, and Sinks
The bathroom is a battlefield of moisture and humidity. Choosing the wrong materials is like sending a soldier into combat with a paper shield. Forget particleboard or MDF. They are essentially sponges waiting to disintegrate. In a bathroom, they are just future landfill fodder.

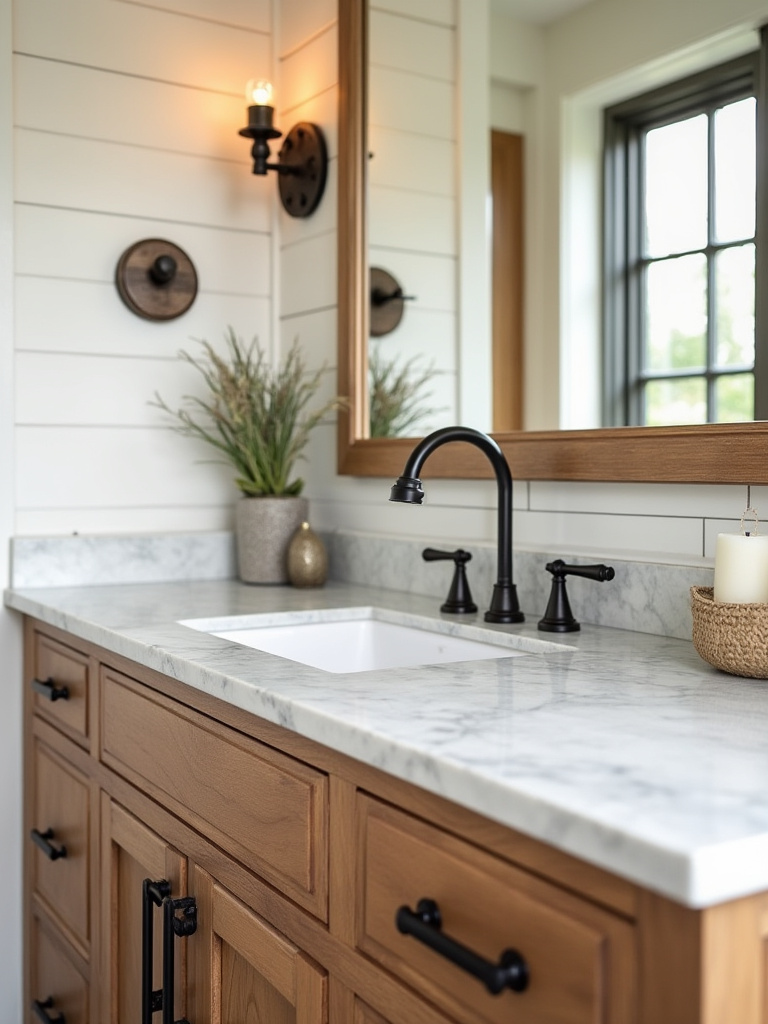
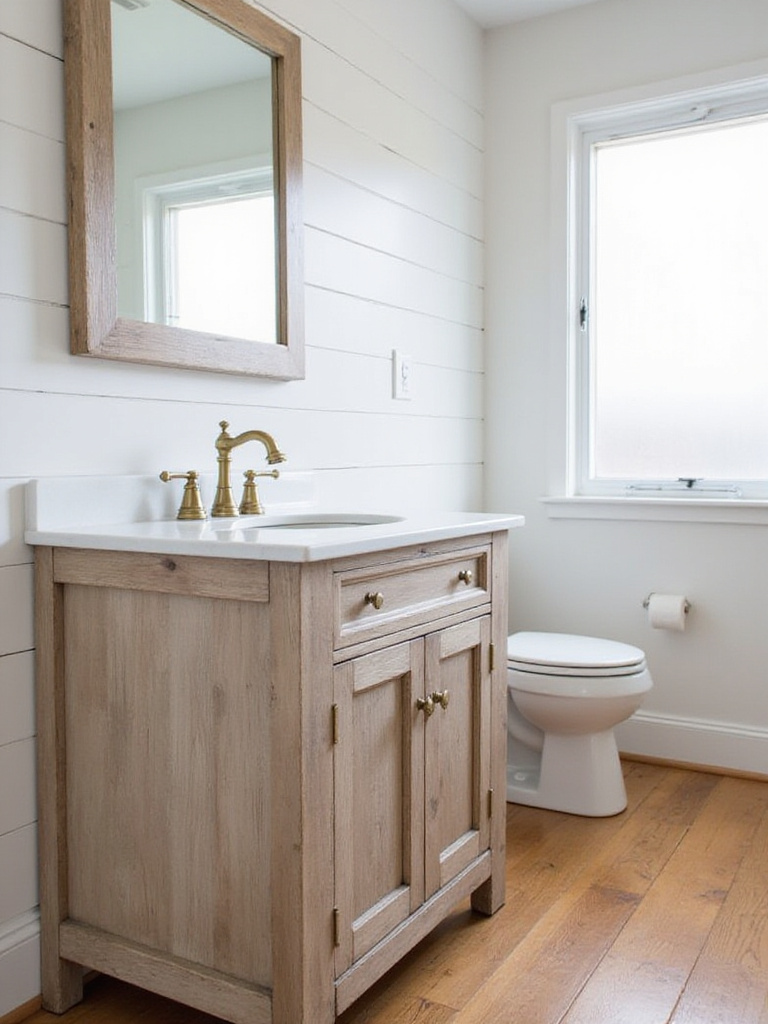
You want solid wood. Look for hardwoods like oak or maple, or even better, find some reclaimed wood. Old-growth lumber from salvage yards is incredibly dense and stable because it grew slowly. It has a character and story you can’t buy new. For countertops, avoid porous stones like unsealed marble unless you love stains and are obsessive about cleaning. Engineered quartz or sealed granite are workhorses—they won’t stain or harbor germs, which is huge for a healthy home.
Think of it as an ecosystem. The materials you choose should be resilient and able to withstand their environment. Your vanity is an investment in a piece that will age gracefully, not one that will swell and delaminate in two years.
6. Understanding Plumbing Requirements for Your Vanity Installation
This is the least glamorous part, but I promise it’s one of the most important. You absolutely must know where your water supply lines and drainpipe are located before you buy your vanity. Pop your head under your current sink and take a picture and some measurements.

So many beautiful vanities, especially ones with drawers instead of open cabinets, don’t have much room for plumbing. I’ve heard horror stories of people having to butcher the inside of their brand-new vanity drawers with a jigsaw just to make them fit around a drainpipe. It’s a heartbreaking and totally avoidable mistake.
If you’re repurposing a dresser or sideboard, this is even more critical. You’ll need to plan your drawer modifications around your existing plumbing to create a piece that is both beautiful and functional. It’s a puzzle, but solving it upfront will save you a world of pain.
Selecting and Implementing Your Dream Farmhouse Vanity (Part 1)
Alright, the planning is done. Now for the fun part: picking the pieces that will come together to form the heart of your bathroom. This is where your aesthetic vision and your practical needs merge. It’s about choosing a style, a sink, and the storage that will truly serve you every single day.
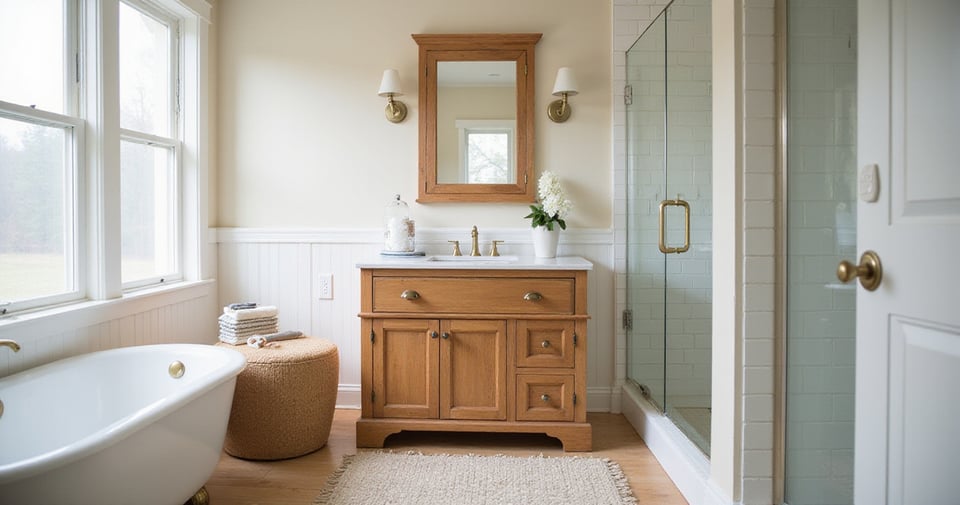
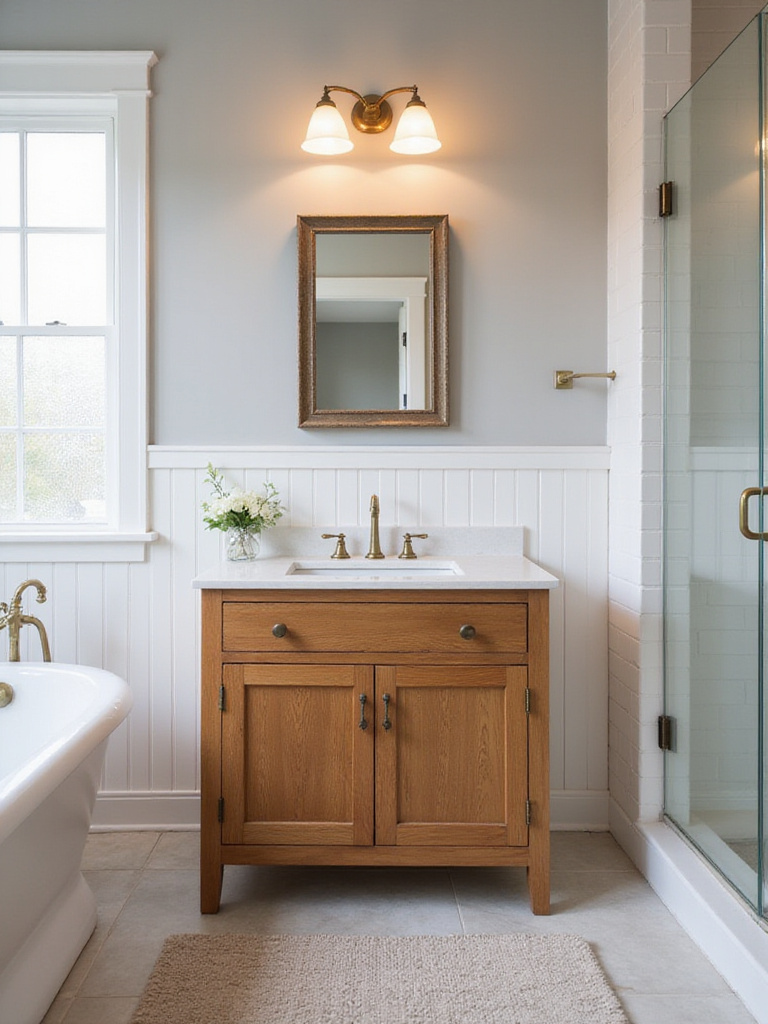
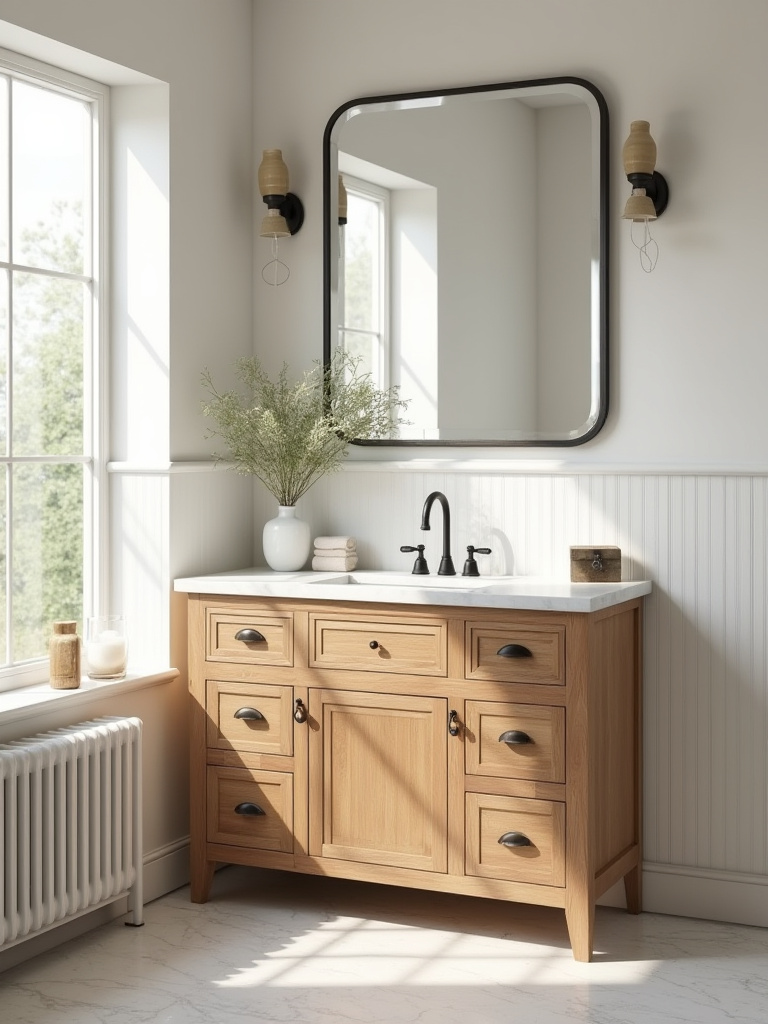
7. Choosing Between Freestanding and Built-In Farmhouse Vanity Styles
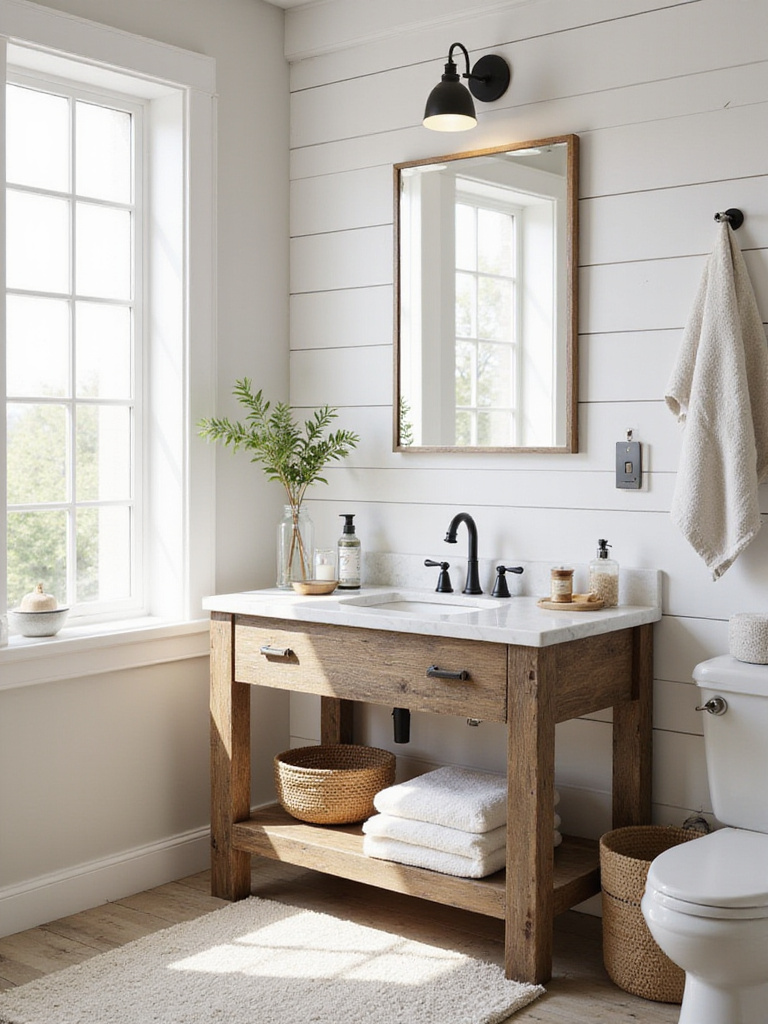
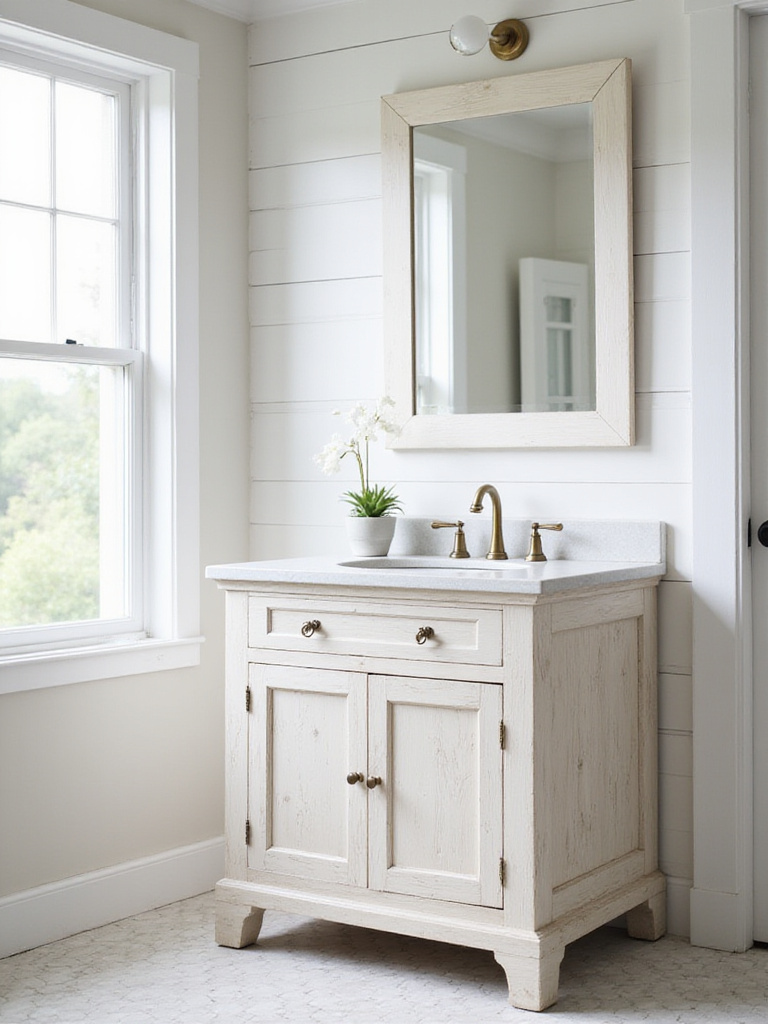
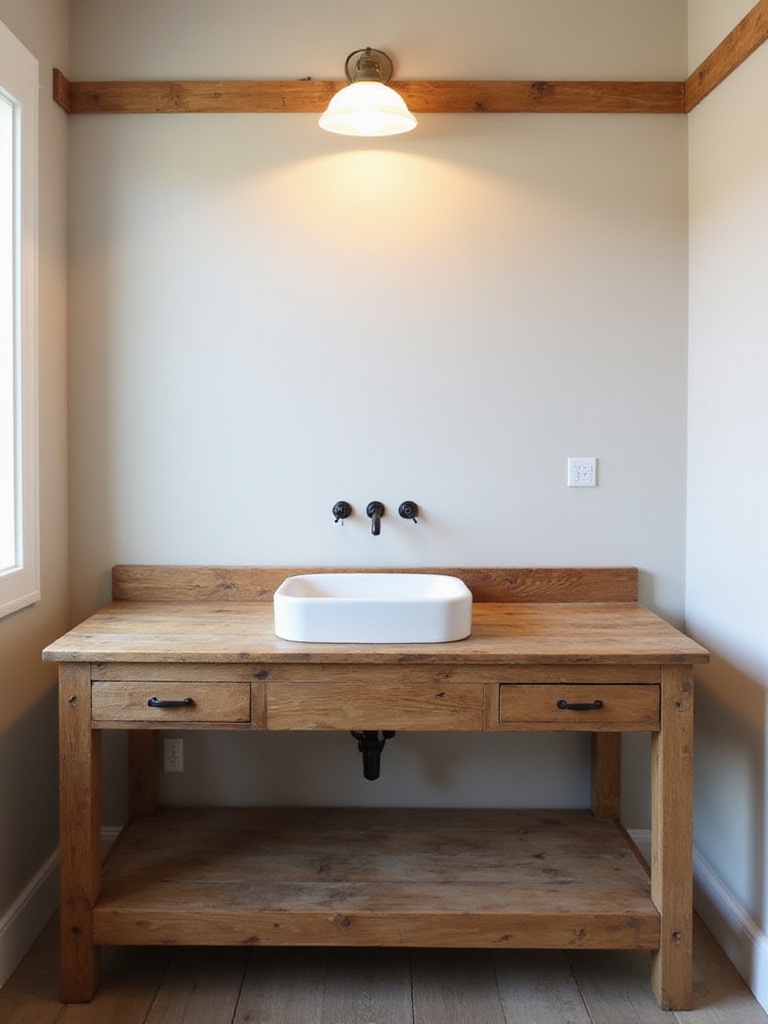
Think of this as choosing between a beautiful piece of furniture and a seamless piece of architecture. A freestanding vanity stands on legs, creating a sense of airiness and space. It’s fantastic for smaller bathrooms because seeing the floor underneath makes the room feel larger. It’s also the perfect opportunity to upcycle a vintage dresser or console table, giving your bathroom instant history and soul.

A built-in vanity, on the other hand, is a storage powerhouse. It runs wall-to-wall, maximizing every inch of counter and cabinet space. This is a great choice for a busy family bathroom where you need to stash endless supplies. It feels more permanent and integrated, like a piece of custom cabinetry, which can be a huge plus for functionality. There’s no wrong answer here; it’s about what your space needs more—the illusion of openness or the gift of maximum storage.
I often lean toward freestanding for character. A beautiful piece of furniture with a vessel sink on top can feel so much more personal and curated than a standard cabinet.
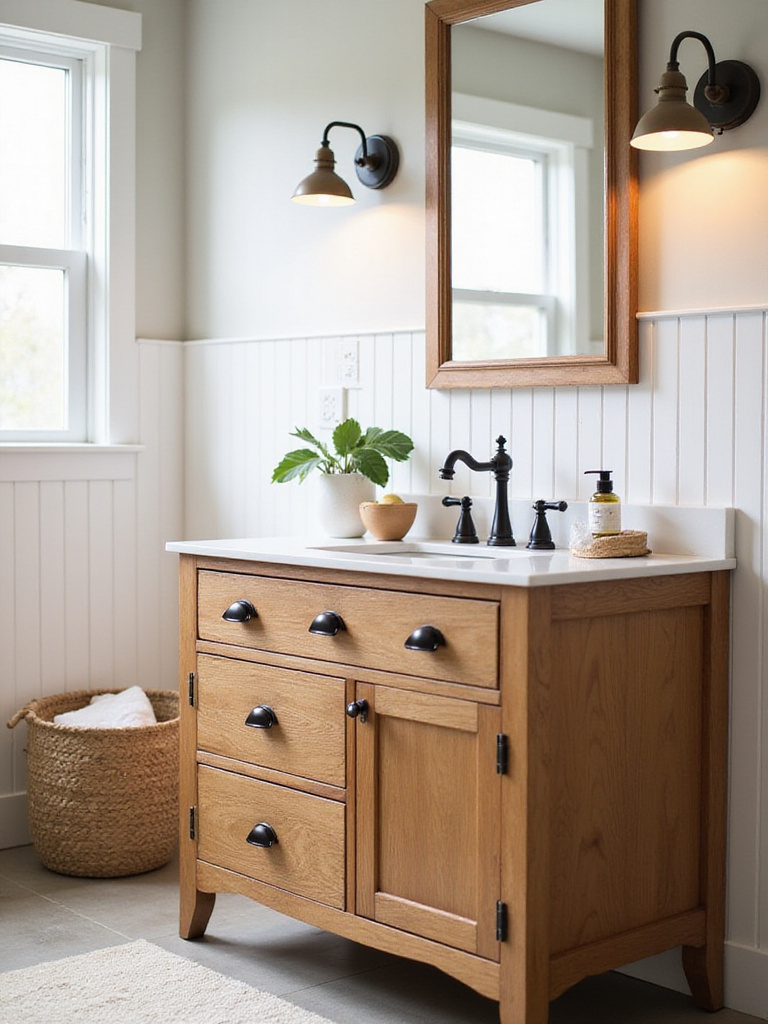
8. Selecting the Perfect Farmhouse Sink: Undermount, Drop-in, or Vessel?
Your sink choice has a huge impact on both the look and the daily usability of your vanity. Let’s break it down simply. An undermount sink is the easiest to clean, period. You can wipe crumbs and spills directly from the counter into the sink with zero obstruction. It creates a sleek, modern farmhouse look.
A drop-in sink, with its visible rim resting on the counter, has a more traditional, classic farmhouse feel. It’s a straightforward and timeless choice. Then there’s the vessel sink, which sits on top of the counter like a bowl. It makes a big design statement and can be absolutely stunning, especially when you find a unique one made of stone or copper. But be warned: they can be a pain to clean around the base, and you need to carefully match them with a taller faucet to avoid splashing everywhere.
My shortcut? For pure, unadulterated function and ease of cleaning, you cannot beat an undermount sink. For a huge style impact in a powder room, a vessel sink is a showstopper.
9. Coordinating Faucet Finishes with Your Chosen Farmhouse Aesthetic
The faucet is the jewelry of your vanity. It’s a small detail that can elevate the entire look. Don’t just grab the cheapest chrome faucet and call it a day. Think about the story you want to tell. Matte black offers a bold, modern contrast, especially against a white sink or light wood. Oil-rubbed bronze has a warm, classic, time-worn feel.
And my personal favorite? Unlacquered brass. This is what we call a “living finish.” It will arrive shiny and new, but over time it will darken and develop a beautiful, rich patina that is unique to your home and how you use it. It embraces the idea that a home should evolve and age gracefully, just like we do. It’s the opposite of a sterile, static finish, and it adds so much character.
Just make sure the finish you choose complements your cabinet hardware and lighting. They don’t have to match perfectly—in fact, a little variation looks more natural—but they should feel like they’re in the same family.
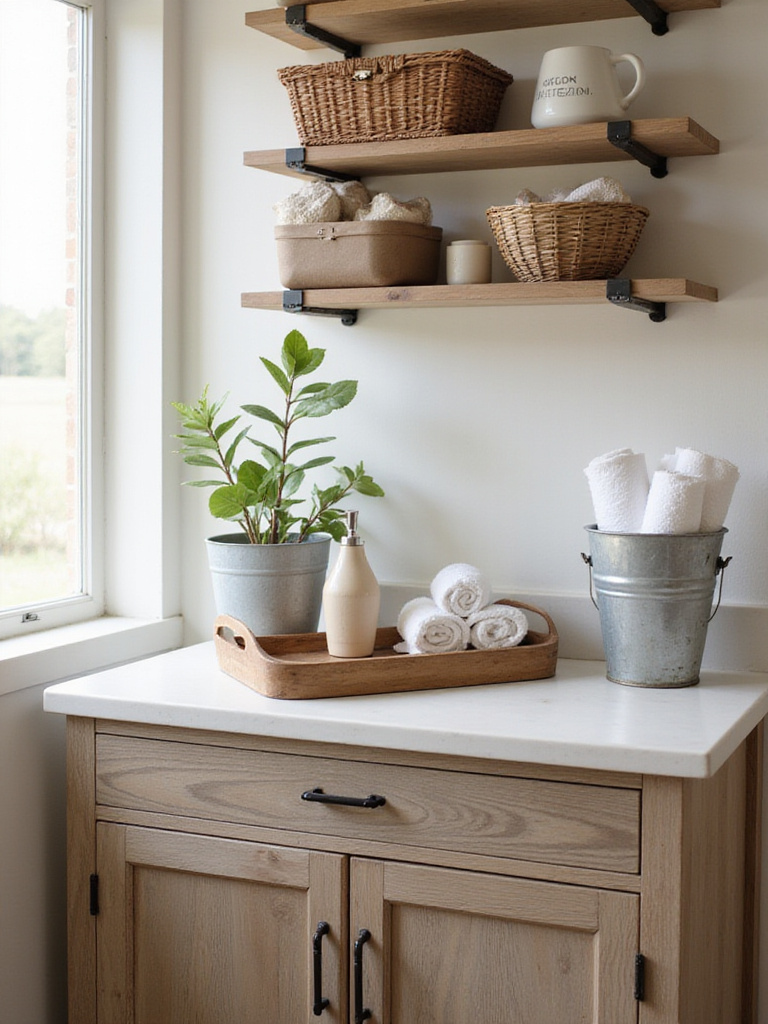
10. Maximizing Storage with Drawers, Open Shelving, or Hidden Compartments
Here’s the truth: open shelving looks beautiful in photos, but it forces you to be incredibly tidy all the time. For real life, drawers are your best friend. They hide the necessary mess of daily life—the half-empty toothpaste tubes, the mismatched bottles, the contact lens cases.

A great compromise is a vanity that has both. Use drawers for all the small, clutter-prone items. Then use an open bottom shelf for things that are naturally beautiful and organized, like neatly rolled towels, a wicker basket for toilet paper, or a row of amber glass bottles. This gives you that light, airy farmhouse look without the pressure of having all your clutter on display.
Another amazing trick is to install a tilt-out tray in the false drawer front right under the sink. It’s the perfect hidden spot to stash your toothbrush and toothpaste, keeping your countertop completely clear and serene.
Selecting and Implementing Your Dream Farmhouse Vanity (Part 2)
You’ve made the big decisions, your beautiful vanity has arrived, and you’re ready to put it in place. Hold on. This next phase is all about the details of the installation. Doing this part with care and precision is what ensures your vanity will be stable, level, and safe for years to come.
11. Essential Pre-Installation Checks for a Smooth Vanity Setup
Before you haul that heavy vanity into the bathroom, do these three things. First, check if your floor is level. Most floors, especially in older homes, are not perfectly flat. You’ll need shims (tiny wedges of wood) to level the vanity so it doesn’t wobble and your countertop doesn’t crack under stress.
Second, double-check your wall. Is it square? Use a level to make sure. If it’s not, you’ll have a gap between the vanity and the wall, which you’ll need to scribe and cut the vanity to fit, or cover with trim. And third, use a stud finder to locate and mark exactly where the studs are in the wall behind your vanity. This is critical for the next step. Don’t skip these checks. Trust me, finding these things out before the vanity is in place saves so much frustration.
This is the nitty-gritty work that nobody sees, but it’s the foundation of a professional-quality installation.
12. Step-by-Step Guide to Securing Your Farmhouse Vanity to the Wall
This is a non-negotiable safety step, especially if you have kids who might try to climb on it. Your farmhouse vanity must be securely anchored to the wall studs you just found. Do not rely on drywall anchors. They are not strong enough to prevent a heavy vanity from tipping over if someone leans on it or pulls on it.
Drill pilot holes through the sturdy back rail of the vanity and into the wall studs. Then use long lag screws to anchor it firmly in place. When you’re done, grab the vanity and try to wiggle it. It shouldn’t budge at all. It should feel like it’s part of the wall itself.
I know it’s tempting to just place it against the wall, especially if it’s a heavy piece. Don’t do it. A secure vanity protects your plumbing from strain, prevents dangerous accidents, and ensures the whole installation feels solid and permanent.
Enhancing and Styling Your Farmhouse Vanity Space (Part 1)
The heavy lifting is done! Your vanity is installed, level, and secure. Now, we get to layer in the personality. These are the details that take it from a nice piece of furniture to a styled, cohesive part of your home ecosystem. The hardware, mirror, and lighting work together to set the final mood.
13. Selecting Complementary Hardware for an Authentic Farmhouse Look
Hardware is the perfect place to add a touch of personality. You can find incredible, unique pieces at flea markets, architectural salvage shops, or on Etsy that will give your vanity a story that no big-box store can offer. Think beyond the standard-issue knobs and pulls.
Cup pulls have a wonderful, utilitarian farmhouse feel, especially on drawers. Simple, hand-forged iron pulls can lean rustic or industrial. And don’t be afraid to choose something with a bit of heft.
“The hardware you choose should feel good in your hand every single time you use it. It’s a small moment of daily satisfaction that makes a huge difference.” – A Wise Designer (Me!)
Quality hardware is a small detail that communicates immense quality. It’s the difference between a vanity that feels solid and one that feels flimsy.
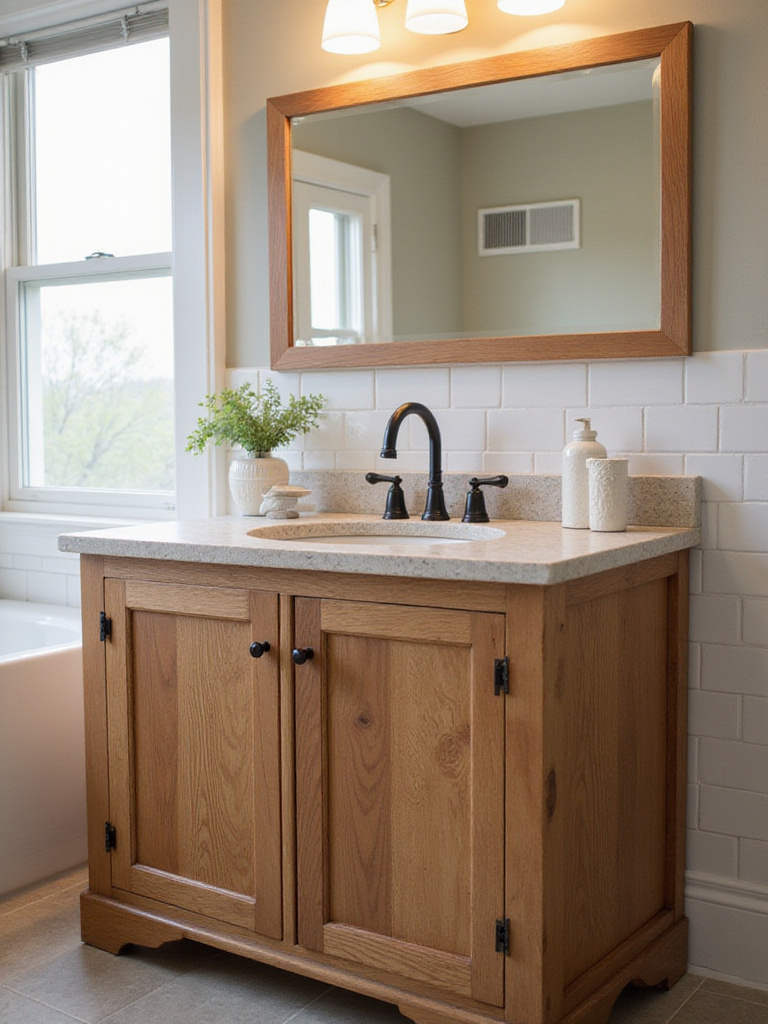
14. Integrating the Right Mirror: Wood-Framed, Metal, or Arch?
The mirror isn’t just for checking your reflection; it’s a design tool. A large mirror can make a small, dark bathroom feel bright and spacious by bouncing light around the room. A wood-framed mirror can echo the material of your vanity, creating a cohesive look. A metal-framed mirror can provide a nice contrast, especially a simple round or arched one for a touch of modern softness.
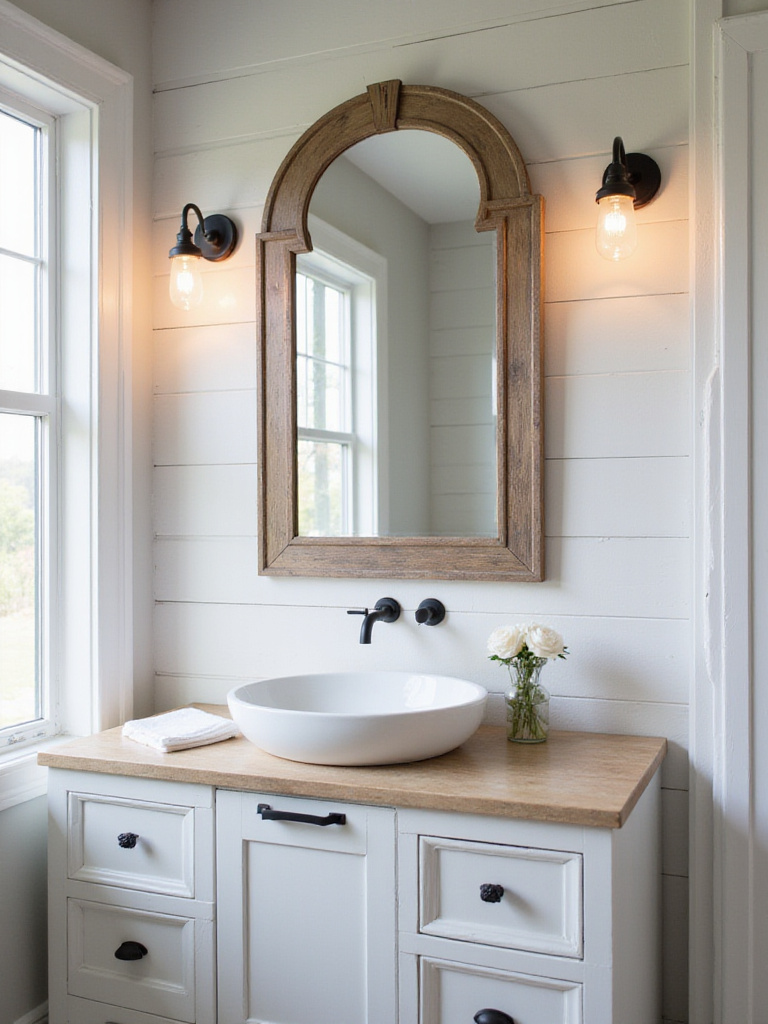
One of my favorite tricks for a truly unique look is to find a beautiful, ornate vintage mirror frame and have a new piece of mirror cut to fit. It instantly adds a sense of history and elegance. The rule of thumb for size is to have the mirror be slightly narrower than your vanity. This creates a pleasing visual balance and keeps the whole setup from looking top-heavy.
Consider how the frame ties into your faucet and lighting fixtures. It’s all part of building a layered, intentional space.
15. Choosing Warm and Inviting Lighting Fixtures for Above Your Vanity
Lighting can make or break your bathroom. Please, I beg you, avoid harsh, cool-toned overhead lighting. It casts unflattering shadows and makes your bathroom feel like a sterile clinic. You want warm, layered light that makes the space feel inviting and relaxing.
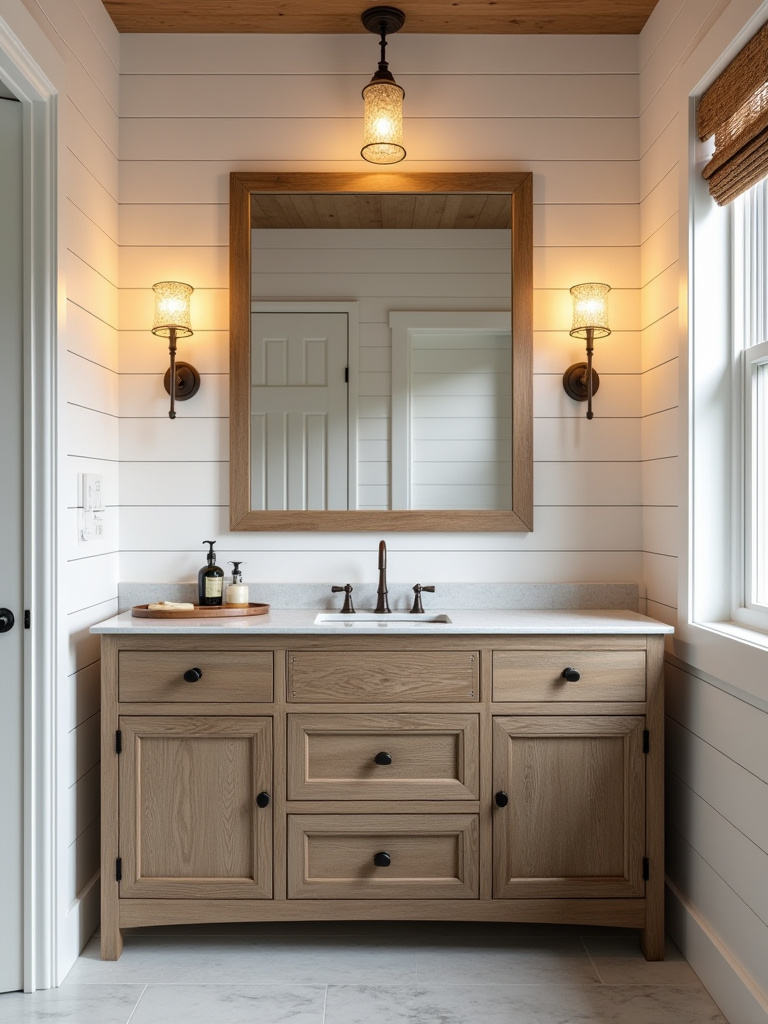
The best setup is to have sconces on either side of your mirror, at about eye level. This provides even, shadow-free light on your face. For the bulbs, look for a color temperature of 2700K. This is a warm, soft white that mimics the glow of incandescent light and makes skin tones look natural and healthy. And a dimmer switch is your best friend. It lets you have bright light when you need it for tasks and a soft, ambient glow when you want to unwind in the bath.
Your light fixtures are another opportunity to reinforce your style. Go for something with seeded glass, aged brass, or a simple black finish to complement your other design choices.
16. Incorporating Organic Textures with Linens, Baskets, and Greenery
Now we bring the space to life. Your vanity needs to be softened with organic textures that invite touch and add visual warmth. Swap out standard terrycloth hand towels for beautiful, absorbent linen ones. Place a small wooden tray on the countertop to corral soap and lotion bottles. Use a woven wicker or seagrass basket on an open shelf to hold extra towels or toilet paper.
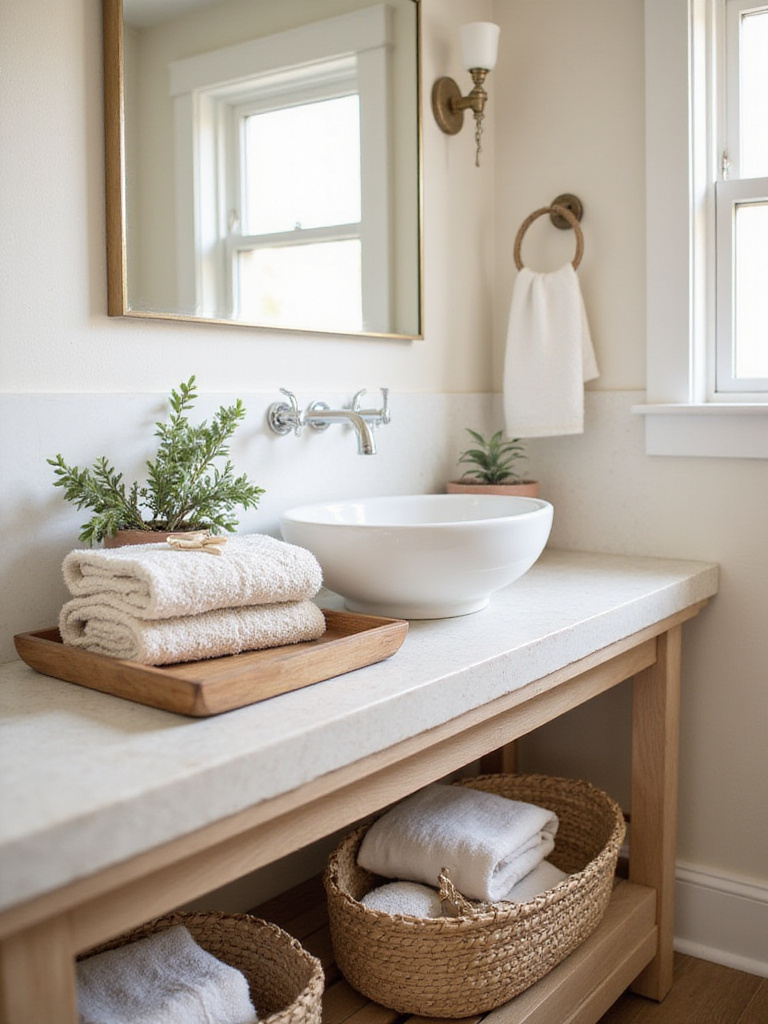
And most importantly, add greenery. A bathroom is often the perfect high-humidity environment for plants like ferns, pothos, or orchids. A small potted plant on the corner of your vanity or a few stems of eucalyptus in a vase brings actual, living energy into the space. It purifies the air and provides a vital connection to nature.
This is what I mean when I say your home is an ecosystem. It’s about creating a symbiosis between the built environment and the natural world, even in a small bathroom.
Enhancing and Styling Your Farmhouse Vanity Space (Part 2)
We’ve added the main styling elements, but the final layer is in the curation of the small things. This last step is about bringing personality and daily functionality together, ensuring your vanity doesn’t just look good in a photo, but works beautifully for your real life.
17. Curating Accessories to Enhance the Farmhouse Charm and Functionality
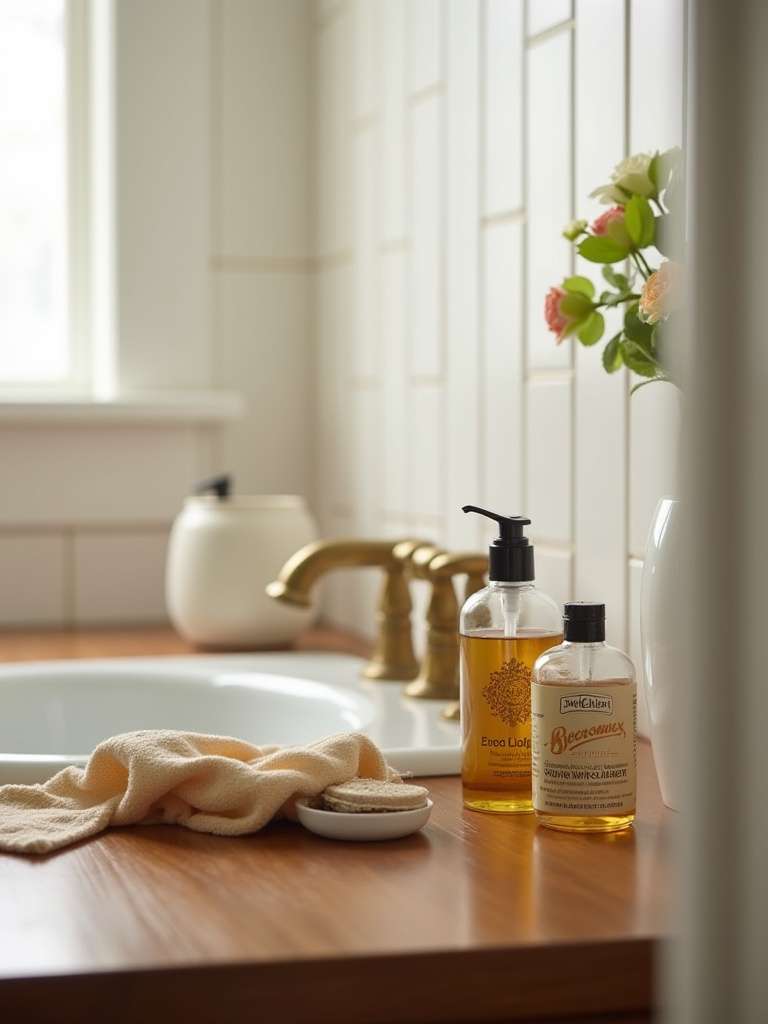
Less is more. Your beautiful new countertop is not a storage shelf. Instead of cluttering it with dozens of products, curate a few beautiful and useful items. Decant your hand soap into a nice ceramic or amber glass dispenser. Use a small dish or tray to hold your rings while you wash your hands.
Think in vignettes. A common designer trick is to group items in threes or other odd numbers. For example: a soap dispenser, a small plant, and a candle on a tray create a balanced, intentional look. Choose accessories made from natural materials like wood, stone, and pottery to reinforce that organic, earthy farmhouse feeling.
This isn’t about hiding everything away; it’s about being intentional with what you choose to leave out. Every item on display should be either beautiful or useful—ideally both.
Maintenance and Optimization for Lasting Farmhouse Beauty (Part 1)
You’ve built a beautiful thing; now you have to protect it. A bathroom is a harsh environment, but with a few simple, consistent habits, you can keep your wood vanity looking incredible for decades. This isn’t about marathon cleaning sessions; it’s about smart, preventative care.
18. Best Practices for Cleaning and Protecting Wood Vanity Surfaces
Here’s the single most important shortcut I can give you for a wood vanity: keep a small microfiber cloth folded in a drawer and wipe down any splashes of water immediately. Standing water is the absolute enemy of wood. It takes five seconds, but this one habit will prevent 90% of water damage issues like dark rings, warping, and peeling finishes.
For regular cleaning, just use a damp cloth with a tiny drop of gentle soap. Avoid harsh chemical cleaners, bleach, or anything abrasive that could strip the protective sealant. And once or twice a year, depending on how much use it gets, treat the wood with a good-quality furniture wax or polish to restore the moisture barrier and keep it looking rich.
It’s like tending to a plant. A little bit of consistent care goes a long way.
19. Troubleshooting Common Plumbing Issues Under Your Vanity
You don’t need to be a plumber, but knowing the absolute basics will save you from panic and a costly emergency call. The first thing you should do is find the small shut-off valves for the hot and cold water lines under the sink and make sure they turn easily. If you ever have a major leak, shutting those off is your first move.
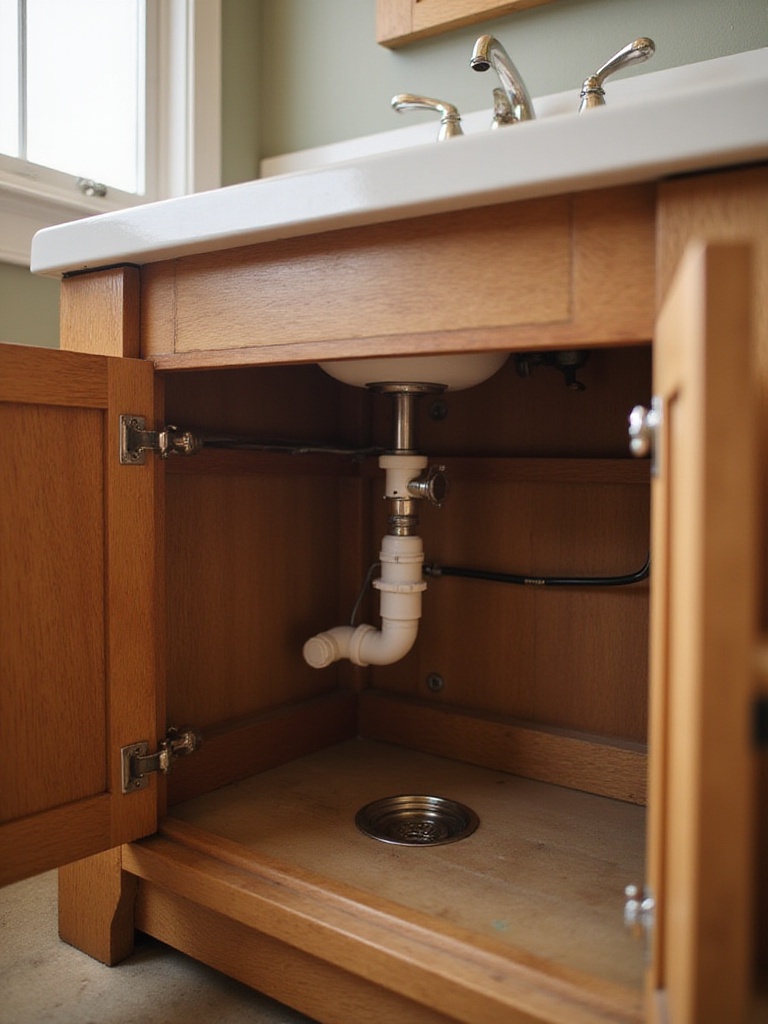
The most common issue you’ll face is a slow drain, which is usually just hair and soap scum in the P-trap (that U-shaped pipe). It’s easy to clean. Just put a bucket underneath, unscrew the two nuts holding it in place, and empty the gunk into the trash, not down the drain. It’s a bit gross, but it’s a five-minute fix that will save you a $150 plumber visit.
Knowing these two simple things—how to shut off the water and how to clear the trap—empowers you to handle the most common problems yourself.
20. Preventing Water Damage: Sealing, Ventilation, and Spill Management
We talked about wiping up spills, but there are two other pillars of water damage prevention. First is sealing. The caulk around your sink is not just decorative; it’s a critical waterproof seal. Check it once a year. If it’s cracking or pulling away, scrape it out and apply a fresh bead of 100% silicone caulk.
The second is ventilation. A good bathroom exhaust fan is your vanity’s best friend. Run it during every shower and for 15-20 minutes afterward to pull all that humid, steamy air out of the room before it has a chance to soak into your wood vanity and walls. This is the single best way to prevent the long-term damage caused by humidity, including mold and mildew.
A healthy bathroom environment is key to a long-lasting vanity.
21. Organizing Vanity Drawers and Cabinets for Clutter-Free Living
A calm exterior hides a smartly organized interior. The secret to clutter-free living is to give every single item a home. Start by decluttering mercilessly. Get rid of the half-empty bottles and expired products. Then, invest in drawer dividers. They are a total game-changer, transforming a chaotic jumble of items into neat, easily accessible compartments.

Use small bins or containers inside your drawers to group like items—all your dental care in one, skincare in another. For the deep cabinet under the sink, use stackable clear bins or a lazy Susan so you can easily see and reach items at the back. When you can find what you need in three seconds, your entire morning routine feels calmer and more efficient.
The goal is to make it just as easy to put things away in their proper place as it is to just toss them on the counter.
Maintenance and Optimization for Lasting Farmhouse Beauty (Part 2)
Finally, let’s talk about longevity. You’ve put so much thought and effort into this project. The last step is to make choices that ensure your vanity won’t feel dated in five years, making it a truly sustainable and timeless part of your home.
22. Future-Proofing Your Farmhouse Vanity with timeless design Choices
The key to a timeless design is to resist trends that are too specific or loud. That intensely patterned tile backsplash that’s all over Instagram right now? It will likely look dated very soon. Instead, choose classic shapes, neutral colors, and natural materials.
A simple Shaker-style cabinet door has been in style for over a century for a reason. A countertop in a neutral like white, grey, or black will always look good. A simple faucet design in a classic finish will outlast the trend-of-the-moment. These are the elements that give your design staying power.
By building your vanity with a timeless foundation, you can easily update the look over the years by simply changing out the less permanent things—the paint color on the walls, the towels, the accessories, the plants. This is the most sustainable approach because it saves you from the cycle of costly, wasteful renovations. You’re creating a piece that can evolve with you.
Conclusion
Creating the perfect farmhouse bathroom vanity isn’t about following a rigid set of rules or buying a specific product. It’s about curating a piece that serves your life, reflects your personality, and connects your home to the durable, practical, and beautiful ethos of farmhouse living. You are crafting a functional hub that will bring you a small moment of joy and calm every time you use it. You’re building a part of your home’s ecosystem.
You now have the roadmap and the shortcuts. You know what actually matters and what’s just noise. Don’t let it just be an idea. Start small. Find a great piece of hardware, tape out the dimensions on your floor, or just start a mood board for the feeling you want to create. Your perfect vanity is waiting, and the satisfaction of building a beautiful, productive space that will last for years is one of the best feelings in the world.


