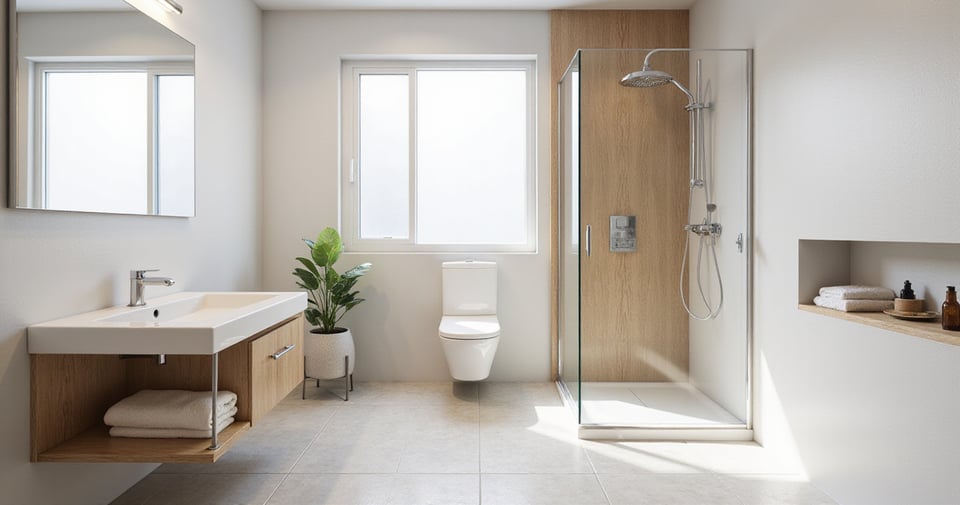
Picture this: You’re standing in a tiny bathroom in a lovely London flat, the kind with charming bones but a floor plan that feels like an afterthought. It’s more of a closet with plumbing than a sanctuary. The door barely clears the loo, the sink is comically small, and the shower feels… well, claustrophobic. This is the exact scene a client presented to me last month, and her sigh was one I’ve heard a hundred times. “Ava,” she said, “is there any hope for this space?”
What people always ask me is how to make these impossibly small spaces feel not just bigger, but also imbued with soul and sophistication. Everyone else will tell you to just paint it white and install a pedestal sink. That’s not the whole story. The real secret lies in a delicate dance between clever British space-saving pragmatism and the rich, intentional details found in South Asian design. It’s about creating a jewel box, not just a white box.
Forget the corporate-speak and the sterile, one-size-fits-all advice. Let’s talk about what actually works. I’m going to share the shortcuts and philosophies that turn cramped, functional-at-best bathrooms into spaces that feel expansive, personal, and deeply serene.
Smart Planning: Laying the Foundation for Your Compact Oasis (Part 1)
Before you fall in love with a single tile or tap, we must talk about the foundation. Honestly, this is where most people go wrong. They rush to the beautiful, tangible things without respecting the geometry and flow of the space. Smart planning isn’t the boring part; it’s the most creative part. It’s where you choreograph the daily movements and decide how the room will feel—open and gracious or awkward and cramped.
1. Conduct a Precise Layout Audit: Identify Current Obstacles & Opportunities
So, what does this actually mean? It means becoming a detective in your own bathroom. Forget rough estimates. You need to get out a tape measure—a laser one is a godsend—and map everything. I’m talking about the exact placement of the soil pipe (that’s the big one for the loo), the swing of the door, the sill height of the window. Draw it out to scale, even if it’s just on graph paper. Mark down where you bump your elbow, where the door hits the vanity, where the bathmat always gets scrunched.
These aren’t just measurements; they are the rules of the game. Once you know the rules, you can start to creatively bend them. I had a client in a Notting Hill mews house who discovered a shallow, forgotten alcove behind the drywall during this process. It was only four inches deep, but it was just enough to recess the entire medicine cabinet, instantly making the room feel sleeker and adding precious inches of clearance over the sink. That discovery came from meticulous auditing, not guesswork.
This initial map becomes your bible. It reveals the non-negotiables but, more importantly, it uncovers hidden opportunities for genius solutions that a quick glance would completely miss.
2. Define Your Must-Have Fixtures: Prioritize Essentials for Limited Space
Now it’s time for some tough love. In a small space, you cannot have it all. Do you truly, deeply need a bathtub, or would a luxurious, spacious walk-in shower serve your daily life better? I often see people trying to cram a tub into a room that’s crying out for a gorgeous, open shower, and the result is that both feel compromised. Be honest about your rituals. If you take a bath once a year, let the idea go.
Once you have your absolute non-negotiables—a toilet, a sink, a shower—you can start looking for the most intelligent, compact versions of each. Think of wall-hung toilets that hide their cisterns, shallow-depth vanities, and slender sinks. This isn’t about downgrading; it’s about choosing pieces that are perfectly scaled, like finding a beautifully tailored jacket instead of trying to make an oversized one work. It’s a design choice that signals sophistication and intention.
This ruthless prioritisation isn’t about sacrifice; it’s about focus. By choosing fewer, better-scaled pieces, you allow each one to breathe and give the entire room a sense of deliberate calm.
3. Map Out Key Traffic Flow Zones: Ensure Comfortable Movement
This sounds terribly technical, but it’s simple: can you comfortably walk from the door to the sink, then to the loo, without performing a strange shimmy? Use masking tape on the floor of the actual bathroom to outline your proposed new fixtures. Then, walk the paths. Open the door. Pretend to dry your hair. Bend over the sink. This little exercise is incredibly revealing. You’ll immediately feel where the pinch points are.
The goal is to create clear, unimpeded “desire lines” between the key areas. Standard building code has minimum clearances for a reason—they ensure basic comfort. But we want to go beyond basic. We want a space that feels gracious. Sometimes shifting a vanity just two inches to the left is the difference between a frustrating bottleneck and a comfortable flow.
Remember, a bathroom is a space of movement, even if it’s small. Honouring that movement in your plan is the key to creating a room that feels effortless to use every single day.
4. Evaluate Existing Plumbing Lines: Understand Renovation Limitations
Here’s the part no one wants to talk about, but it’s where budgets get shattered. That main soil pipe for the toilet is a very stubborn, very expensive thing to move, especially in an apartment or on a concrete slab. While a sink drain is more flexible, the toilet’s location is often the fixed point around which the rest of the layout must pivot. Get a plumber in early—before you’ve even bought a tap—to tell you what’s realistic.
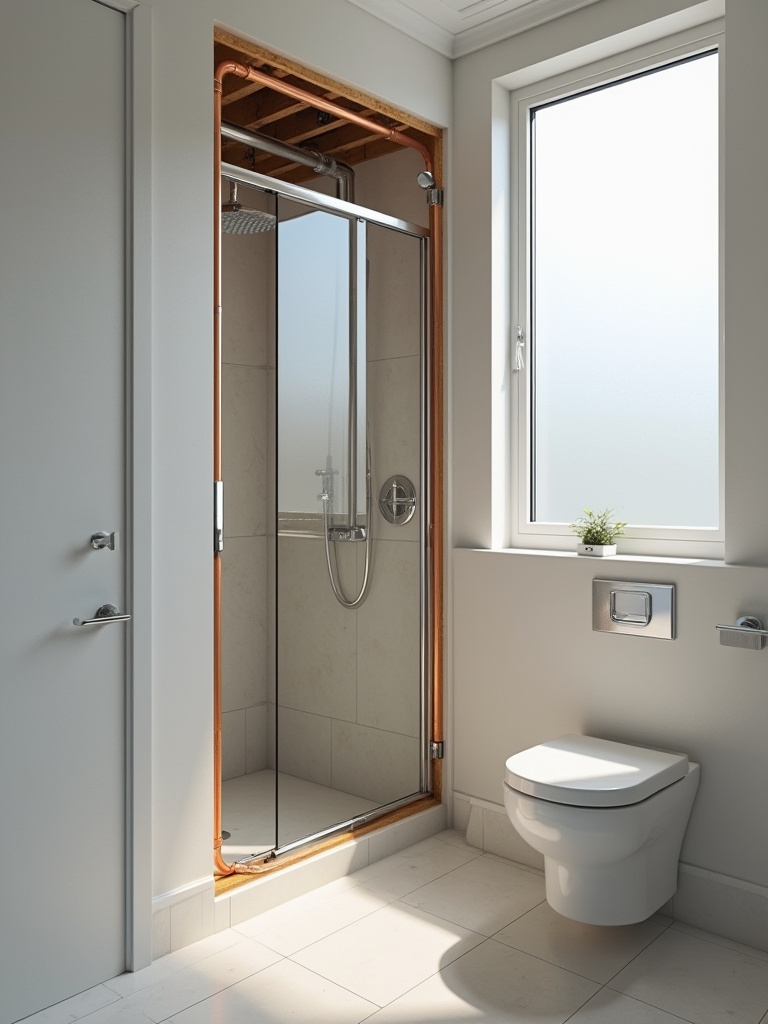
Think of the existing plumbing not as a limitation, but as a helpful constraint that can guide your design. I often find the most creative solutions come from working with the bones of a building, not fighting against them. A client once despaired because her loo couldn’t be moved from a prominent wall. Instead of hiding it, we embraced it, creating a stunning feature wall behind it with a gorgeous, hand-painted wallpaper, turning a problem into a stunning focal point.
Understanding these guts of the room from the outset saves you from heartbreak and financial shock down the line, allowing you to allocate your budget to the things that truly elevate the space.
Smart Planning: Laying the Foundation for Your Compact Oasis (Part 2)
With the physical constraints mapped, we can now turn to the financial ones. This isn’t about limiting your vision; it’s about empowering it. A well-crafted budget is a tool for smart decision-making, ensuring you can afford the elements that matter most to you while finding clever ways to save on others.
5. Establish a Realistic Budget for Small Bathroom Transformations
Let’s be candid. Everyone underestimates the cost of renovating a small bathroom because they think “small space, small cost.” But the labour—plumbing, electrical, tiling, waterproofing—is just as intensive, if not more so because of the tight quarters. Start by getting at least three detailed quotes from reputable builders. This will give you a realistic baseline for labour in your area.
Then, make a list of everything, and I mean everything, you need to buy, from the toilet to the tiles to the loo roll holder. Price it all out. And then—this is the most important part—add a 15-20% contingency fund on top of your total. This is not “if” money; it is “when” money. Because something will always come up. You’ll open a wall and find old water damage or decide you simply can’t live without those handmade brass taps. Your contingency fund is what separates a stressful project from a smooth one.
Having a clear, honest budget allows you to decide where to splurge and where to save. Maybe you invest in stunning, artisan-made tiles for the shower wall and pair them with a simple, affordable field tile for the floor. This balance is what creates a high-end, custom look without an astronomical price tag.
Maximizing Space: Smart Fixture & Material Choices (Part 1)
Now for the fun part: choosing the pieces that will bring your space to life. In a small bathroom, every single fixture and finish has to work twice as hard. It must be functional, of course, but it must also contribute to the illusion of space and reflect your personal style. Think of it as curating a small, precious gallery.
6. Choose Wall-Mounted Toilets & Sinks for Floor Visuals
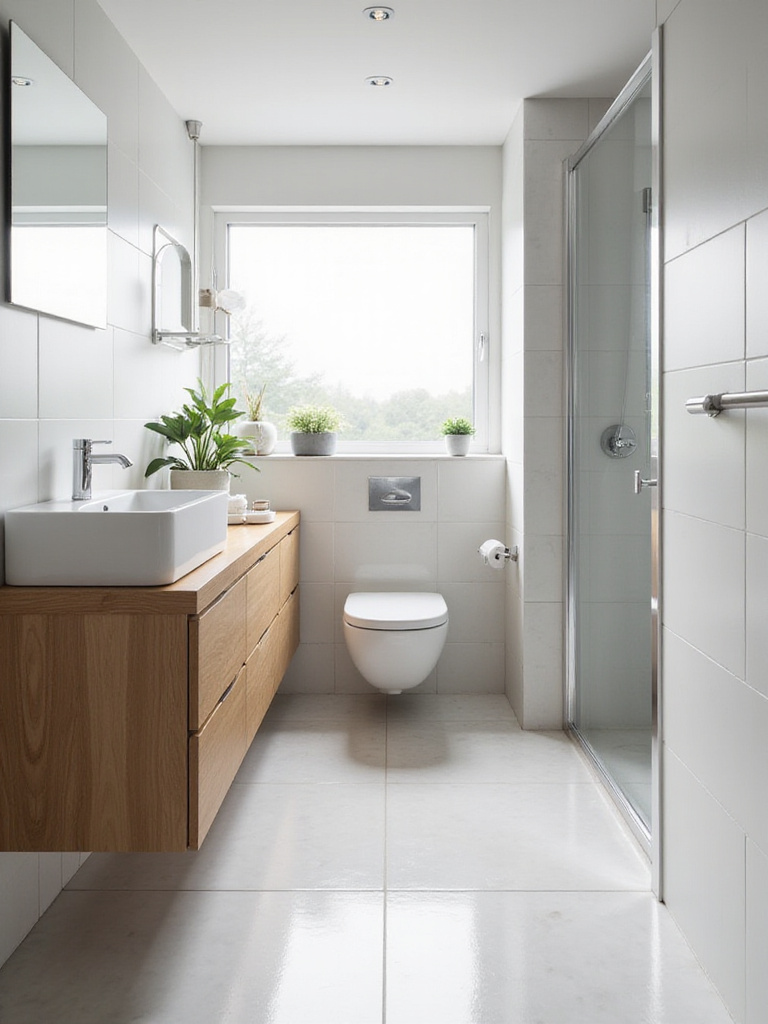
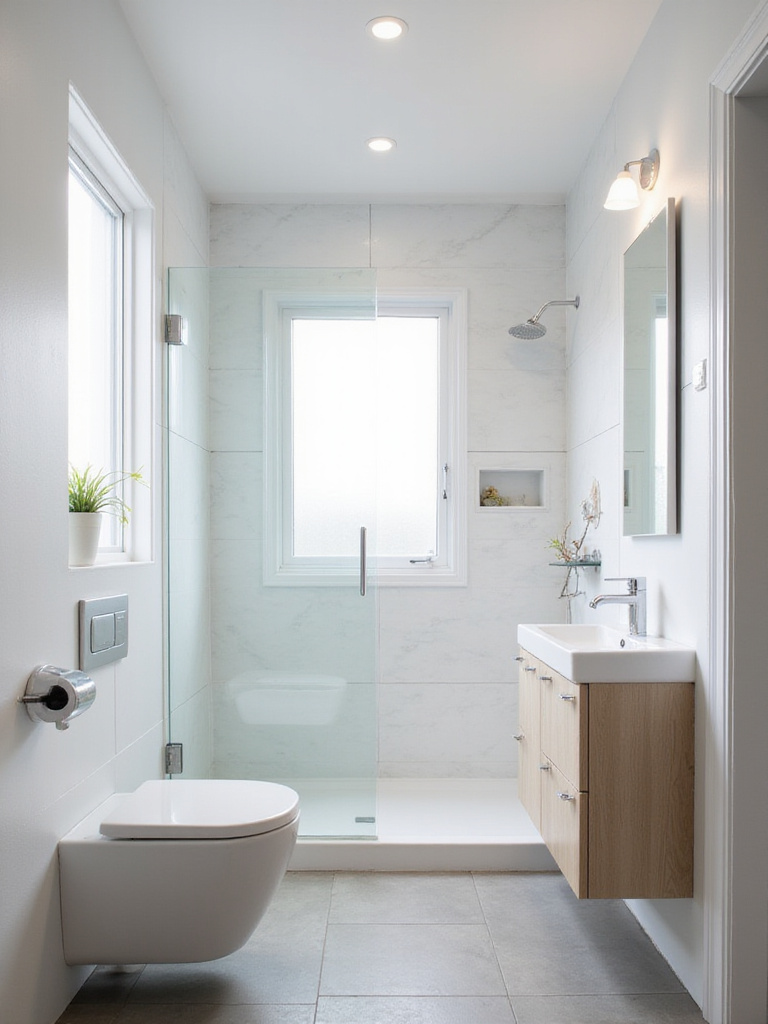
This is probably the single most impactful choice you can make. Lifting the toilet and the vanity off the ground does something magical. It creates an uninterrupted plane of flooring that flows from wall to wall, which your brain instantly interprets as more space. It feels lighter, more open, and infinitely easier to clean. There are no awkward corners for dust to gather.
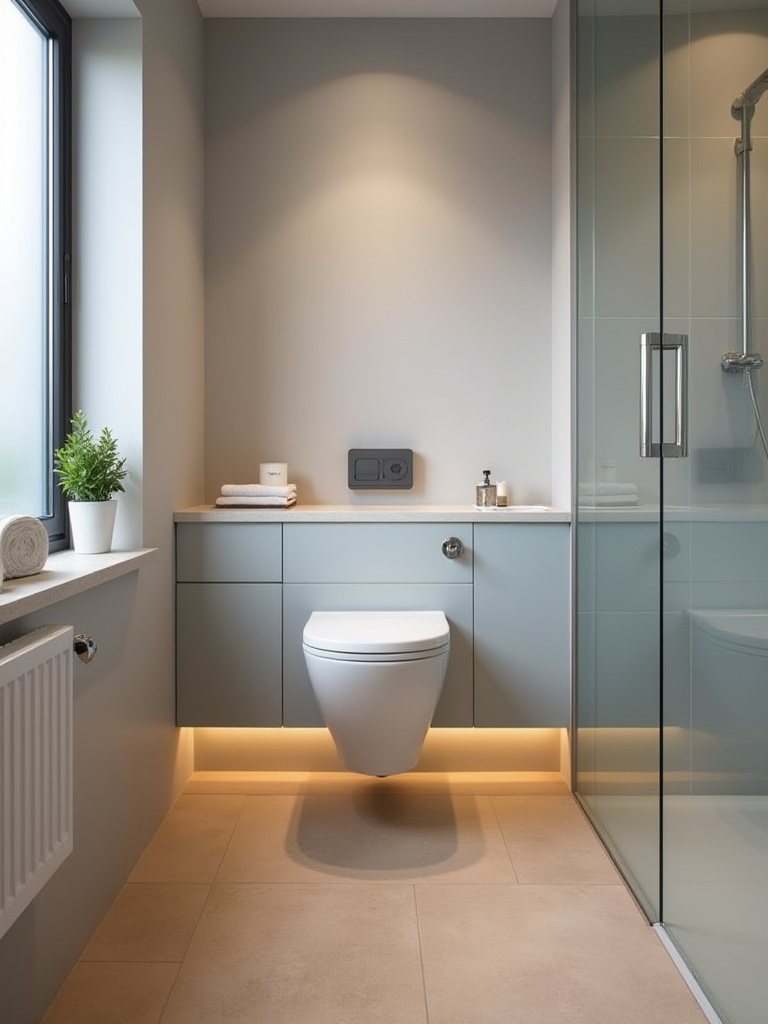
From a design perspective, it’s just cleaner. It gives the room a contemporary, almost weightless feel. People worry about their strength, but a properly installed wall-hung toilet carrier is incredibly robust. It’s a modern marvel of engineering that lends a sophisticated, hotel-like aesthetic to even the most modest bathroom. It signals a certain attention to detail.
By liberating the floor, you’re not just making the room look bigger; you’re fundamentally changing its character from heavy and grounded to light and airy.
7. Install Corner Sinks to Reclaim Precious Walkway Space
In an awkwardly shaped or truly minuscule powder room, a corner sink can be a brilliant problem-solver. It takes up residence in what is often dead space, freeing up precious inches along the main traffic path. This is a classic European trick, born from centuries of dealing with compact historic buildings. It keeps the main walkway clear and can make the difference in a room where the door swing is a major issue.
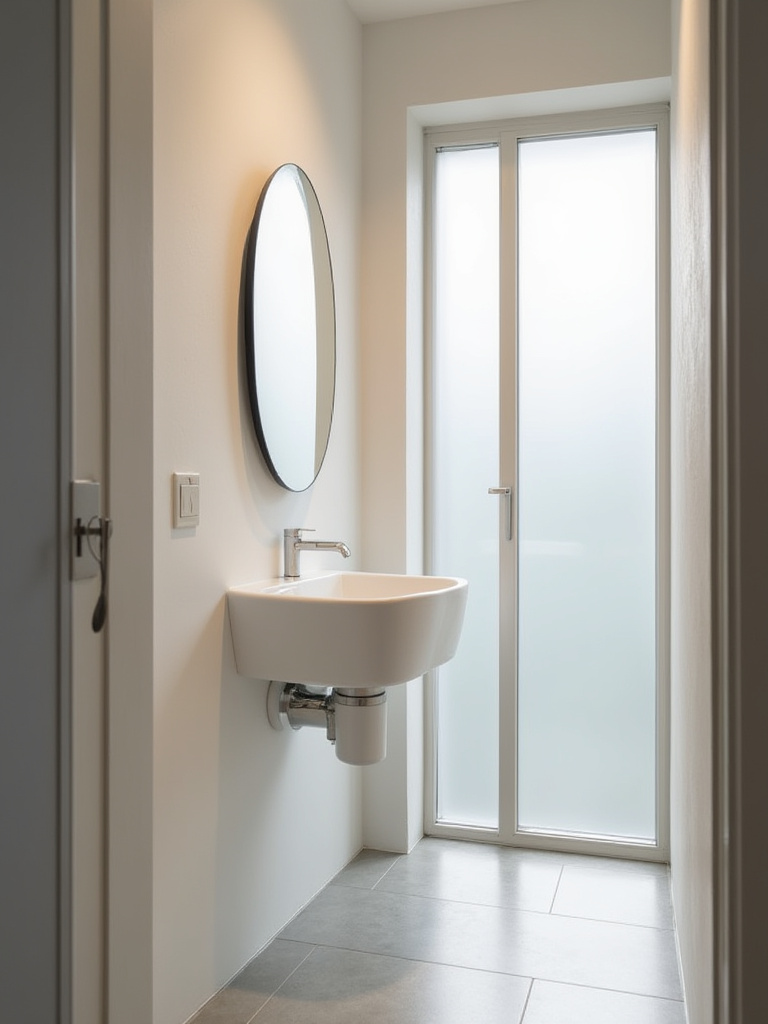
A corner sink doesn’t have to feel like a compromise. There are beautiful, contemporary designs that turn the corner into an intentional feature. You can find lovely wall-mounted versions or even small, triangular vanities that offer a bit of storage. It’s about looking at your floor plan and finding the most intelligent home for each essential fixture.
This is a perfect example of working with the architecture you have, turning an awkward corner into a functional and charming design moment.
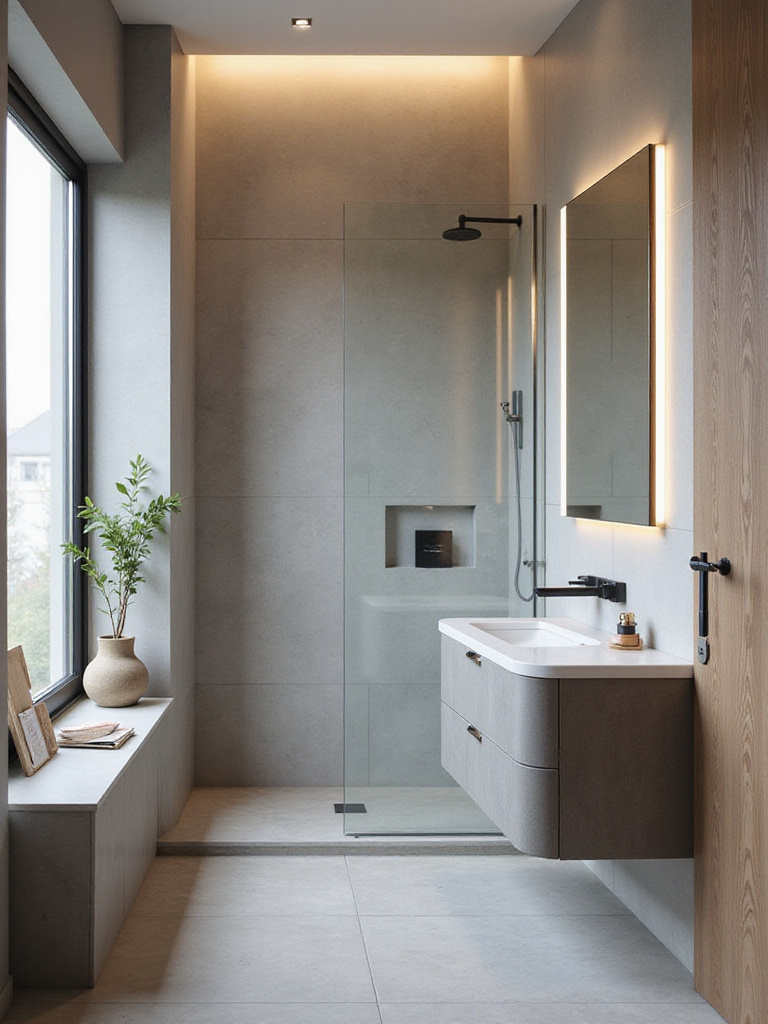
8. Opt for Curbless Showers to Expand Visual Area
If you do one thing in your shower, make it this. A curbless, or “wet room” style, shower is the epitome of seamless design. By eliminating that six-inch curb you have to step over, you allow the bathroom floor tile to flow directly into the shower. The visual effect is immediate and profound. The room instantly feels wider and more integrated, as there’s no longer a clunky box dividing the space.
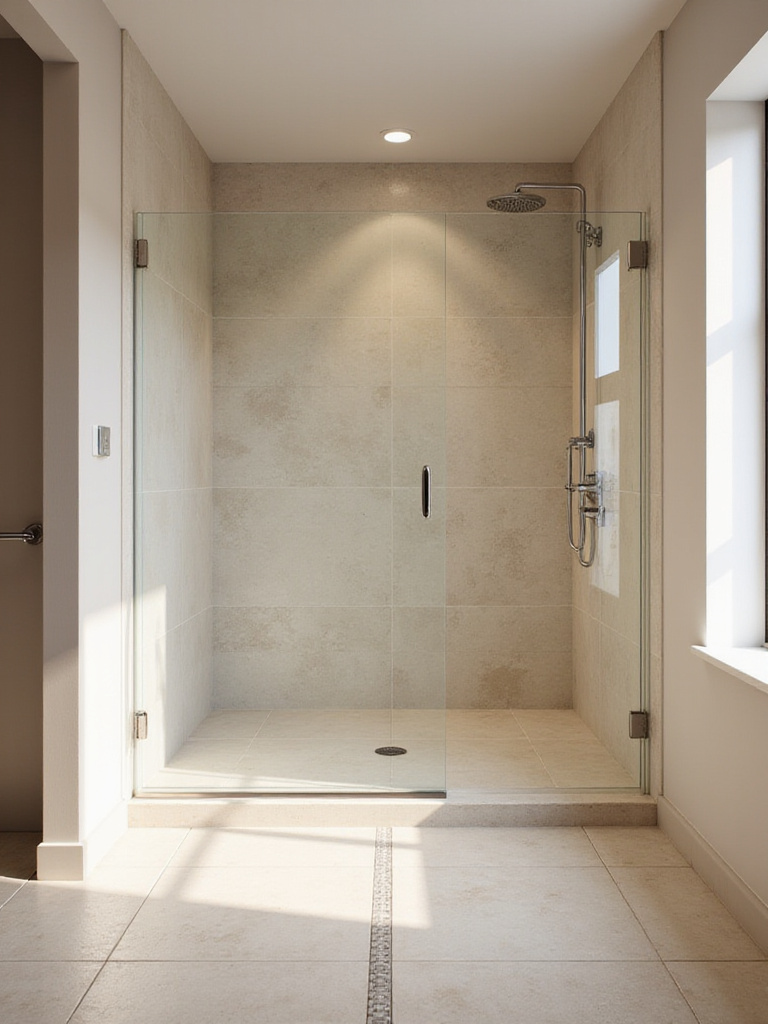
This is a design element I often draw from travels in Asia, where the concept of the integrated bathing space is common. Aesthetically, it’s sleek, modern, and luxurious. Functionally, it’s brilliant—it’s more accessible for everyone, and it’s a dream to clean. It requires proper waterproofing and a subtle slope in the floor towards the drain, so it’s essential to have a skilled tiler, but the payoff is immense.
Creating this single, unbroken surface makes a small bathroom feel less like a collection of separate zones and more like one serene, expansive space.
9. Integrate Niche Shelving Within Shower Walls
Can we all agree to banish those precarious, rusty shower caddies for good? A recessed niche, built into the stud wall of your shower, is an infinitely more elegant and practical solution. It provides a dedicated, out-of-the-way home for your shampoos and soaps, keeping clutter off the shower floor or benches. It’s a small detail that makes a world of difference to the daily experience.
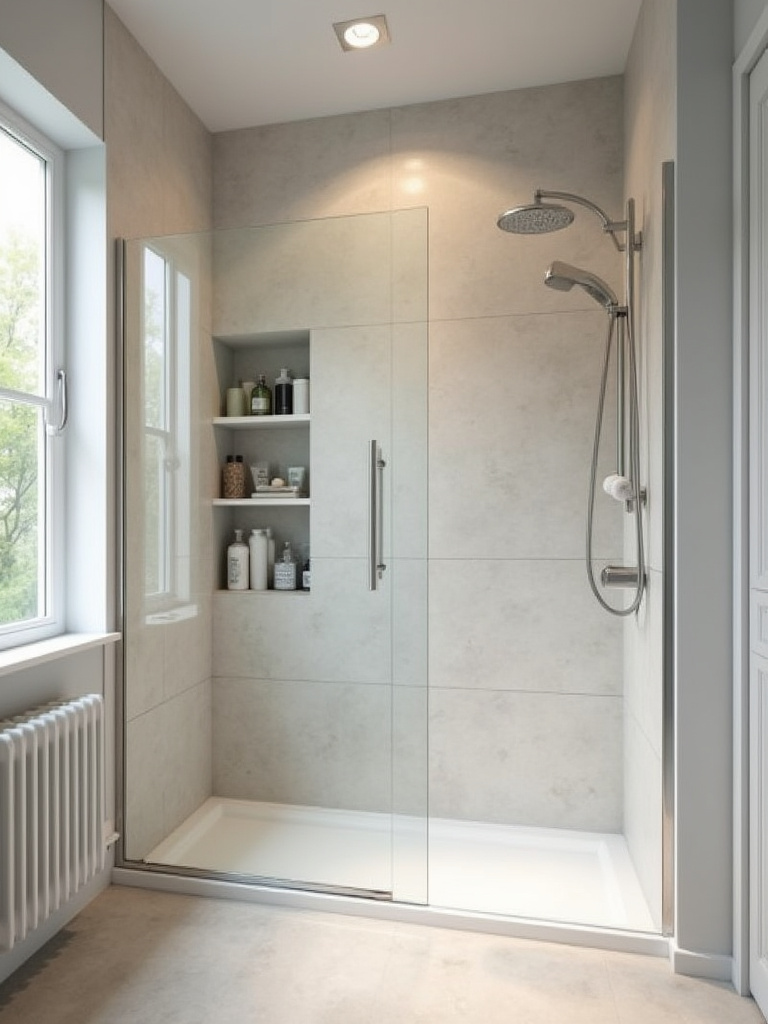
This is another opportunity to inject personality. I love lining a shower niche with a different tile—perhaps a beautiful, handmade Zellige tile from Morocco or a stunning mosaic that adds a jewel-like pop of colour and texture against a simpler field tile. It transforms a purely functional element into a bespoke design feature, reminiscent of the decorative alcoves found in Mughal architecture. It’s a small moment of delight in an unexpected place.
A shower niche is the perfect blend of British pragmatism and artful detail—it streamlines your space while creating an opportunity for a beautiful, personal touch.
Maximizing Space: Smart Fixture & Material Choices (Part 2)
As we continue to select the core elements of the room, let’s focus on the surfaces and doorways. These larger elements have a huge impact on the overall feeling of the space. Smart choices here can amplify light, reduce visual noise, and unlock hidden potential in your floor plan.
10. Select Large Format Tiles for Fewer Grout Lines & Open Feel
This is a trick that works every time. Our eyes are drawn to lines, and a standard tiled floor is a grid of them, which can make a small room feel busy and segmented. By choosing large format tiles—think 24×24 inches or even larger—you drastically reduce the number of grout lines. The result is a more monolithic, continuous surface that feels calm and expansive.
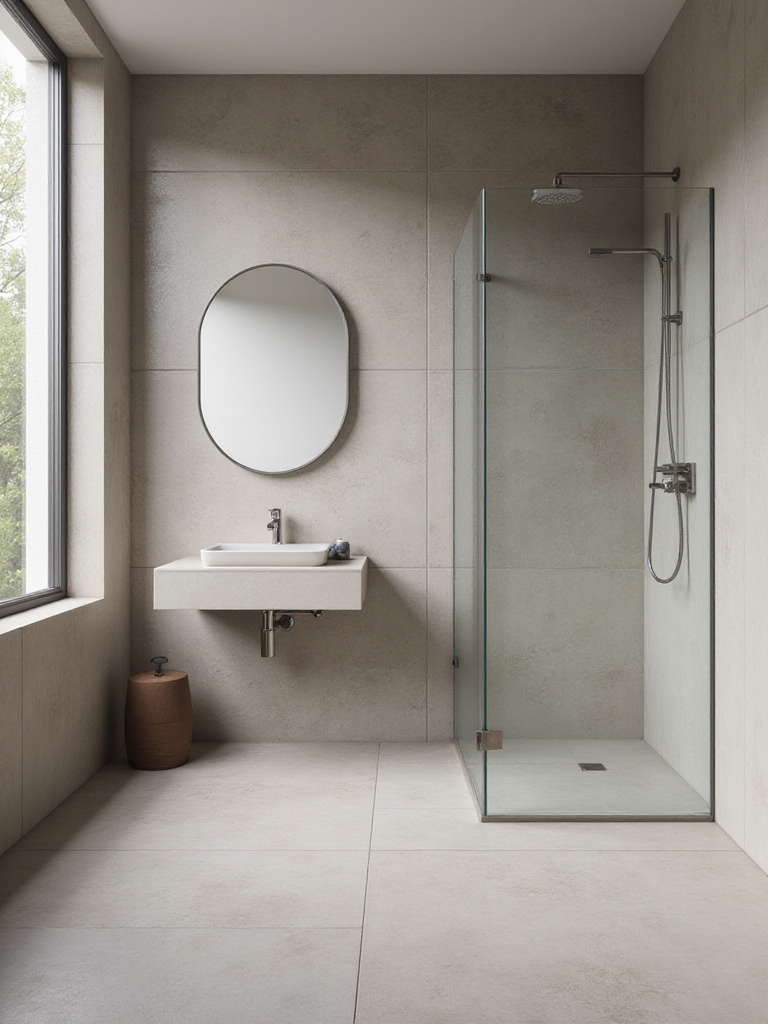
I recommend running the same large format tile on both the floor and the walls to create a seamless, enveloping effect. Choose a grout colour that is as close as possible to the tile colour to make those few lines virtually disappear. This creates a serene, almost stone-like backdrop that feels incredibly sophisticated and spacious. It allows the fixtures and any special decorative elements to become the true heroes of the room.
Fewer lines mean less visual chatter, giving your mind—and your eye—a chance to relax and perceive the space as a single, unified whole.
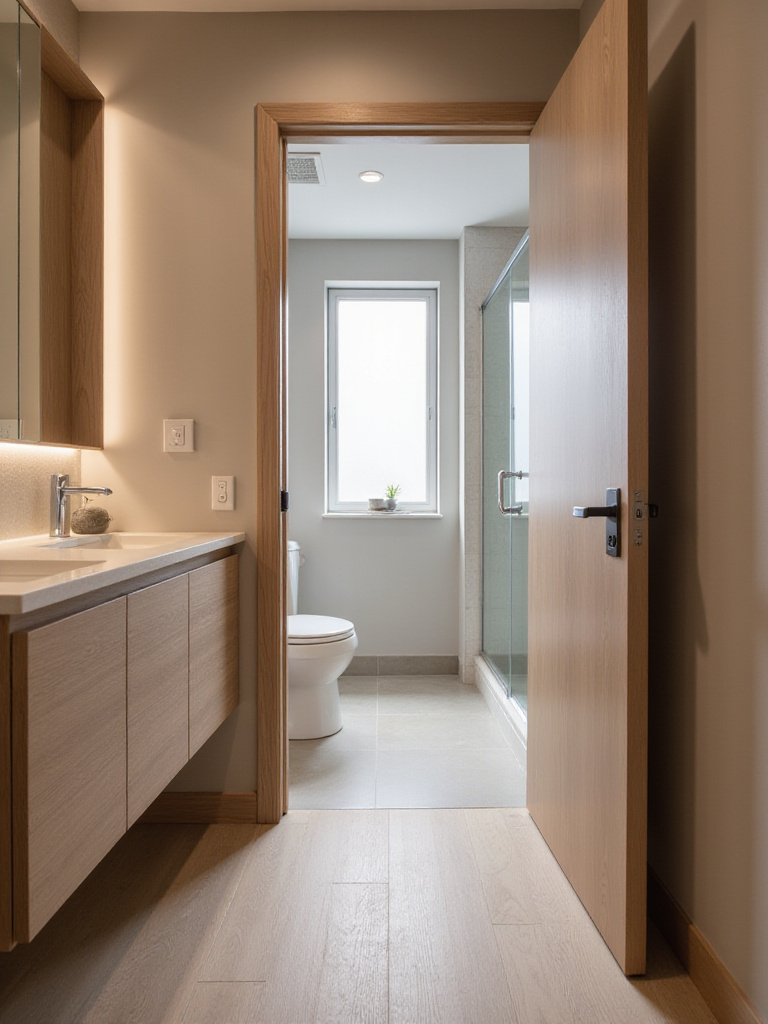
11. Replace Swing Doors with Space-Saving Sliding or Pocket Options
The traditional swing door is a notorious space thief. It requires a clear arc to open, rendering a surprising amount of floor space unusable. In a small bathroom, that can be nine square feet of prime real estate. Replacing it with a pocket door (which slides into the wall) or a surface-mounted barn door (which slides along the outside of the wall) is a complete game-changer.
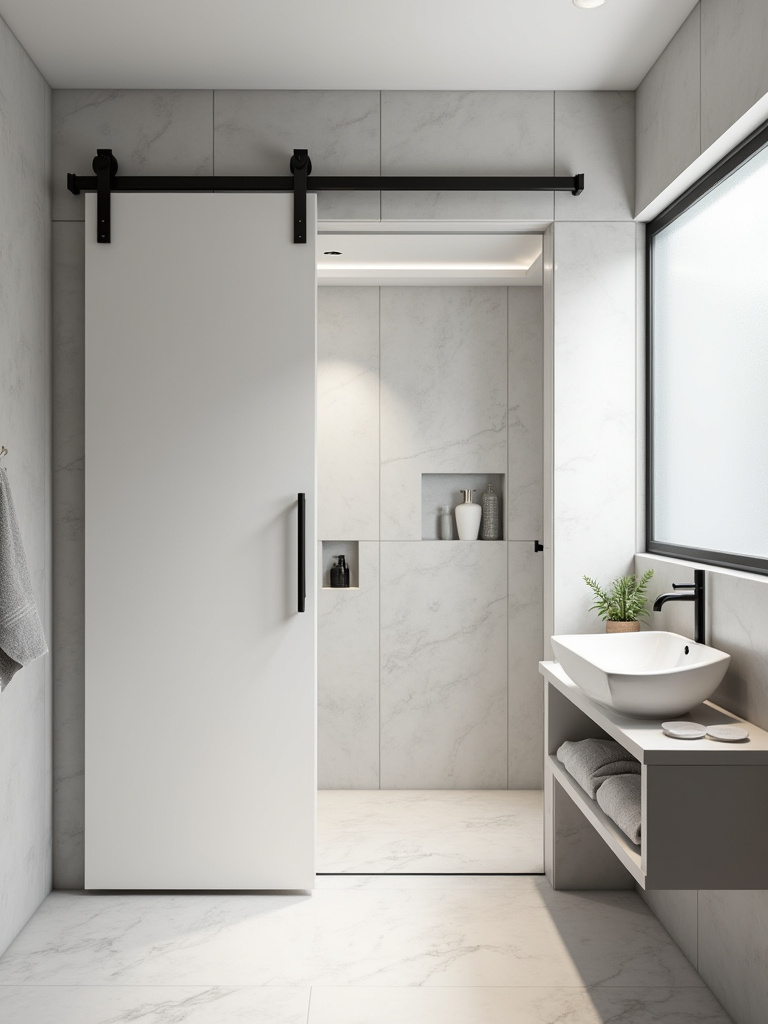
Suddenly, you can place a towel rail where the door used to swing, or you can have a slightly larger vanity. It fundamentally alters the possibilities of the layout. A pocket door provides the cleanest look, disappearing entirely when open. A beautiful barn door can act as a stylistic feature. I once commissioned a reclaimed teak door for a client’s bathroom, and it became a stunning piece of functional art.
Reclaiming that “swing space” doesn’t just add a few square feet; it unlocks a level of design flexibility that can completely transform the functionality of your small bathroom.
Visual Expansion: Creating the Illusion of Larger Space (Part 1)
With the layout fixed and the hard finishes chosen, we now move into the art of illusion. This is where we use light, colour, and reflection to trick the eye and make the physical boundaries of the room feel like they’ve receded. This is where the real magic happens.
12. Employ Light and Neutral Color Palettes on Walls & Floors
Yes, it’s true that light colours make a space feel bigger, but “light and neutral” does not have to mean boring clinical white. Think of the incredible spectrum of nuanced neutrals available. Consider a soft, chalky limewash that gives the walls a beautiful, velvety texture. Or a very pale greige with a warm undertone. Or the subtle, polished sheen of Tadelakt, a traditional Moroccan plaster.

These colours and textures reflect light beautifully, but they also have a depth and soul that standard paint lacks. I love using a single, soft, light hue and wrapping it over the walls, the ceiling, and even the vanity. This monochromatic approach blurs the corners and edges of the room, creating a seamless, cloud-like effect that feels incredibly open and serene.
The goal is to create a soft, light-bouncing envelope that feels calm and cohesive, eliminating the hard lines that define and confine a small space.
13. Strategically Place Large Mirrors to Reflect Light & Depth
A mirror is the oldest and best trick in the book for a reason. It literally doubles the visual space. But a large mirror is what takes it from a functional object to a transformative design element. Whenever possible, I try to run a mirror wall-to-wall above the vanity. This reflects the entire room, creating an incredible sense of depth and openness.
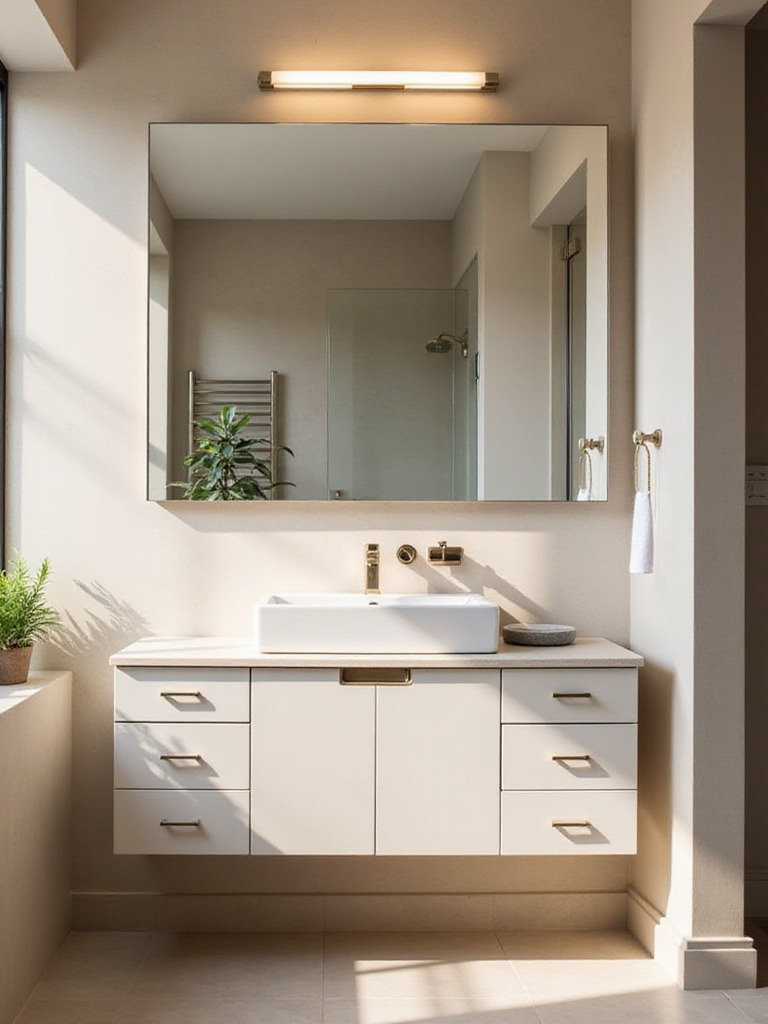
Consider the frame carefully. A frameless mirror offers the cleanest, most expansive look. However, a slim, elegant frame in a material like aged brass or matte black can add a beautiful, grounding detail. Think about what your mirror is reflecting. If you can, position it opposite a window to bounce natural light around, or opposite a piece of art or a beautiful wall finish to duplicate that feature.
Think of a large mirror less as a place to see your reflection and more as an additional window, one that you can place anywhere to open up the room.
14. Integrate Ample Recessed & Task Lighting to Eliminate Shadows
A single, central light fixture is the enemy of a small bathroom. It casts harsh shadows in the corners, making the room feel smaller and more cave-like. The key is to layer your lighting. You need good ambient light from overhead (recessed ceiling lights are perfect), and excellent, shadow-free task lighting around the mirror.
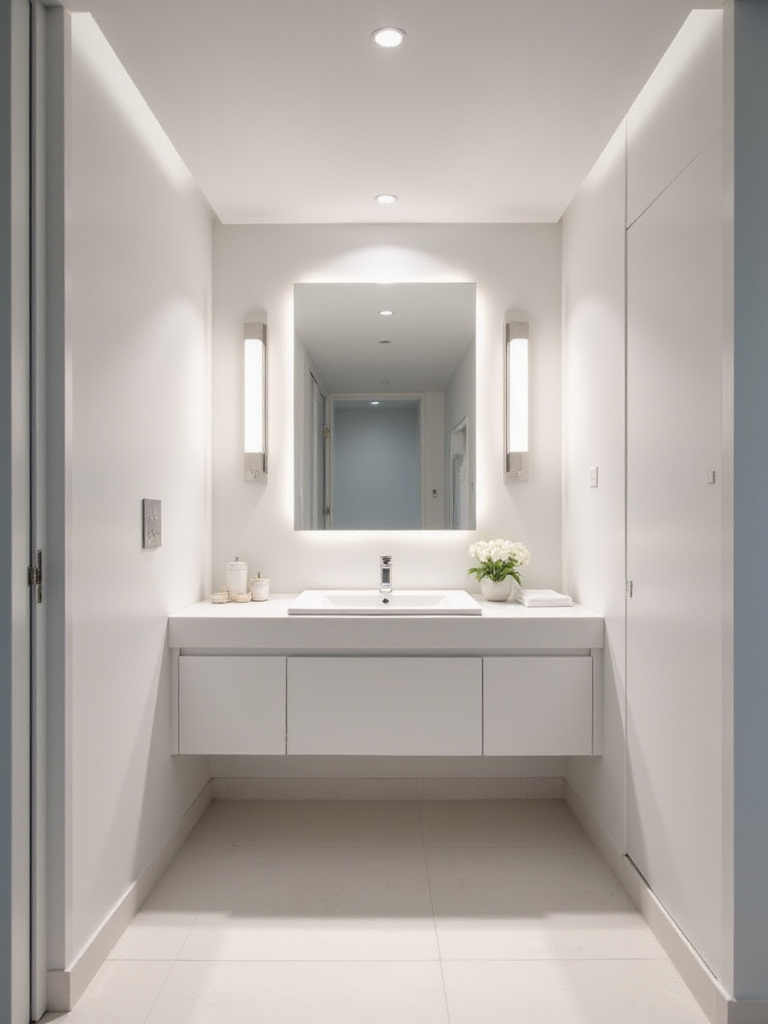
My favourite solution for task lighting is to place two sconces on either side of the mirror at eye level. This provides beautiful, even cross-illumination that’s perfect for grooming and feels very glamorous. Wall-mounted lights are far better than overhead ones for eliminating those unflattering shadows on your face. And please, put everything on a dimmer. This allows you to have bright, functional light in the morning and a soft, ambient glow for a relaxing evening soak.
Good lighting is like an eraser for shadows. By thoughtfully washing every corner with light, you push the walls out and make the entire space feel bright and welcoming.
15. Choose Transparent Glass Shower Screens Over Opaque Curtains
A shower curtain is a solid wall that slices your bathroom in half. A clear glass screen, on the other hand, allows your eye to travel all the way to the back wall of the shower, incorporating that entire area into the main volume of the room. This simple change can make a small bathroom feel almost twice as big.
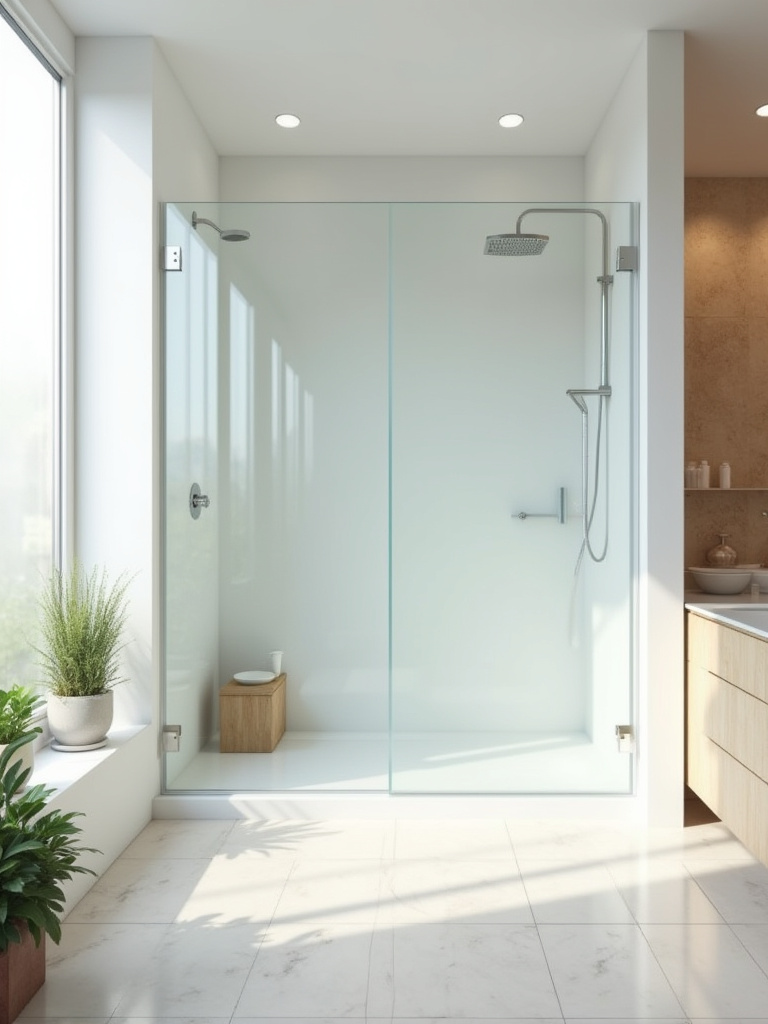
Opt for a frameless or semi-frameless design to minimize visual clutter from metal hardware. If you’re worried about water spots, treat the glass with a protective coating (many come with this now) and keep a small squeegee in the shower for a quick wipe-down. The visual payoff is more than worth the tiny bit of maintenance. You spent time choosing beautiful tile for your shower—let it be seen!
By removing this visual barrier, you unify the space and borrow three precious feet of visual depth from the shower enclosure, instantly making the whole room feel larger.
Visual Expansion: Creating the Illusion of Larger Space (Part 2)
Continuing our exploration of visual alchemy, let’s look at how the style of our fixtures themselves can contribute to this sense of openness. It’s not just about what you put on the walls, but how the objects within the space occupy their volume.
16. Utilize Open Shelving & Floating Vanities to Maintain Airiness
We’ve touched on floating vanities, but let’s pair them with open shelving. While closed cabinets are essential for hiding clutter, a few well-placed open shelves can prevent a small room from feeling too blocky or heavy. They provide a place to display beautiful, curated items—a small vase, a lovely scented candle, neatly folded hand towels.
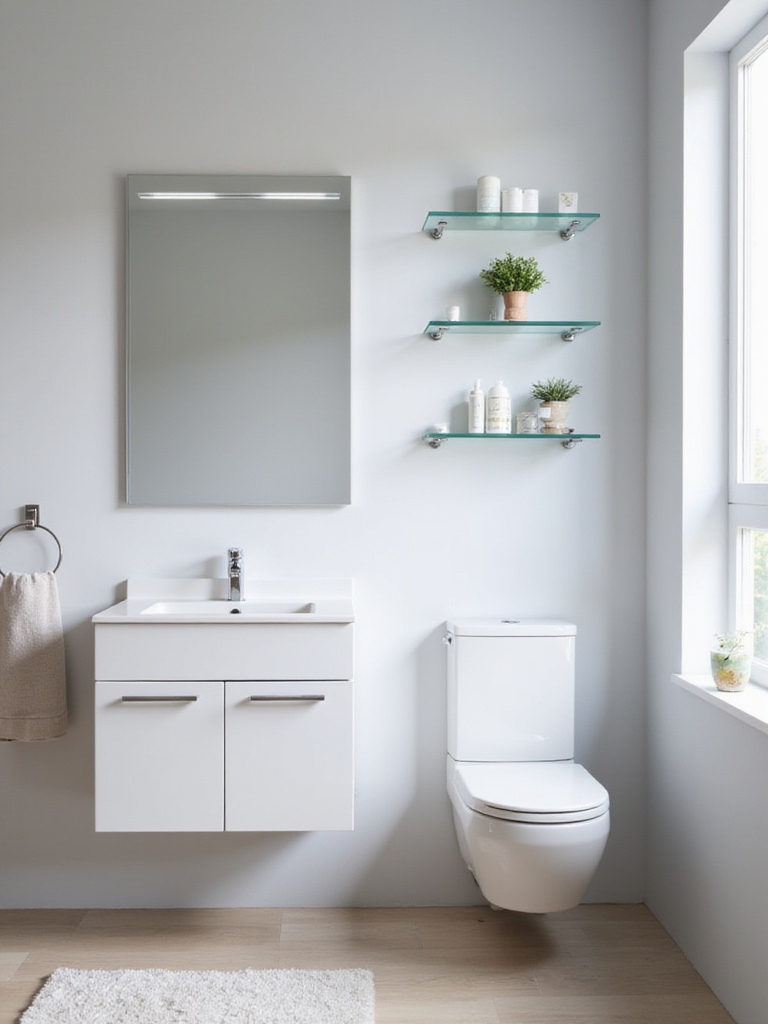
The key word here is “curated.” Open shelving is not for your spare toothpaste tubes. I love using slim shelves in natural materials like reclaimed wood or elegant glass. Placing one or two above the loo is a classic way to add a bit of storage and personality without taking up any floor space. It maintains a sense of lightness and allows you to inject your style into the room in a very deliberate way.
These elements work together to keep the floor clear and the visual field open, tricking the eye into seeing a larger, more breathable space.
Smart Storage & Ongoing Optimization: Keeping Your Small Space Tidy (Part 1)
A small bathroom can only feel serene if it is impeccably organised. Clutter is the kryptonite of a small space; it visually shrinks the room and creates a sense of chaos. Smart, intentional storage is not an add-on; it must be integrated into the very fabric of your design.
17. Implement Vertical Storage Solutions Like Tall Cabinets & Shelves
When you can’t build out, you must build up. Vertical space is your most valuable, under-utilised asset. A tall, slender cabinet—often called a linen tower—can provide an incredible amount of storage on a tiny footprint. It draws the eye upward, which has the pleasant side effect of making the ceilings feel higher.
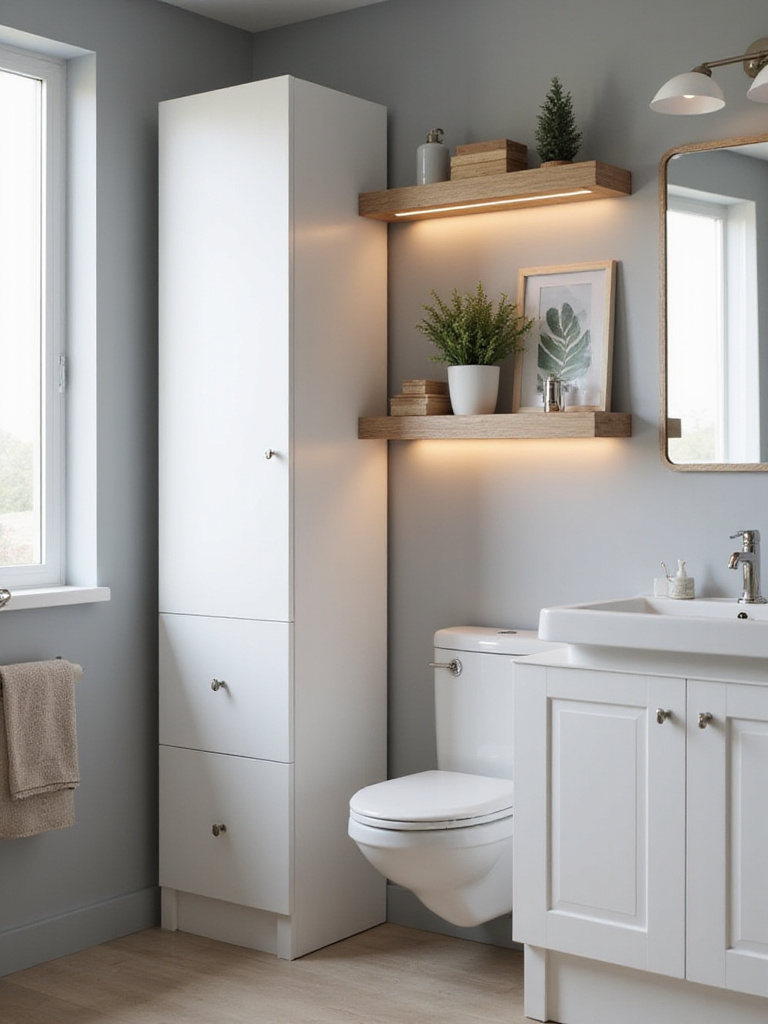
Look for opportunities to go vertical everywhere. A ladder-style shelf unit can lean against a wall, offering towel storage and display space with a very light visual footprint. Wall-mounted shelves stacked one above the other create powerful storage while keeping the floor clear. Think like a city dweller: every vertical inch is precious real estate.
By maximising the volume of the room, not just its square footage, you can create a home for everything, ensuring your beautiful new space remains calm and clutter-free.
18. Utilize Over-the-Toilet Storage Units Judiciously
That blank wall above the toilet is crying out for a job to do. An over-the-toilet storage unit is a classic small-space solution for a reason. But the key here is the word “judiciously.” Steer clear of the clunky, freestanding metal units of dorm rooms past. Instead, look for more sophisticated options.
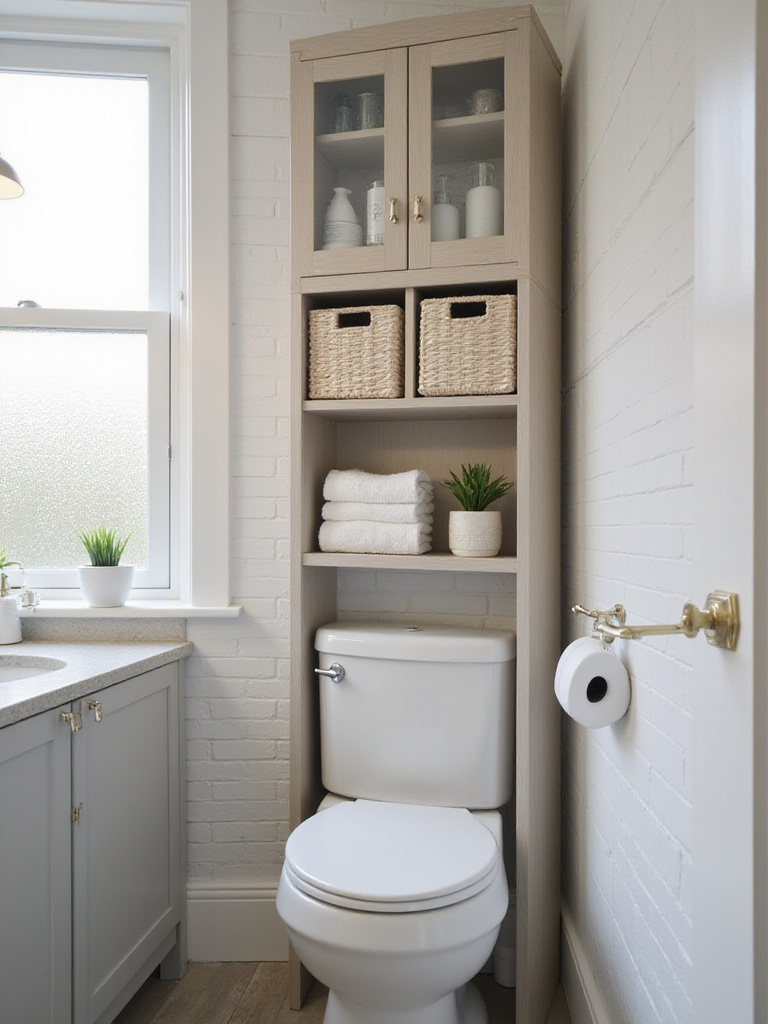
Consider installing three beautiful floating shelves in a warm wood or crisp white. Or find a slim, wall-mounted cabinet with doors that can hide away the less sightly necessities. The goal is to make it look like an intentional, integrated piece of the design, not a temporary afterthought. It should feel as considered as your vanity or your tile choice.
When chosen with care, this type of storage can be both incredibly hardworking and aesthetically pleasing, turning dead space into a stylish, functional asset.
19. Install Hooks & Racks on Doors and Walls for Towels & Robes
Never underestimate the power of a good hook. The back of the bathroom door is the perfect place for a robe hook or a multi-hook rack for towels. Instead of a bulky towel bar that projects far from the wall, consider a row of elegant, sculptural hooks. They take up less visual space and can look like small pieces of art when not in use.
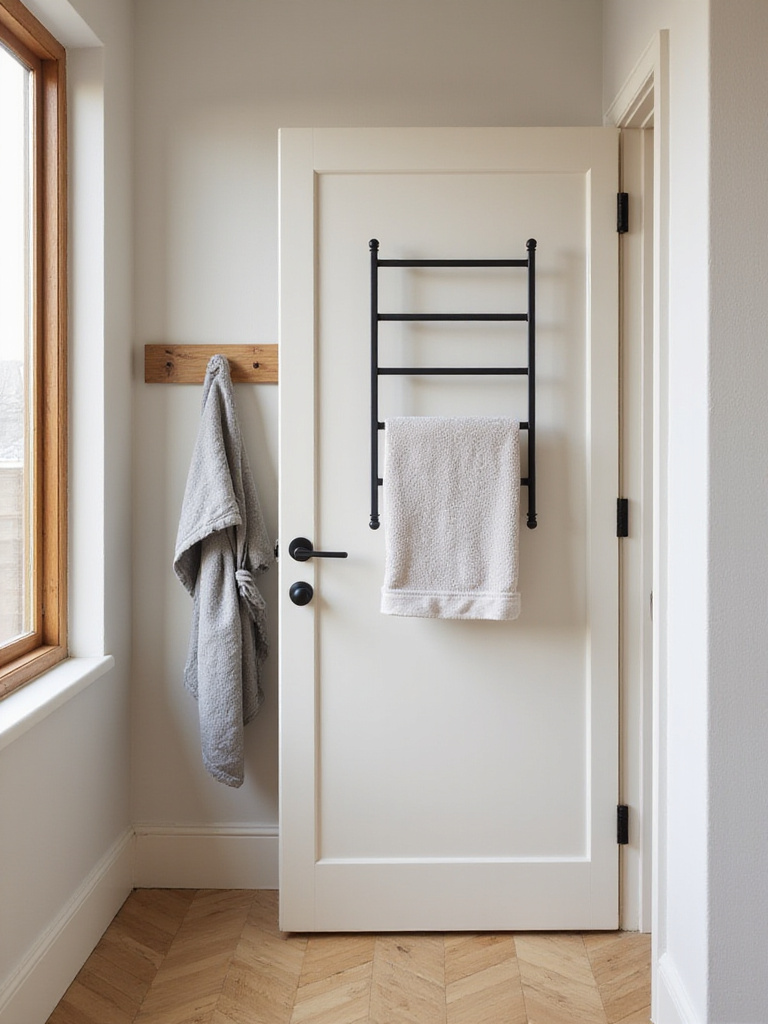
This is a wonderful place to invest in beautiful hardware. A set of hefty brass or modern matte black hooks adds a touch of bespoke quality for a very small outlay. They are infinitely more stylish and practical than draping damp towels over the shower door. Spacing them properly allows towels to air dry effectively, which is crucial in a small, often poorly ventilated, space.
Simple, well-chosen hooks are the unsung heroes of bathroom organisation, offering maximum function with a minimal footprint.
20. Integrate Smart Drawer Organizers for Clutter-Free Countertops
The true secret to a serene bathroom is having nothing on the countertop except for a beautiful soap dish and perhaps a small plant. Everything else should be out of sight. The way to achieve this is through militant drawer organisation. A drawer is only as useful as what’s inside it, and a jumbled mess is no use to anyone.
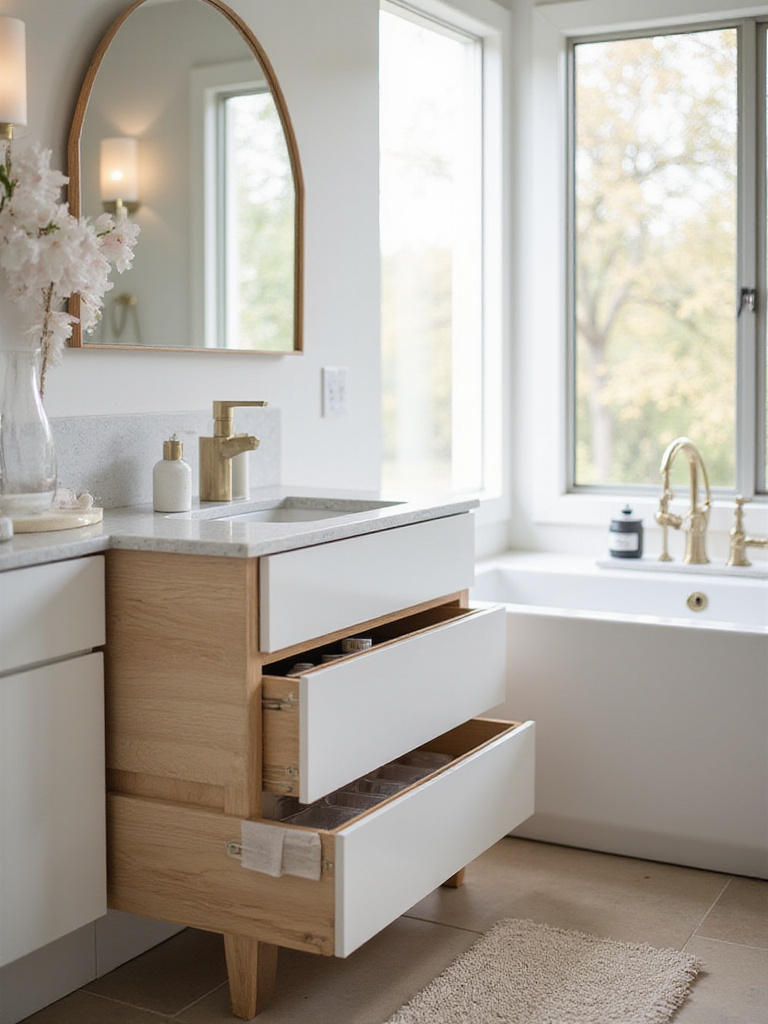
Invest in a system of modular drawer dividers—you can find beautiful ones in bamboo or clear acrylic. Designate specific compartments for everything: makeup, skincare, dental supplies, hair accessories. The 10 seconds it takes to put something back in its designated spot will save you from the visual chaos of a cluttered counter. This is less a design tip and more of a life-changing habit for a small space.
True luxury is not about what you display, but about the calm that comes from knowing everything is in its place. An organised drawer is the foundation of a peaceful morning routine.
Smart Storage & Ongoing Optimization: Keeping Your Small Space Tidy (Part 2)
Finally, let’s discuss the ongoing philosophy that will keep your small sanctuary looking its best. It’s about maintaining a minimalist mindset, where every object has earned its place. This isn’t about deprivation; it’s about the joy of curation.
21. Maintain Minimalist Decor to Avoid Visual Clutter and Overwhelm
In a small space, every object has a louder voice. A minimalist approach is about ensuring those voices are speaking in harmony, not shouting over each other. This means editing ruthlessly. You don’t need five half-empty bottles of lotion on display; decant your favourite into a beautiful, refillable bottle. One gorgeous, handwoven Turkish towel is better than three mismatched ones.
Minimalism here means intentionality. It’s the conscious choice to surround yourself only with things that are either beautiful or useful—and ideally both. It applies to everything from your fixtures (clean lines, simple forms) to your accessories. By reducing the sheer number of things in the room, you allow the space itself, and the few beautiful objects within it, to shine.
This isn’t about creating a sterile, empty room. It’s about creating a calm, curated space where you are surrounded only by things that bring you peace and function beautifully. It’s the ultimate form of respect for your home and for yourself.
Conclusion
So you see, there is always hope, even for the tiniest of bathrooms. The secret is to stop seeing the small size as a problem to be solved and start seeing it as an opportunity for thoughtful, creative design. It’s a chance to create a jewel box—a perfectly curated, intimate space where every single element has been chosen with intention and care.
By blending clever space-saving strategies with a deep appreciation for beautiful materials and a commitment to serene organisation, you can transform a cramped closet into a personal sanctuary. Don’t be intimidated by the constraints. Embrace them. Use them to guide you toward a more disciplined, more elegant, and ultimately more personal design. Your small bathroom is not a lost cause; it’s a canvas waiting for a masterpiece.


