Can we talk about why everyone gets kitchen organizing wrong? People always ask me how to get that clean, minimalist kitchen they see online. They think the answer is buying a hundred identical, beautiful glass containers and a fancy label maker. That’s not the answer. That’s a symptom.
The real work, the work that actually matters, happens before you buy a single thing. I learned this the hard way years ago with a client, a tech CEO with a stunning, architect-designed kitchen. He’d spent a fortune on bespoke walnut organizers and custom bins, but his kitchen was still chaotic. Why? Because organization isn’t an aesthetic you purchase; it’s a practice you cultivate. It’s about understanding your own flow, not forcing yourself into someone else’s pretty picture.
So let’s cut through the noise. Most of what you see online is just a performance of organization. The real goal is to create a space of such intuitive function that it feels calm. It’s about reducing the tiny points of friction in your day so you can focus on the ritual of preparing food, not the frustration of finding the paprika. These ideas aren’t just about tidying up. They are about creating a sanctuary.
Foundational Assessment & Strategic Planning (Part 1)
Before you even think about containers or clever gadgets, we must start here. This is the part everyone wants to skip, but it is, without question, the most important. Think of this phase as creating the blueprint. Without a solid plan grounded in your actual life, anything you build on top will be unstable and ultimately collapse back into chaos. This is about observing, editing, and planning with intention.
1. Declutter Ruthlessly with the “Keep, Toss, Donate” Method
Your journey begins not with adding, but with subtracting. A cluttered space creates a cluttered mind, and the first step toward serenity is to create visual silence. This means a ruthless, honest edit of what you own. Empty a drawer or a cabinet completely. Pick up every single item and ask if it serves a real purpose or brings you genuine joy. If the answer is no, it doesn’t belong here.
Create three piles: Keep, Toss, and Donate. Don’t create a “maybe” pile—that’s just a holding pen for future clutter. Be decisive. This process isn’t just about making room; it’s a ritual of letting go. I once watched a client hesitate over a set of fish-shaped measuring spoons she’d never used. When she finally put them in the donate pile, her whole posture changed. It was a visible release of a tiny burden she didn’t even know she was carrying.
Now that you’re left with only the essentials, we must understand what we have. This next step is a diagnostic tool to reveal your true storage needs.
2. Group Similar Items Together to Identify Storage Needs Accurately
The biggest mistake people make is trying to organize by location. Don’t just clean out one drawer; gather every single cooking utensil from everywhere in your kitchen. All the spatulas, all the whisks, all the measuring cups. Lay them all out on your dining table. This is the moment of truth. You will inevitably find you own five can openers or three melon ballers you forgot about.
This act of gathering isn’t just for inventory; it’s for insight. It shows you the patterns of your consumption and the reality of your redundancy. Seeing all your spices together reveals the five jars of expired cumin. Seeing all your mugs together might reveal you have thirty, but only ever use your favorite three. Only when you see the true volume of a category can you determine the right container and the right home for it.
With your curated items grouped, it’s time to choreograph their placement. This is where we create flow.
3. Zone Your Kitchen for Cooking, Prep, and Baking Stations
A kitchen shouldn’t be a random collection of stations; it should be a seamless workflow. Think like a chef. Everything related to a task should live together in a “zone.” Create a coffee and tea zone with mugs, sweeteners, the kettle, and coffee maker all in one spot. Establish a prep zone with cutting boards, knives, and mixing bowls near your largest clear counter space. Your cooking zone, near the stove, should house pots, pans, oils, and common spices.
This isn’t about rigid rules; it’s about economy of motion. You are designing a dance. Each step should flow to the next without wasted energy searching for a tool that lives on the other side of the room. A well-zoned kitchen allows you to move with intention and focus, turning meal prep from a chaotic scramble into a mindful practice. I tell my clients to close their eyes and walk through the process of making their favorite meal. Where do their hands naturally reach? That is where the tool belongs.
Before we fill these zones with solutions, there’s one more critical, non-negotiable step.
4. Measure Drawer and Cabinet Interiors Precisely Before Buying Organizers
This might sound obvious, but it’s the shortcut everyone ignores, leading to wasted money and ill-fitting plastic bins that just create a new kind of clutter. Before you click “add to cart” on any organizer, take out a metal tape measure. Measure the interior width, depth, and height of every drawer and cabinet you plan to organize. Write it down in a note on your phone.
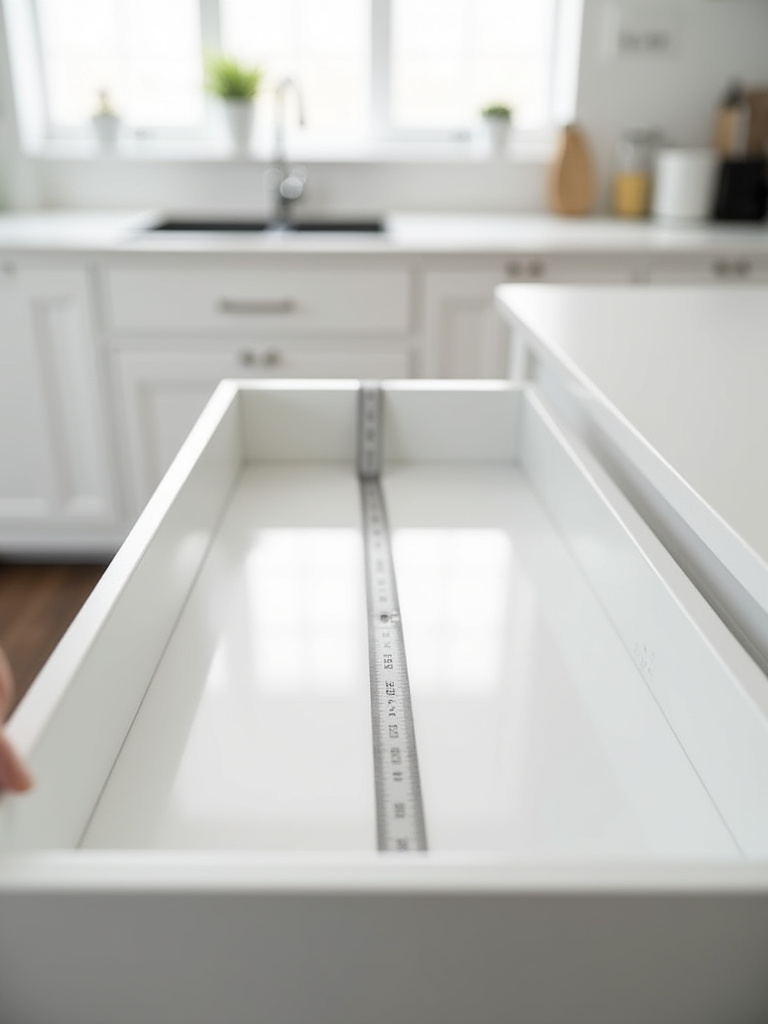
And don’t just measure the main space. Note the location of hinges, pipes under the sink, and the lip of the drawer that might block a tall insert. Precision here is a form of respect—for your time, your money, and your space. A well-fitting organizer feels custom and seamless, maximizing every millimeter. A poorly fitting one is a constant, subtle source of irritation. The goal is friction-less living, and that starts with a perfect fit.
Foundational Assessment & Strategic Planning (Part 2)
We’ve cleared the physical space and planned its flow. Now, we refine that plan with data. The modern home runs on information, and your kitchen should be no different. This next step creates a central nervous system for your culinary space, making you a more mindful consumer and a more efficient cook.
5. Create a Detailed Inventory List of All Kitchen Contents and Their Frequency of Use
This is where the tech-savvy minimalist thrives. Create a simple spreadsheet or use a notes app to create a digital inventory of your pantry and freezer. It doesn’t have to be complicated. List the item, its location, and the date you bought it. This simple act transforms your kitchen from a passive storage unit into an active database. You’ll know exactly what you have at a glance when you’re at the grocery store, eliminating duplicate purchases and food waste.
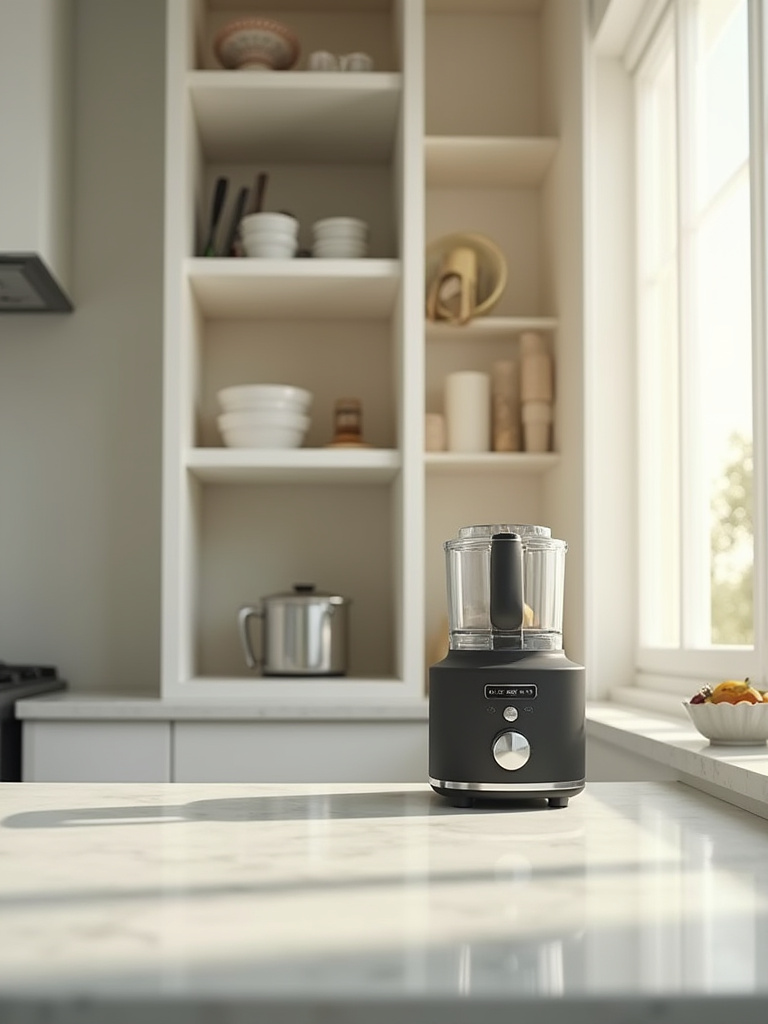
Beyond the pantry, do a mental inventory of your gadgets. For each appliance, assign a frequency of use: daily, weekly, monthly, or yearly. This objective data makes decluttering non-negotiable. That bread maker you use once a year does not deserve prime real estate in your main cabinets. This isn’t about getting rid of things you love; it’s about assigning space based on true function, ensuring your most-used items are the most accessible.
Now that our foundation is set, we can finally, mindfully, introduce tools to enhance our system.
Implementing Smart storage solutions & Tools (Part 1)
This is the phase everyone looks forward to, but it’s only effective because of the foundational work you’ve already done. We are not just buying things; we are selecting specific tools to solve specific problems we have already identified. The goal is to enhance accessibility, functionality, and calm.
6. Install Pull-Out Shelves or Drawer Inserts for Deep Cabinets
Deep lower cabinets are black holes. They are where forgotten appliances and expired cans go to die. Reaching into the back of them is inefficient and undignified. The solution is simple and transformative: installing pull-out shelves. They bring the contents of the cabinet out to you, making everything visible and accessible. It’s an immediate ergonomic and functional upgrade.
This single change can reclaim up to 50% of your cabinet’s usable space. Suddenly, the back is just as useful as the front. I had a client, an older woman who loved to cook but was finding it physically difficult. We installed pull-outs for her heavy pots and pans. She later told me it felt like she’d been given a new kitchen, because she could finally use all the tools she loved without pain or frustration. It’s about making your space serve you, not the other way around.
While we’re solving for depth, let’s also look up. Untapped potential lives above every shelf.
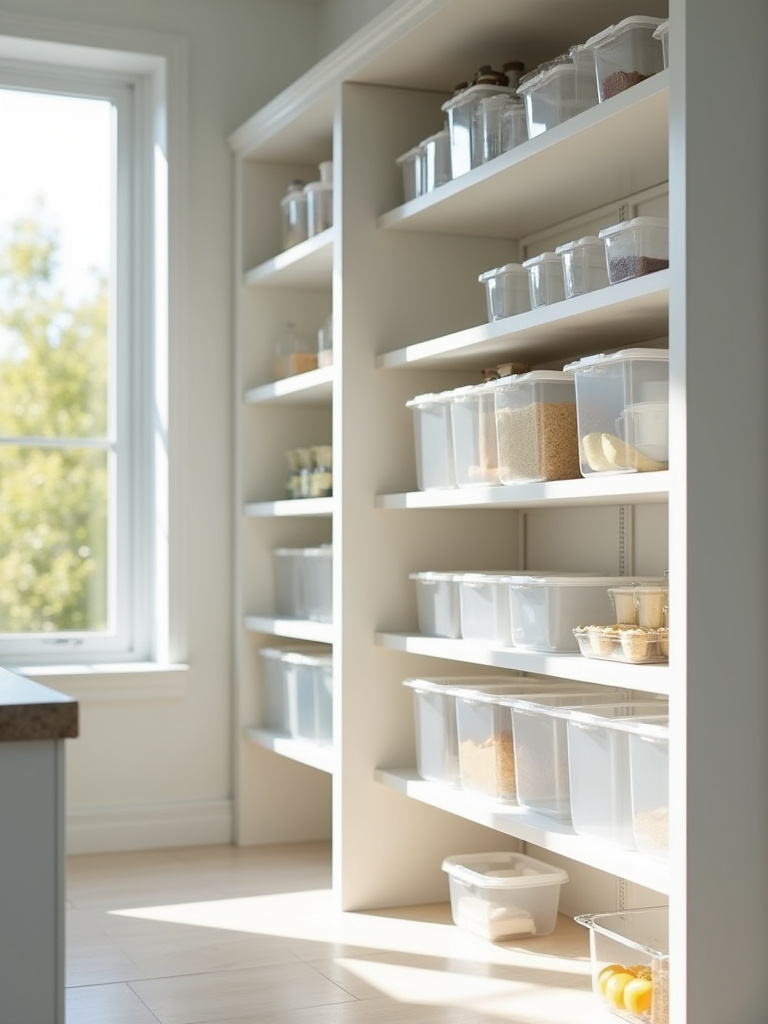
7. Utilize Vertical Space with Stackable Containers and Shelf Risers
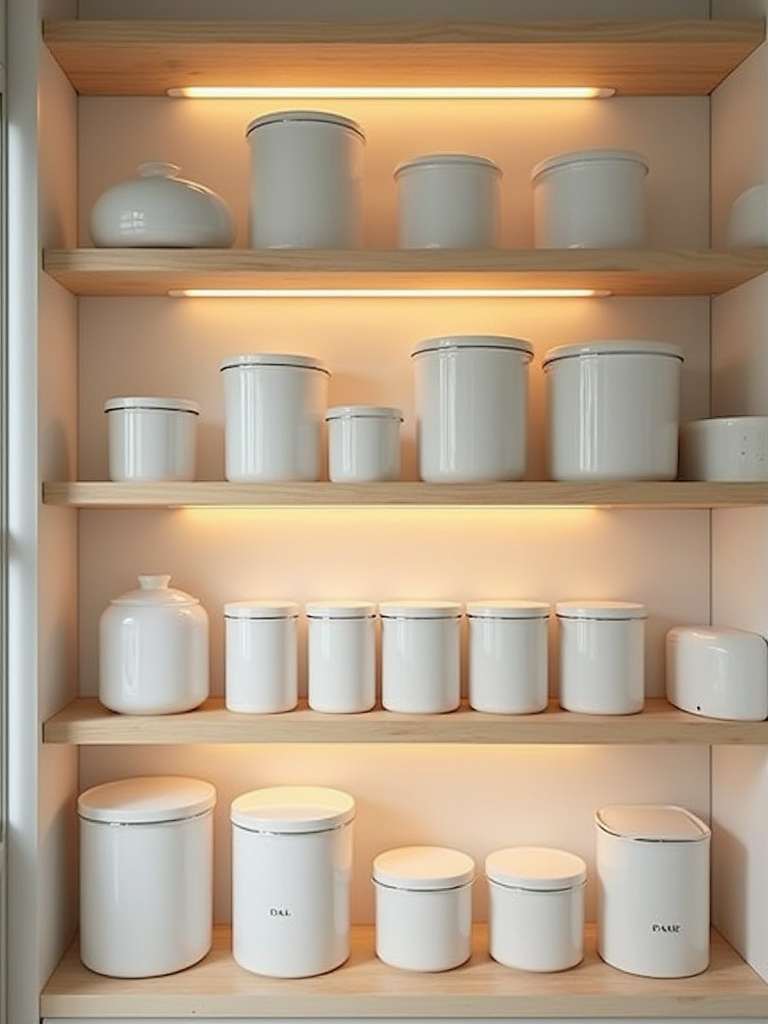
Most cabinets have an enormous amount of unused air. We tend to place one layer of items on a shelf, wasting all the vertical space above it. Shelf risers are the answer. These simple wire or bamboo “mini-shelves” instantly double the surface area inside your cabinets, allowing you to stack plates without chipping them or to see the cans in the back row.
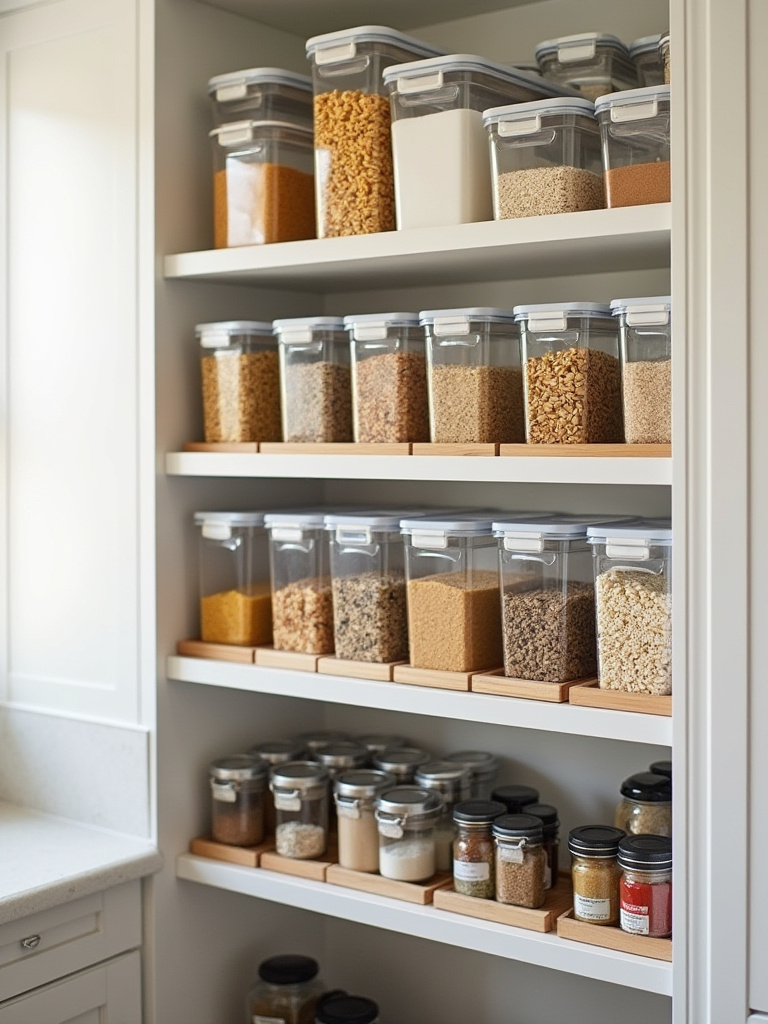
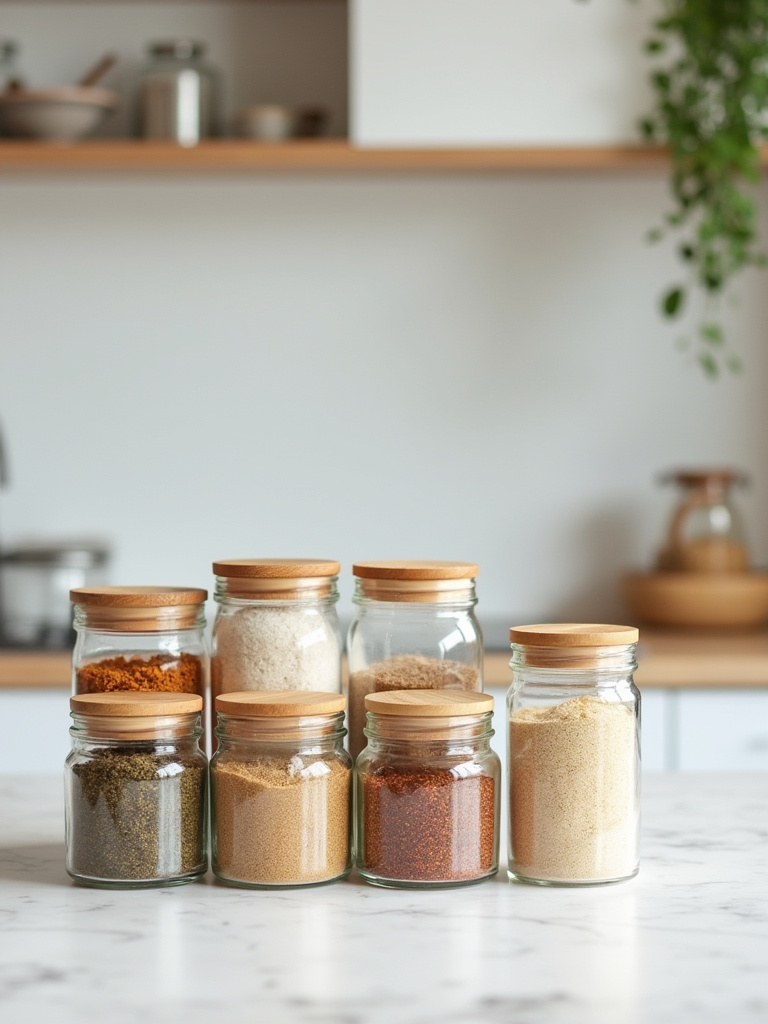
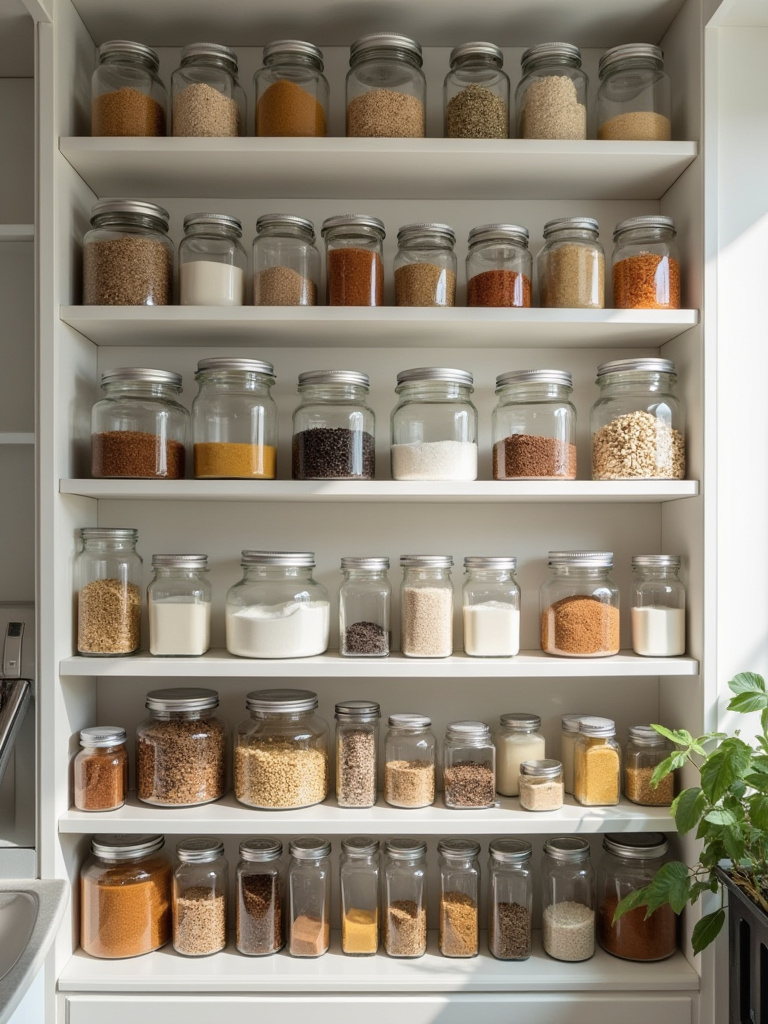
For the pantry, clear, stackable containers are non-negotiable. They allow you to decant dry goods from bulky, mismatched packaging into a uniform system. This is not just for aesthetics. It protects food from pests, allows you to see inventory at a glance, and creates a modular system that uses every inch of vertical space. You’ll be amazed at how much more a shelf can hold when you use its full height.
With our space maximized, we now refine for speed and ease. Your daily rituals should be effortless.
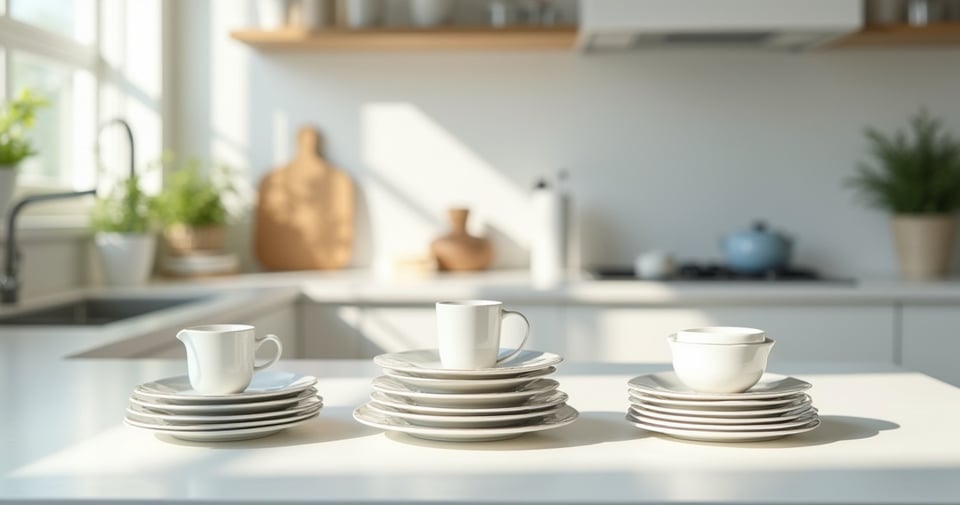
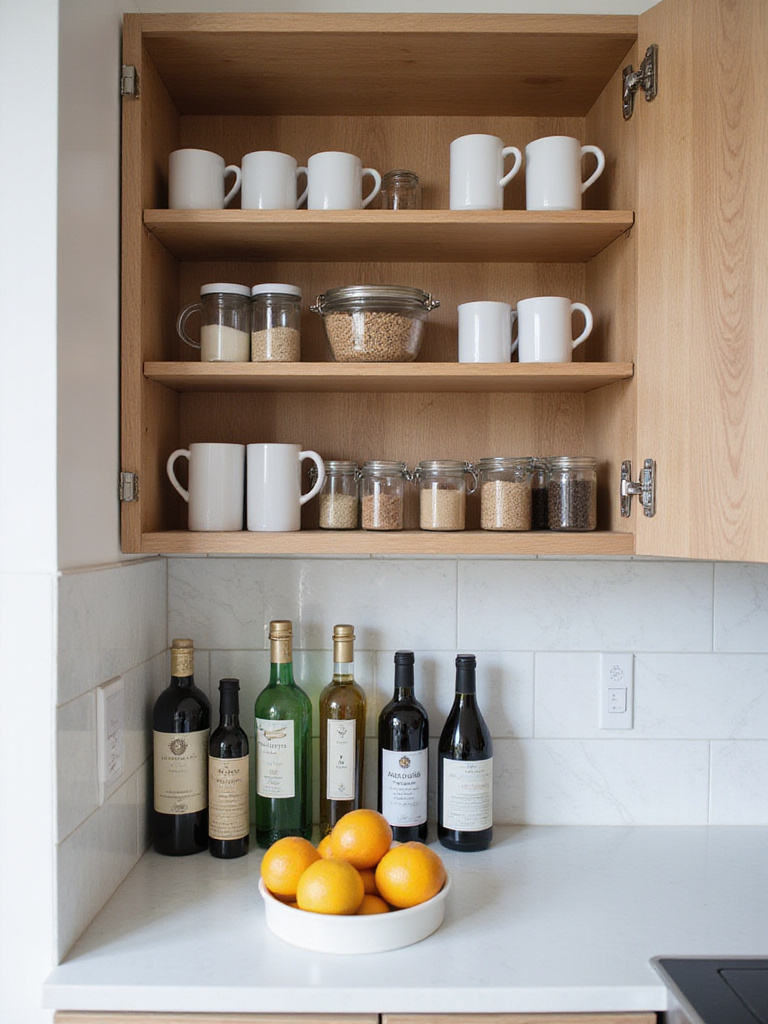
8. Store Frequently Used Items at Eye-Level for Easy Access
Think of your kitchen storage as real estate. The space between your shoulders and your knees is prime territory. This is where your daily-use items belong: your favorite mugs, your everyday plates, the olive oil you reach for constantly. Anything you use less than once a week should be moved to a higher or lower shelf.
This is a simple ergonomic principle that dramatically reduces the small physical and mental efforts you expend all day. Your body shouldn’t have to bend or stretch for the things you need most often. Your brain shouldn’t have to remember that the coffee filters are in the high cabinet above the fridge. Placing your essentials in this prime zone creates muscle memory, making your daily routines feel automatic and serene.
The pantry is often the heart of kitchen chaos. Let’s bring a system of calm to it.
9. Implement a Streamlined Pantry Organization System for Dry Goods
A truly streamlined pantry is a thing of beauty and logic. After you’ve decanted everything into your clear, stackable containers, it’s time to zone the shelves. Create a baking zone, a grains and pasta zone, a snack zone, and a canned goods zone. Grouping like with like makes finding what you need instant and intuitive.
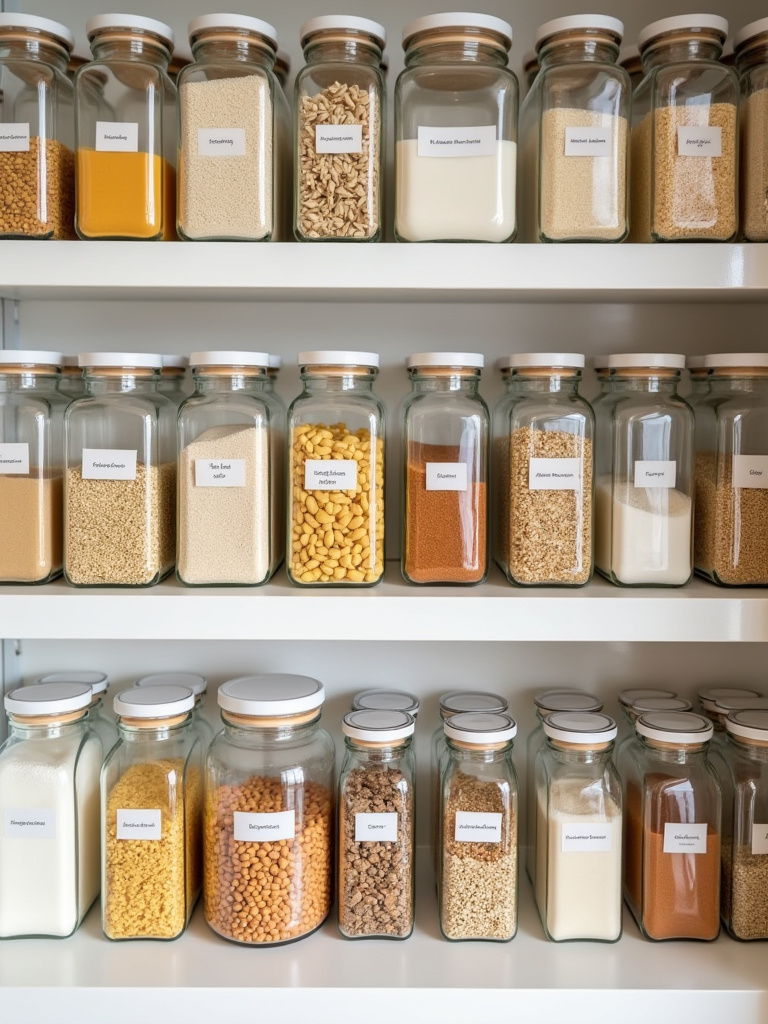
And the final touch—the one that holds the whole system together—is labeling. Label the front of every container clearly. Use a simple, clean font. A good label answers the question before you even have to ask it, eliminating guesswork and creating a sense of calm control. This isn’t just tidy; it’s a functional information system for your home.
“When you can see everything you have, you naturally become more resourceful and reduce food waste.”
Implementing Smart Storage Solutions & Tools (Part 2)
Our system is taking shape within the cabinets and pantry. Now, let’s apply the same principles of function and flow to our drawers and countertops. These are the high-touch, high-traffic areas where small improvements yield huge gains in daily calm.
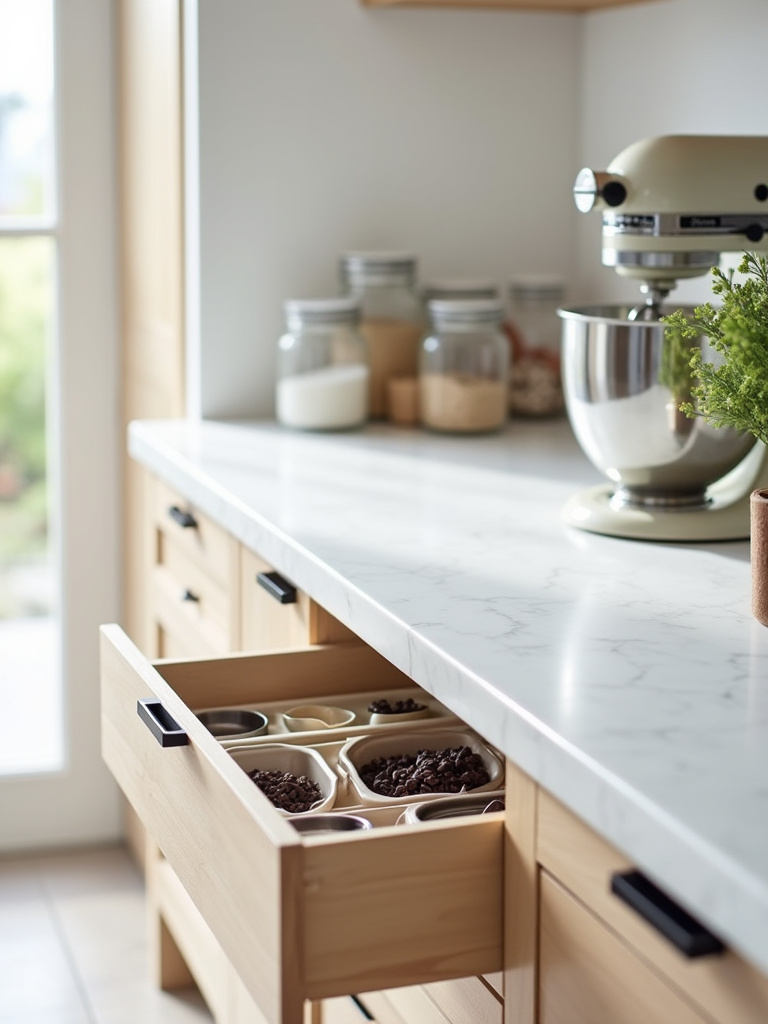
10. Categorize Utensils and Tools with Modular Drawer Dividers
A jumbled utensil drawer is a daily source of stress. The solution is simple: modular dividers. Forget those one-size-fits-none plastic trays. Invest in bamboo or high-quality plastic dividers that are adjustable or come in various sizes. This allows you to create a custom-fit system for your specific tools. Every spatula has a home. Every whisk has its slot.
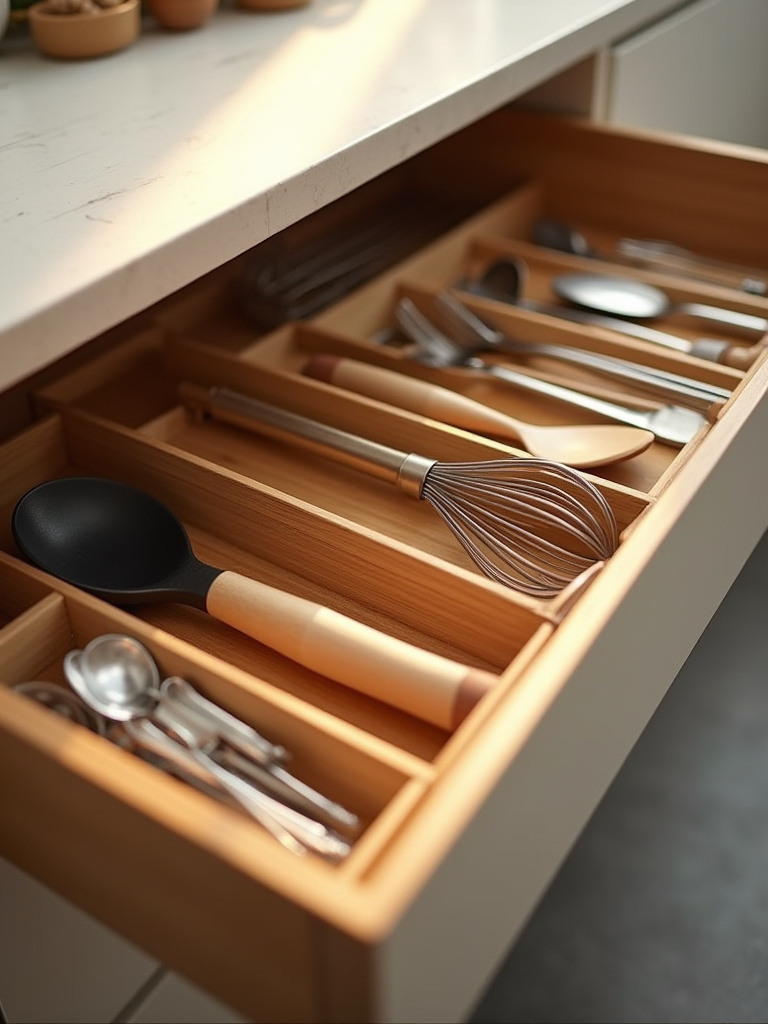
This isn’t just about neatness. It’s about honoring your tools and making your process seamless. When you can reach into a drawer and grab exactly what you need without rummaging, you stay in the flow of cooking. A client once told me that organizing their utensil drawers was the single most impactful change they made. It was a small thing that removed a dozen tiny moments of frustration from their day, every single day.
Let’s carry that philosophy of honoring our tools to the most important ones: your knives.
11. Mount a Magnetic Knife Strip to Free Up Counter and Drawer Space
Knife blocks are bulky, take up valuable counter space, and can be unhygienic. Keeping knives loose in a drawer is a cardinal sin—it dulls the blades and is incredibly unsafe. The most elegant solution, both functionally and aesthetically, is a wall-mounted magnetic knife strip. It transforms your knives from hidden clutter into a functional display.
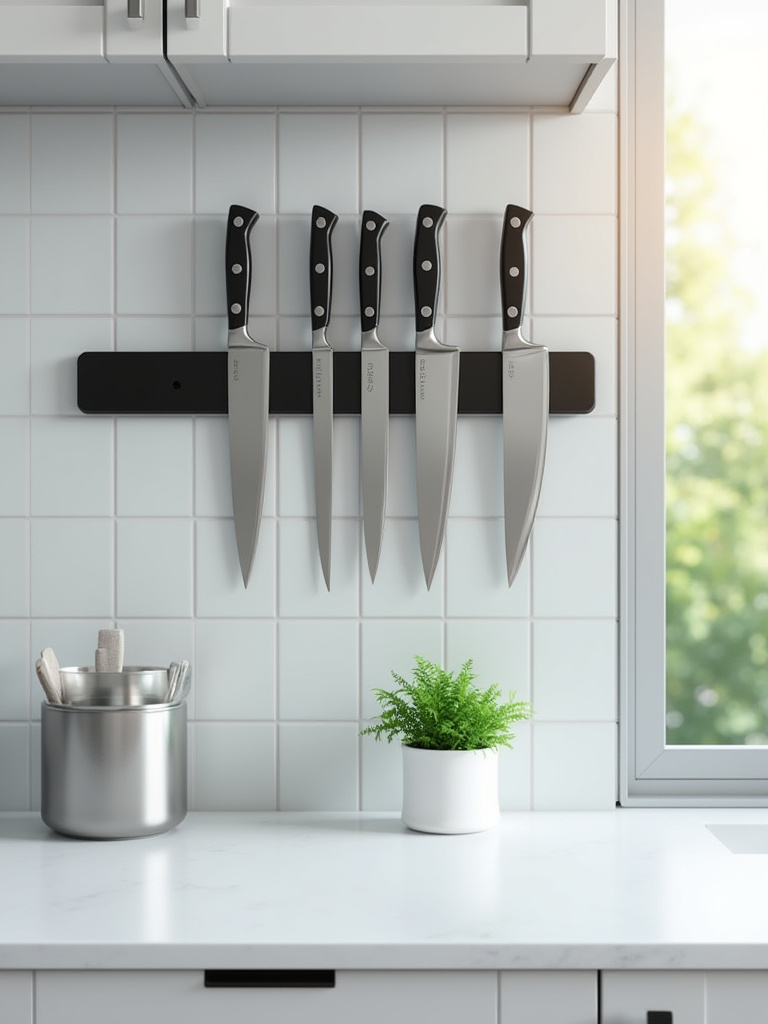
A magnetic strip keeps your blades sharp, sanitized, and within easy reach of your prep area. It’s what professional chefs use for a reason: efficiency and safety. Plus, it frees up an entire drawer or a significant chunk of countertop. Seeing your tools well-cared-for and beautifully arranged brings a sense of respect and intentionality to the simple act of preparing a meal.
Maximizing Space & Optimizing Workflow Efficiency (Part 1)
As we refine our system, we start looking for opportunities to integrate modern life into our traditional spaces more gracefully. The kitchen is no longer just for cooking; it’s a hub of activity. The goal is to accommodate this reality without letting it create chaos, preserving the serenity of the space.
12. Repurpose an Unused Drawer for a Convenient Device Charging Station
Countertops are not for charging phones. They are for preparing food. The visual clutter of tangled cords and scattered devices instantly raises the stress level in a room. A simple, brilliant solution is to dedicate one drawer—often a shallow “junk drawer”—as a central charging station.
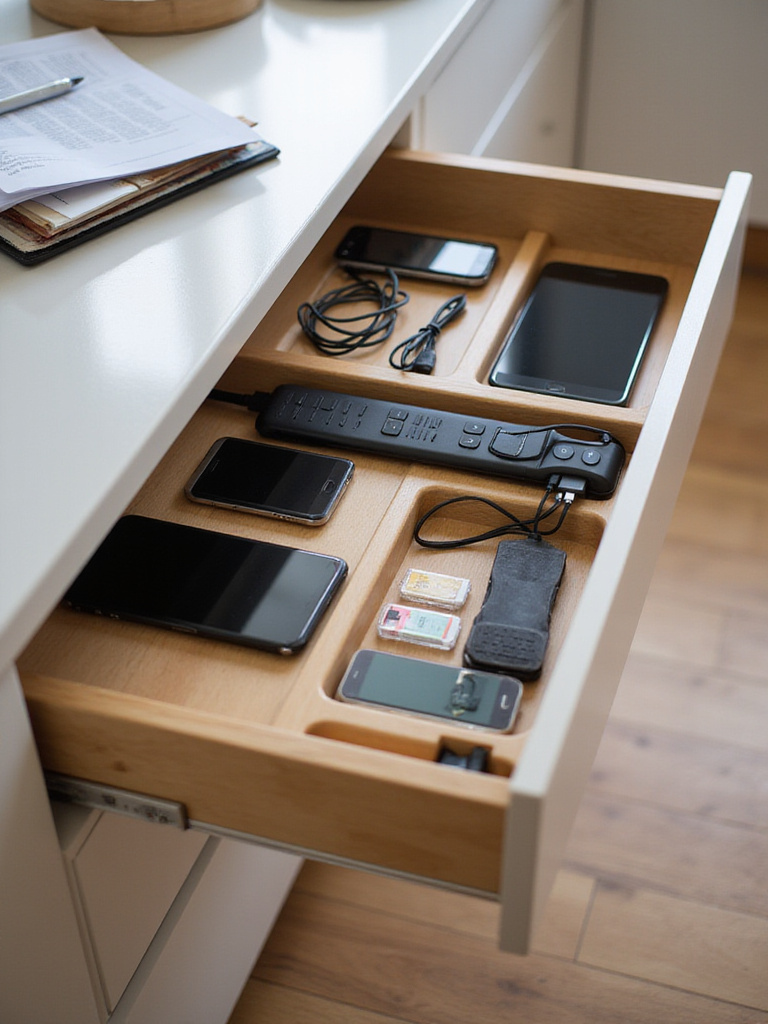
It’s an easy weekend project. Drill a small hole in the back of the drawer, thread a power strip cord through, and secure the strip inside. Use small dividers to create neat compartments for each device and its cable. Now, all your electronics can charge out of sight. It’s a perfect fusion of modern need and minimalist principle: technology is integrated, functional, but not visually intrusive.
Next, we can apply that “get it off the counter” philosophy to our most-used analog tools.
13. Integrate Hooks for Hanging Frequently Used Tools and Potholders
Your walls and the sides of your cabinets are valuable, underutilized real estate. Simple, elegant hooks or a sleek rail system can be used to hang frequently used items like a favorite spatula, a whisk, measuring cups, or potholders. This frees up drawer space and makes these tools instantly accessible.
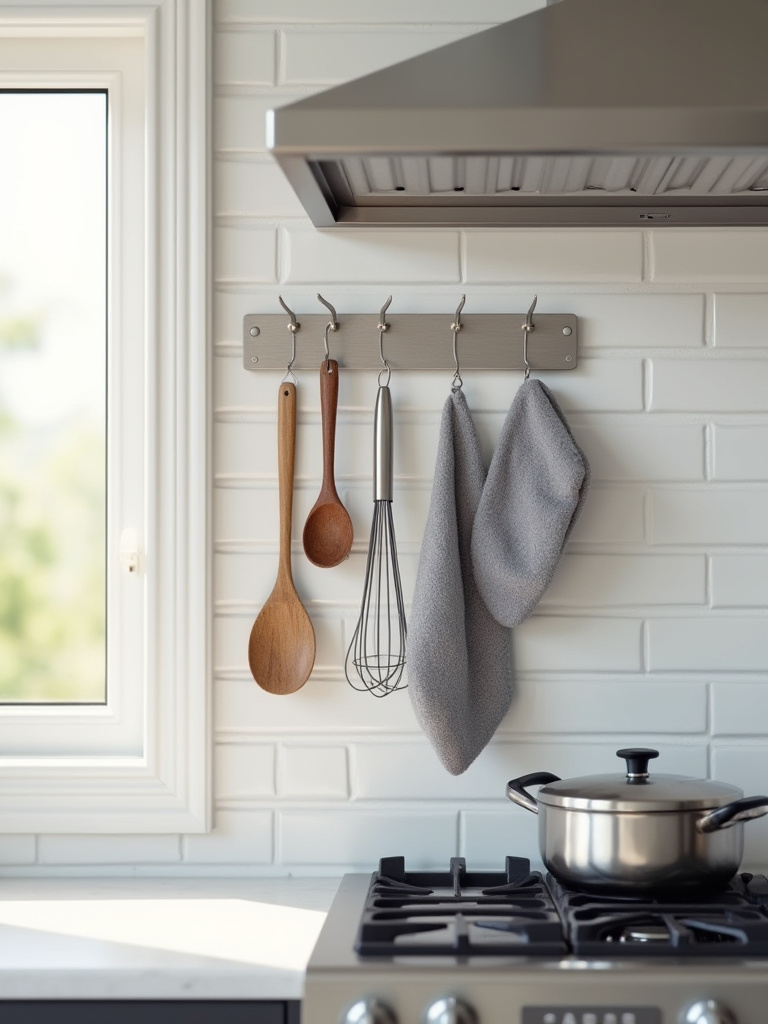
The key is to be intentional. This is not an excuse to hang everything you own. Display only the few items you use daily that are also beautiful to look at. A set of copper measuring cups or a well-made wooden spoon can act as functional art, adding warmth and personality to the space without creating clutter. It celebrates the beauty in utility.
Now for one of the most feared spaces in the kitchen: the cabinet under the sink. We can bring order there, too.
14. Optimize Under-Sink Space with Tiered Racks for Cleaning Supplies
The area under the sink is notoriously awkward, with its pipes and garbage disposal. It often becomes a jumbled mess of cleaning bottles. Tiered or pull-out organizers specifically designed for this space are a game-changer. They use the vertical height and navigate around the plumbing, making everything visible and reachable.
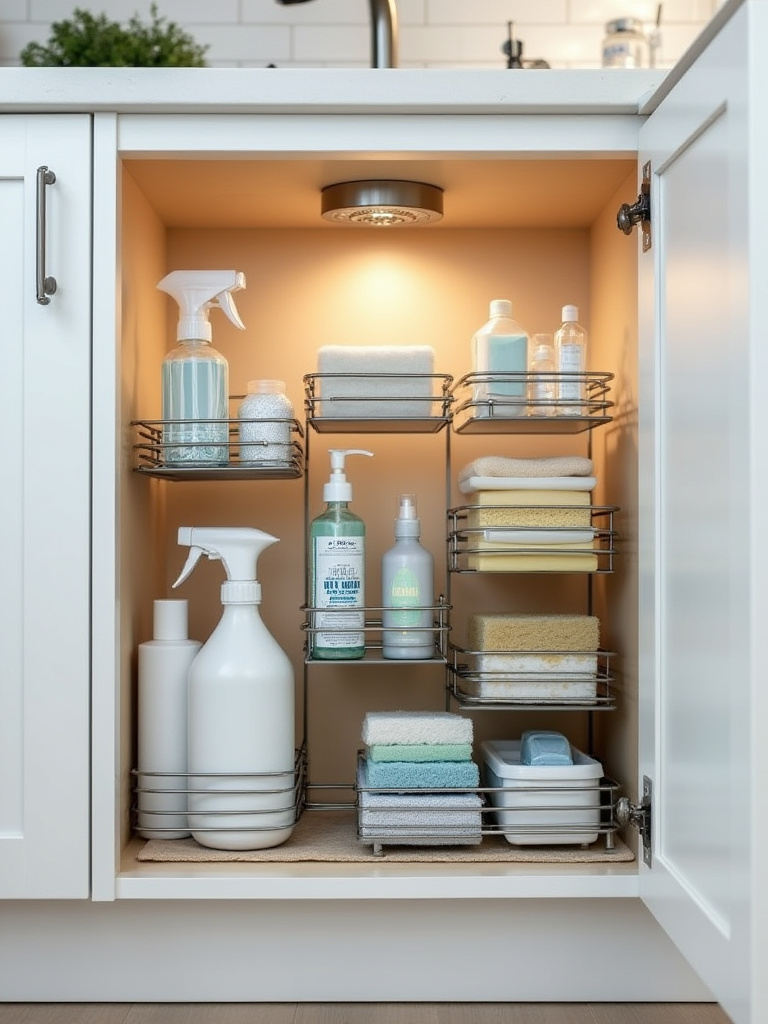
Organizing this space brings a surprising sense of accomplishment. It’s a hidden corner of your home that you’ve reclaimed and brought into a system of order. A simple, slide-out caddy for your most-used cleaning supplies also means you can grab everything you need for a quick cleanup in one go. It’s about making even the chores more efficient and less stressful.
Our system is nearly complete, but it requires one final layer to make it truly effortless.
15. Label Containers Clearly for Instant Identification of Contents
I know I mentioned this for the pantry, but it applies everywhere. Any opaque container, bin, or box, whether in a cabinet or the fridge, needs a label. It’s the final step that makes your system truly readable. A label is a piece of information that saves you mental energy. You don’t have to open three boxes to find the tea bags. You don’t have to guess if a container holds leftovers from Monday or Thursday.
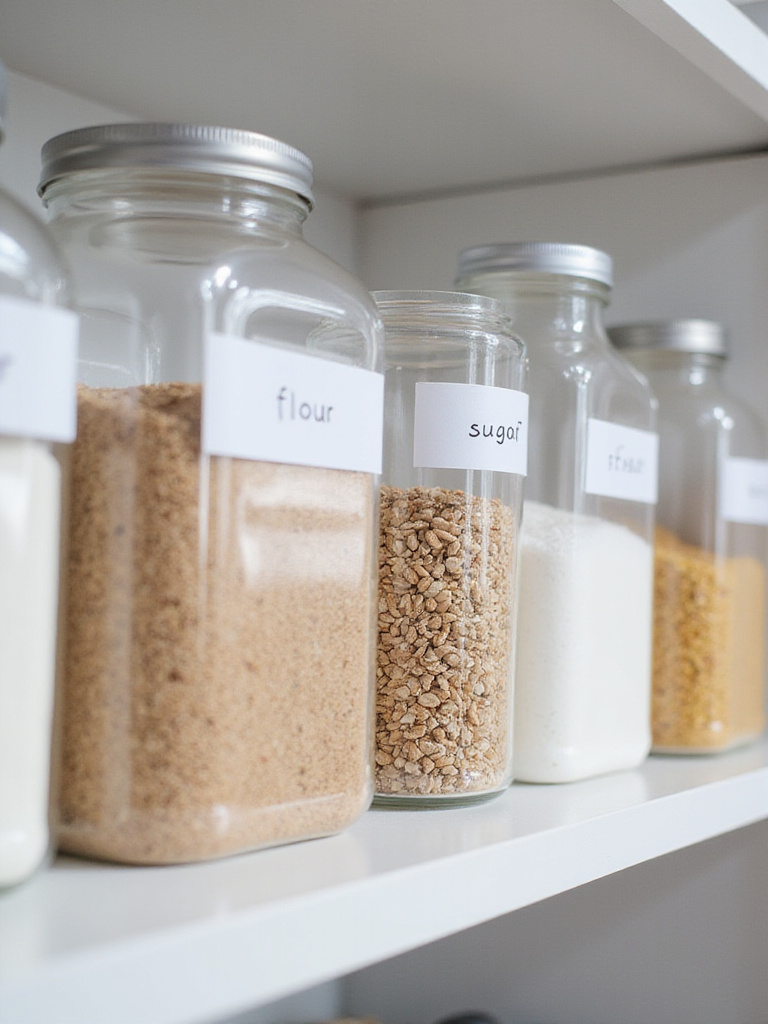
Use a simple, consistent style. A good label maker is a fantastic investment for creating clean, waterproof labels. This removes all ambiguity from your kitchen. It’s about clarity. A clear space with clear information leads to a clear mind. It’s the final detail that solidifies your kitchen as a space of effortless function.
Maximizing Space & Optimizing Workflow Efficiency (Part 2)
Our final focus shifts from organizing the inside of the kitchen to protecting its boundaries. A serene kitchen cannot exist if it’s the dumping ground for the entire house. This final principle is about creating a buffer between the chaos of the outside world and the calm of your culinary space.
16. Create a Dedicated “Drop Zone” for Mail and Keys Outside the Main Prep Area
The kitchen counter is not an inbox. It’s not a key hook. It’s not a purse shelf. When these items land on your counter, they signal that the kitchen’s purpose is secondary to being a catch-all. This is why a dedicated “drop zone” near your main entrance is one of the most powerful kitchen organizing ideas—even though it’s not technically in the kitchen.
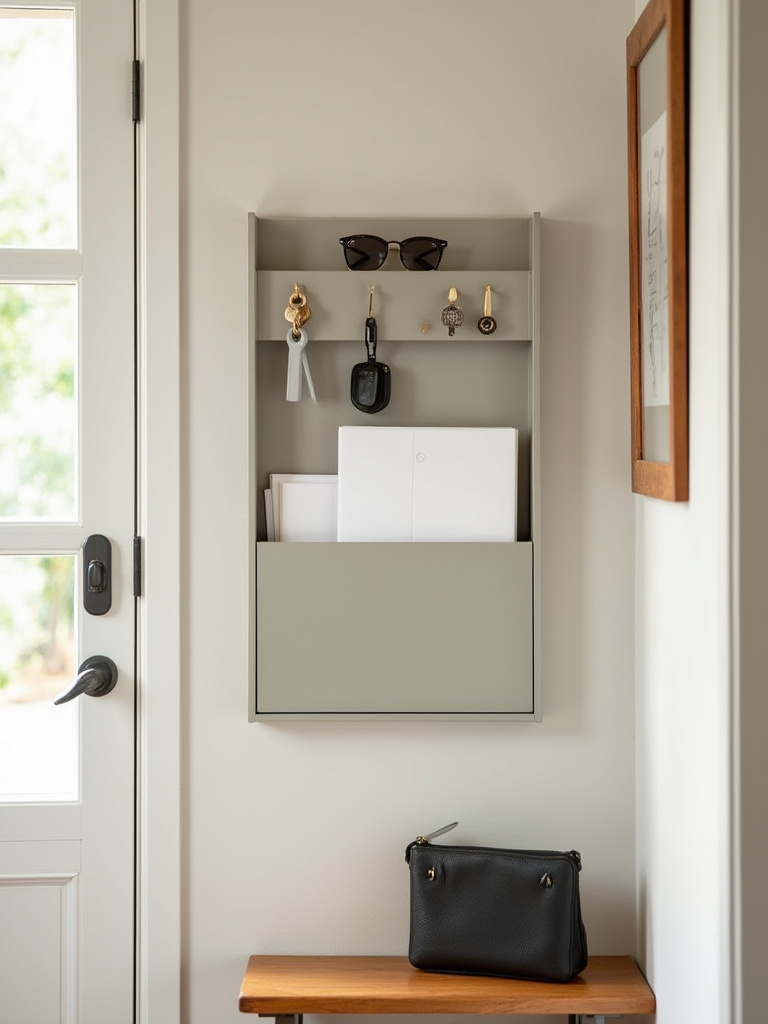
Set up a small console table, a wall-mounted organizer, or even just a designated bowl by the door. This becomes the official home for keys, wallets, mail, and sunglasses. You must be disciplined about this. Create the habit of depositing these items here the moment you walk in. By creating a specific home for incoming clutter, you protect your kitchen’s status as a dedicated, functional sanctuary.
Personalization, Continuous Maintenance & Smart Habits (Part 1)
An organized kitchen isn’t a static photo. It’s a living, breathing space that needs to be maintained. The final set of ideas isn’t about initial setup, but about the ongoing habits and personal touches that keep the system working and make the space truly feel like your own.
17. Color-Code Cutting Boards to Prevent Cross-Contamination
This is a simple habit borrowed from professional kitchens that has profound benefits for hygiene and workflow. Designate different colored cutting boards for different food types: red for raw meat, green for vegetables, blue for fish, white for bread and dairy. This simple visual system practically eliminates the risk of cross-contamination.
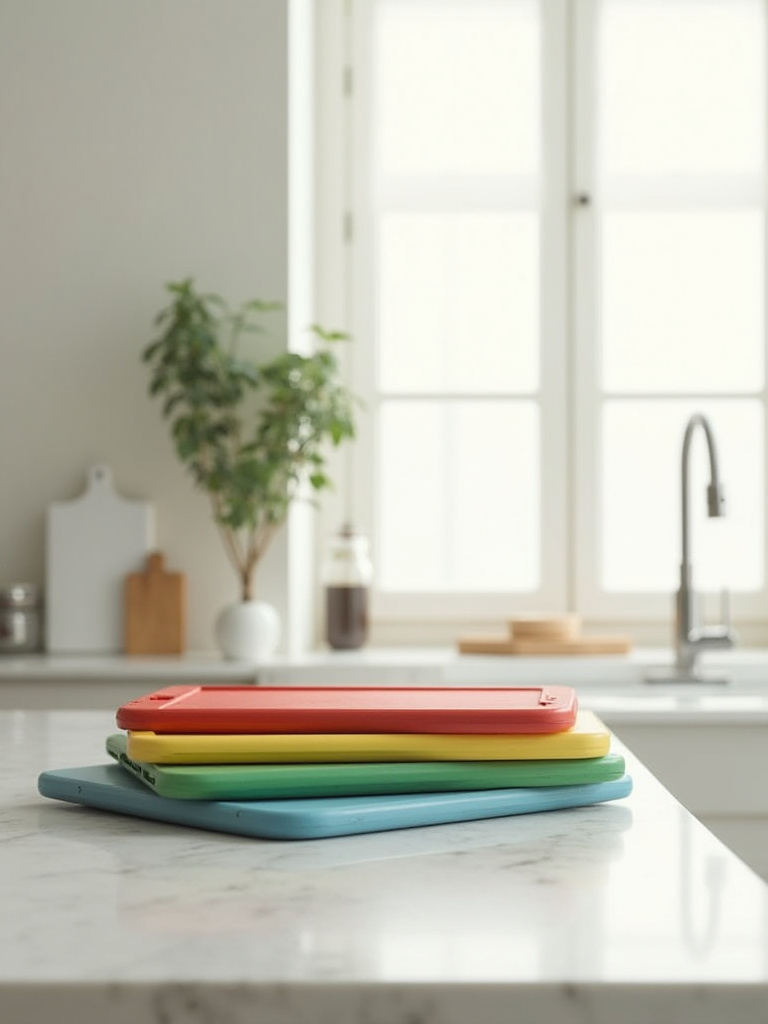
This isn’t just about safety; it’s about mindfulness. It forces a moment of consideration in your prep work. Storing them upright in a simple file holder keeps them separate and easy to grab. It’s a small, professional habit that elevates the quality and care you bring to your cooking.
Now, let’s blur the line between storage and decor. Let your personality shine through.
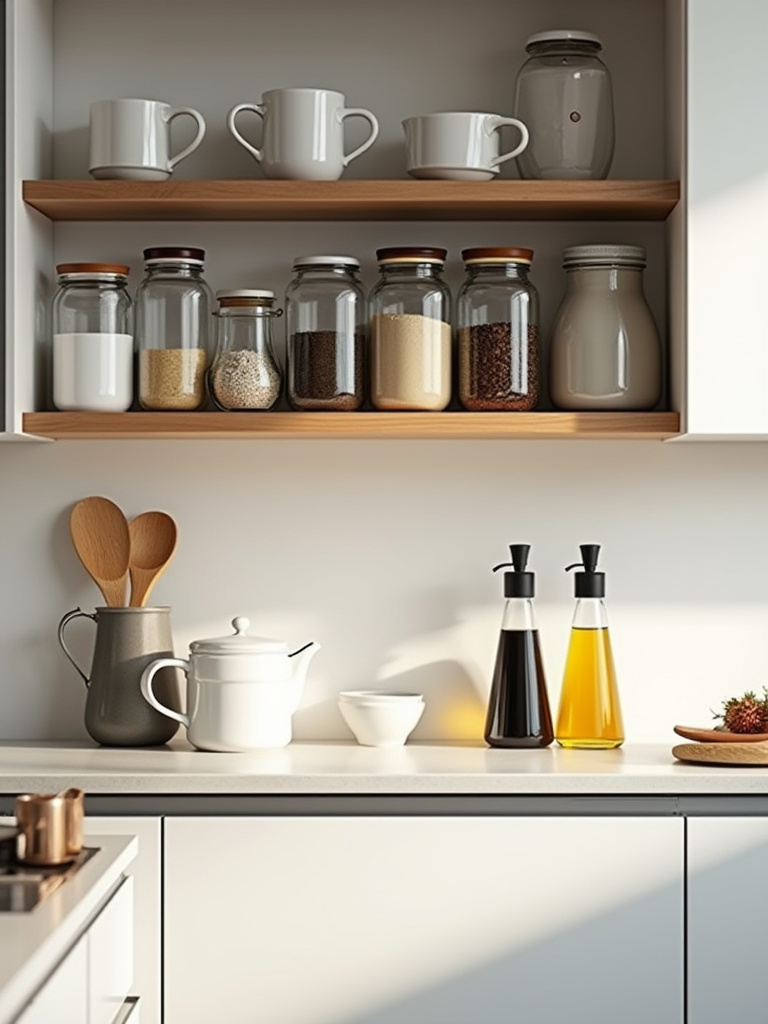
18. Display Decorative Yet Functional Items Like Cookbooks or Specialty Dishes
Minimalism doesn’t mean sterile. A truly beautiful space reflects the personality of the person who lives there. Embrace this by intentionally displaying items that are both functional and beautiful. A stack of your most-loved cookbooks, a beautiful ceramic pitcher holding your wooden spoons, or a collection of handmade mugs on an open shelf.

The key is curation. Don’t display everything. Choose a few pieces that bring you joy and that you use regularly. This turns everyday items into art and storage into decor. It makes the space feel personal and lived-in while still maintaining an organized, uncluttered aesthetic. It’s about finding the soul of the space.
To maintain this balance, you need a rule of engagement for new acquisitions.
19. Develop a “One In, One Out” Policy for New Kitchen Gadgets
This is the golden rule for preventing clutter creep. For every new kitchen gadget you bring into your home, one must leave. Your space is finite. This policy forces you to be an intentional consumer rather than an impulsive one. Before you buy that new air fryer, you must decide what it’s replacing. Does it truly offer more value than the thing you’re letting go of?
This simple rule is incredibly powerful. It keeps your inventory lean and ensures that everything in your kitchen has earned its place. It turns the act of shopping into a mindful curation of your space, preserving the balance you’ve worked so hard to create.
Finally, organization requires a ritual of maintenance. It is a garden that must be tended.
20. Schedule Quarterly Maintenance Checks for Continued Order and Refreshment
An organized kitchen won’t stay that way on its own. Life happens. Things get messy. That’s okay. To combat this, schedule a two-hour maintenance session on your calendar once every quarter. Assign a focus for each quarter: Q1 is the pantry, Q2 is the fridge and freezer, Q3 is drawers and cabinets, Q4 is under the sink and appliances.
Treat this like any other important appointment. During this time, you do a quick purge, wipe everything down, and reset your system. This proactive approach prevents small messes from turning into overwhelming chaos. It’s a simple, sustainable habit that ensures your kitchen remains a functional and serene space year-round.
Personalization, Continuous Maintenance & Smart Habits (Part 2)
We arrive at the final, most essential principle. It is the wisdom that sits atop all the other strategies. The kitchen is not a museum. It’s the most dynamic room in your home. Your life will change, and for your systems to survive, they must be able to change with you.
21. Adapt Your System to Evolving Kitchen Needs and Lifestyle Changes
The organizational system you create today may not serve you perfectly in two years. And that is the entire point. True organization is not a rigid, fixed state; it is a flexible, responsive practice. When you start a new diet, have a baby, or discover a passion for baking, your kitchen’s needs will change. Your system must be fluid enough to adapt.
Don’t be afraid to completely re-zone a cabinet or re-purpose a drawer. A successful system isn’t one that never changes; it’s one that is easy to change. Use adjustable dividers and modular containers that can be reconfigured. Every six months, take a fresh look at your kitchen and ask, “Is this still working for me?” This continuous dialogue with your space is the true secret to lasting order. It ensures your kitchen is always supporting the life you are living right now.
Conclusion
We’ve covered a lot, but don’t feel overwhelmed. You don’t have to do it all at once. This isn’t a checklist to be completed; it’s a philosophy to be adopted. Start with the first principle: ruthless decluttering. The feeling of lightness that comes from that single act will give you the energy for the next step.
An organized kitchen does more than save you time; it gives you back mental space. It turns a place of potential stress into a sanctuary of creativity and nourishment. By bringing intention and mindfulness to this space, you are investing in your own well-being. This is your space. Make it serve you. Make it calm. Make it flow.


