There’s a particular frustration that comes from walking into a bathroom every single morning and noticing the same dated grout, the same builder-grade fixtures, the same beige walls doing absolutely nothing for anyone. You know the room needs work. The budget disagrees. Most renovation content draws a clean line between “full gut renovation” and “give up and buy a nice candle” — and ignores the entire middle ground where most of us actually live.
As someone who’s spent years designing spaces on constrained budgets — turning scrappy studio flats and cluttered spare rooms into places people genuinely want to spend time in — I’ve come to believe that a limited budget isn’t a limitation. It’s a brief. Constraints are where creativity starts. And bathrooms, of all rooms, are incredibly responsive to targeted, specific intervention. You don’t need to replace everything. You need to change the right things. A good budget bathroom remodel isn’t about doing everything at once; it’s about doing the right things in the right order.
Here are 18 ideas that shift how the room looks and feels — most of which you can execute in a weekend, several of which cost less than a takeaway dinner.
1. Peel-and-Stick Tile Over Existing Flooring for an Instant Floor Flip
The floor is one of the first things you notice in a bathroom and one of the most daunting to change — until you discover that you don’t have to replace the tile underneath at all.
Modern peel-and-stick floor tiles have improved dramatically. Products from brands like FloorPops, Stickwoll, and Yipscazo now use SPC (Stone Plastic Composite) or PVC-composite construction that’s 100% waterproof, moisture-resistant at the adhesive layer, and capable of lasting 5-10 years on a properly prepped surface. That last part matters: the surface must be clean, dry, and level. Any ridge or bump telegraphs through. Any grease or wax residue defeats the adhesive within months.
Materials cost $1.50-$4.00 per square foot, so a 50 sq ft budget bathroom remodel floor runs $75-$200 in materials. No wet saw, no mortar, no grout lines to deal with. A utility knife and a metal ruler handle all the cutting around toilet bases and vanity feet. Hex mosaic patterns hide seams better than large-format tiles. Matte finishes show fewer water spots and footprints than gloss in humid environments.
One honest note: look specifically for “waterproof” certification, not “water-resistant.” That distinction isn’t marketing — it’s the difference between a product designed for splash zones and one that fails within a year of steam exposure.
2. Fresh Paint: The Budget Bathroom Remodel Move That Changes Everything
Minor cosmetic paint updates return $1.71 for every $1 spent in home value terms — and in lived experience, the return is even higher. Paint changes a room’s emotional register. It’s the difference between a space you tolerate and one you look forward to.
For a bathroom specifically, the paint choice matters more than people realise. Standard wall paint applied to a humid room will peel and mildew within 12-18 months. You want bathroom-grade formulas: Benjamin Moore Aura Bath & Spa (matte, mildew-resistant), Sherwin-Williams Duration, or Valspar Signature — all include moisture-blocking additives that hold up in steam. Satin finish is the all-rounder: enough sheen to resist moisture and wipe clean, not so much that it turns the room into a reflective surface.
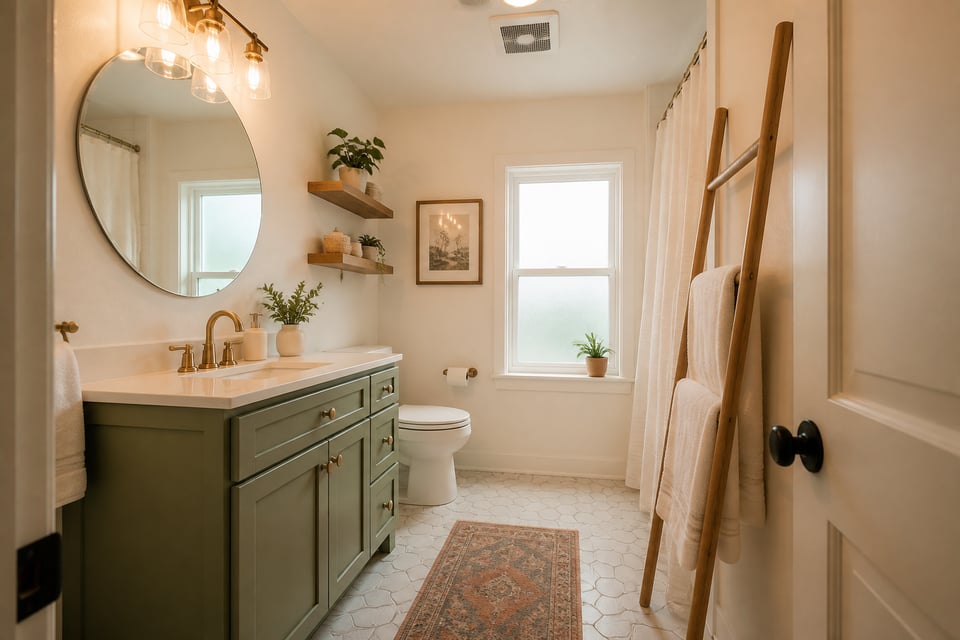
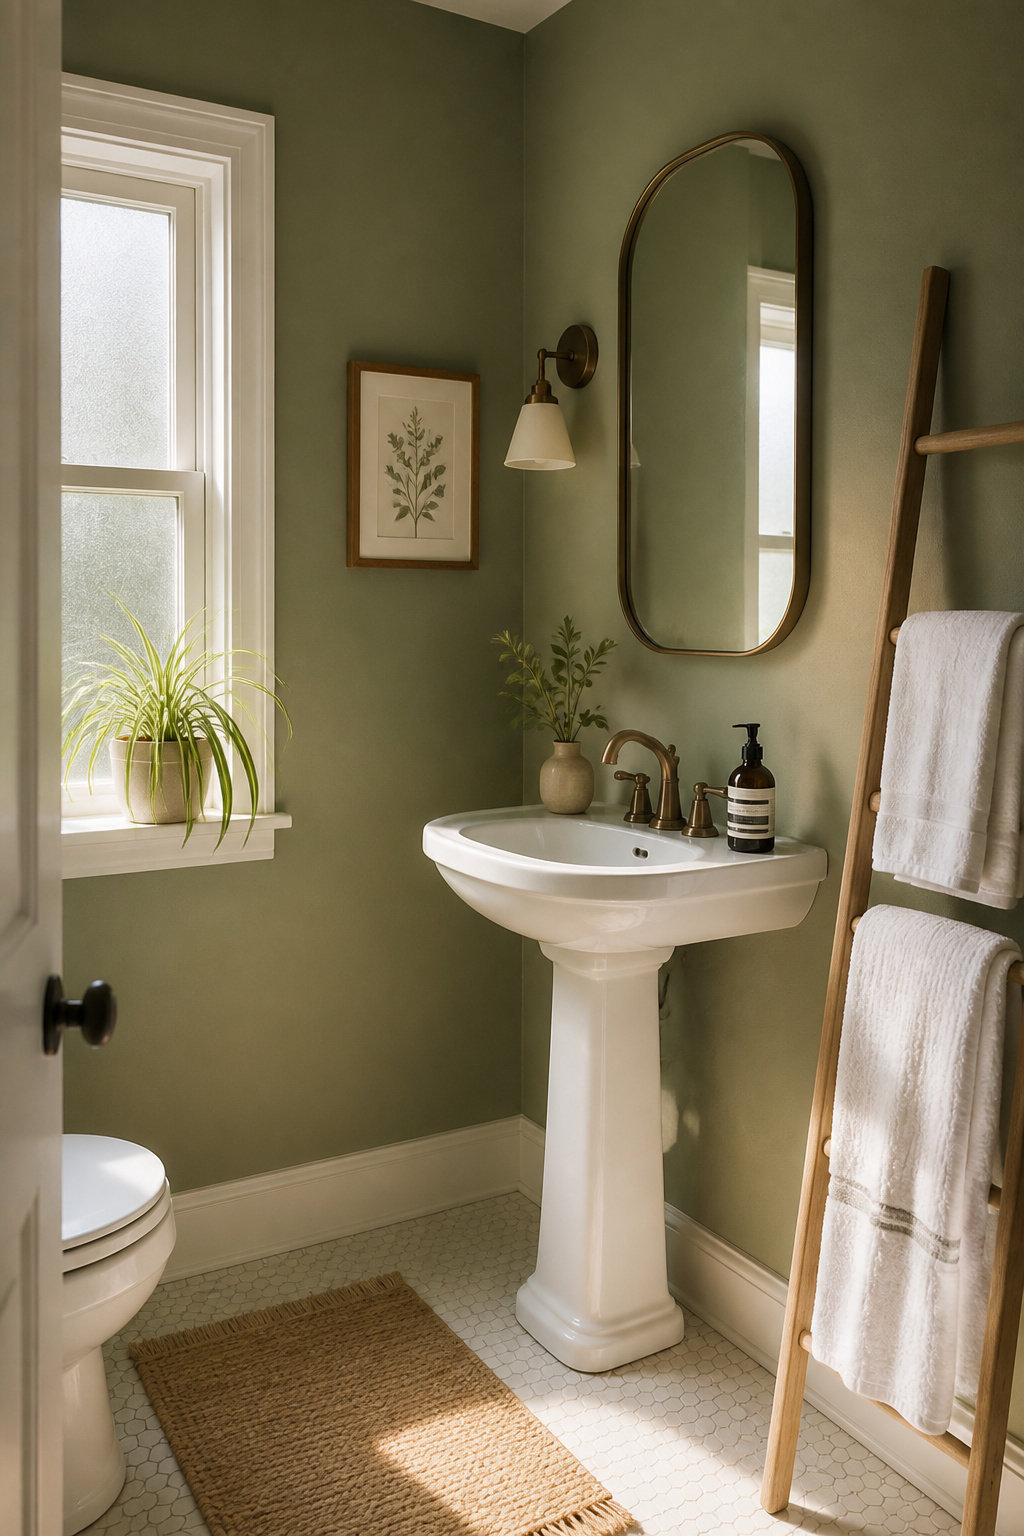
For modern bathroom colors in a small space, the conventional “paint it white” advice is only one option. Soft sage, muted slate blue, and dusty terracotta all make small bathrooms feel considered rather than squeezed. Dark colours — deep navy, forest green — can work brilliantly in a small bathroom when you lean into them fully and pair them with warm lighting. Half-hearted dark paint looks like a mistake. Committed dark paint looks like a boutique hotel.
One technique worth knowing: painting the ceiling the same colour as the walls removes the visual ‘lid’ effect and makes the room feel significantly taller. It costs nothing extra.
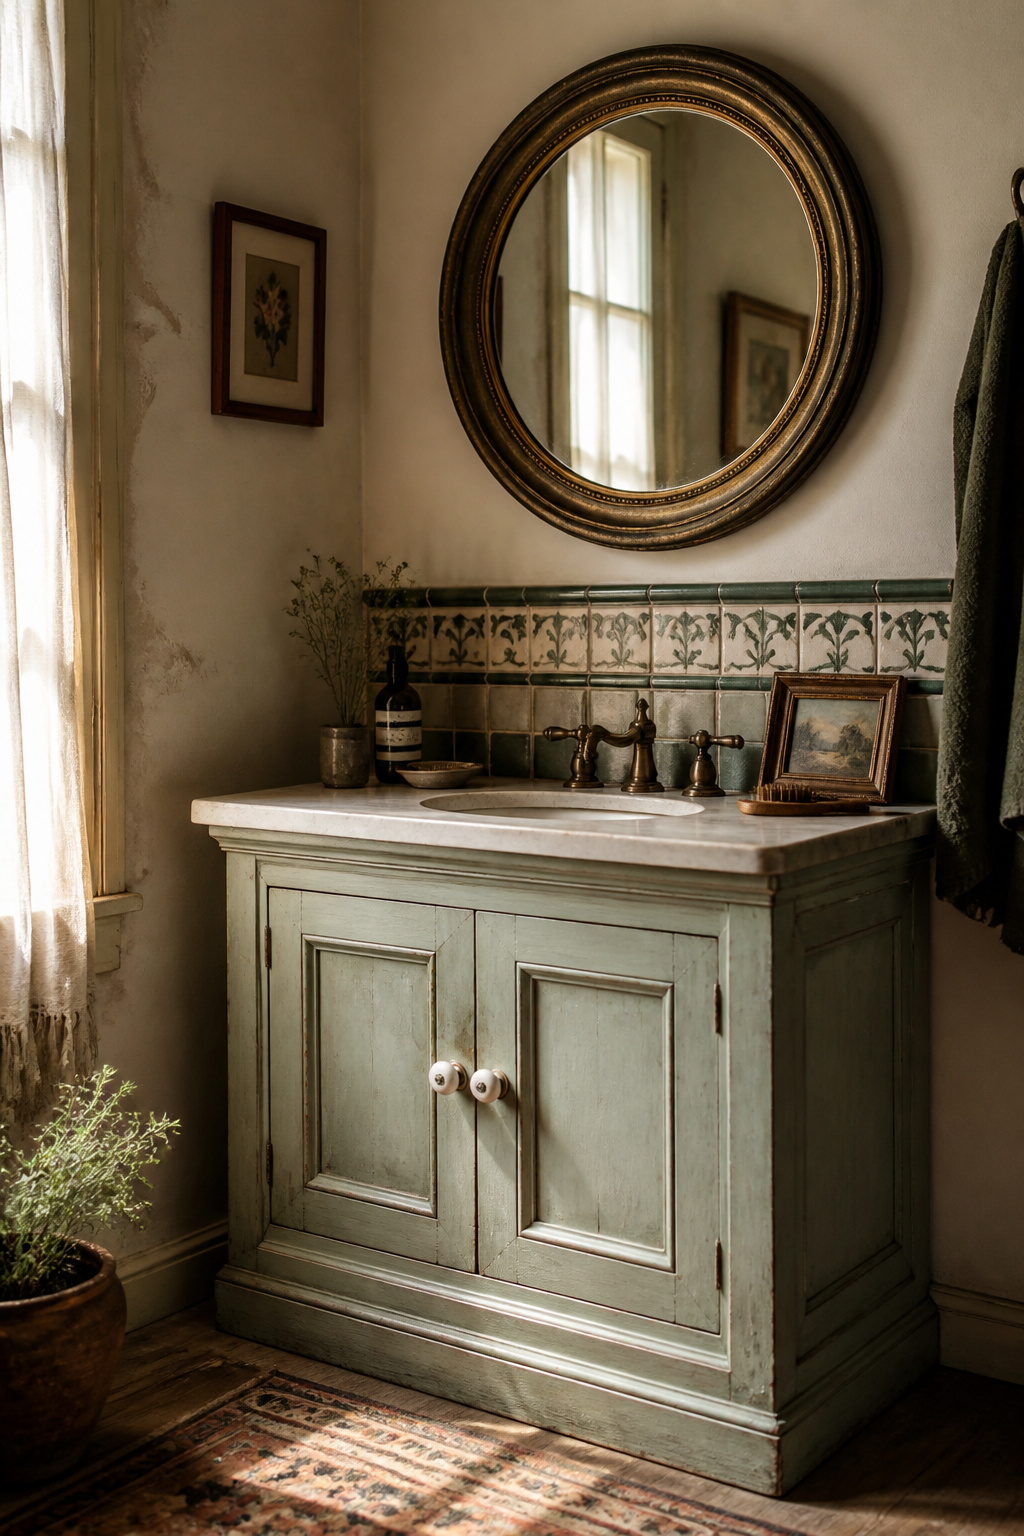
3. Swap Your Builder-Grade Mirror for an Arch or Round Frame
Walk into almost any bathroom built in the last 20 years and you’ll find the same large rectangular mirror, sized to fill the wall space rather than to suit the vanity below it. It’s a missed opportunity — and also a very easy fix.
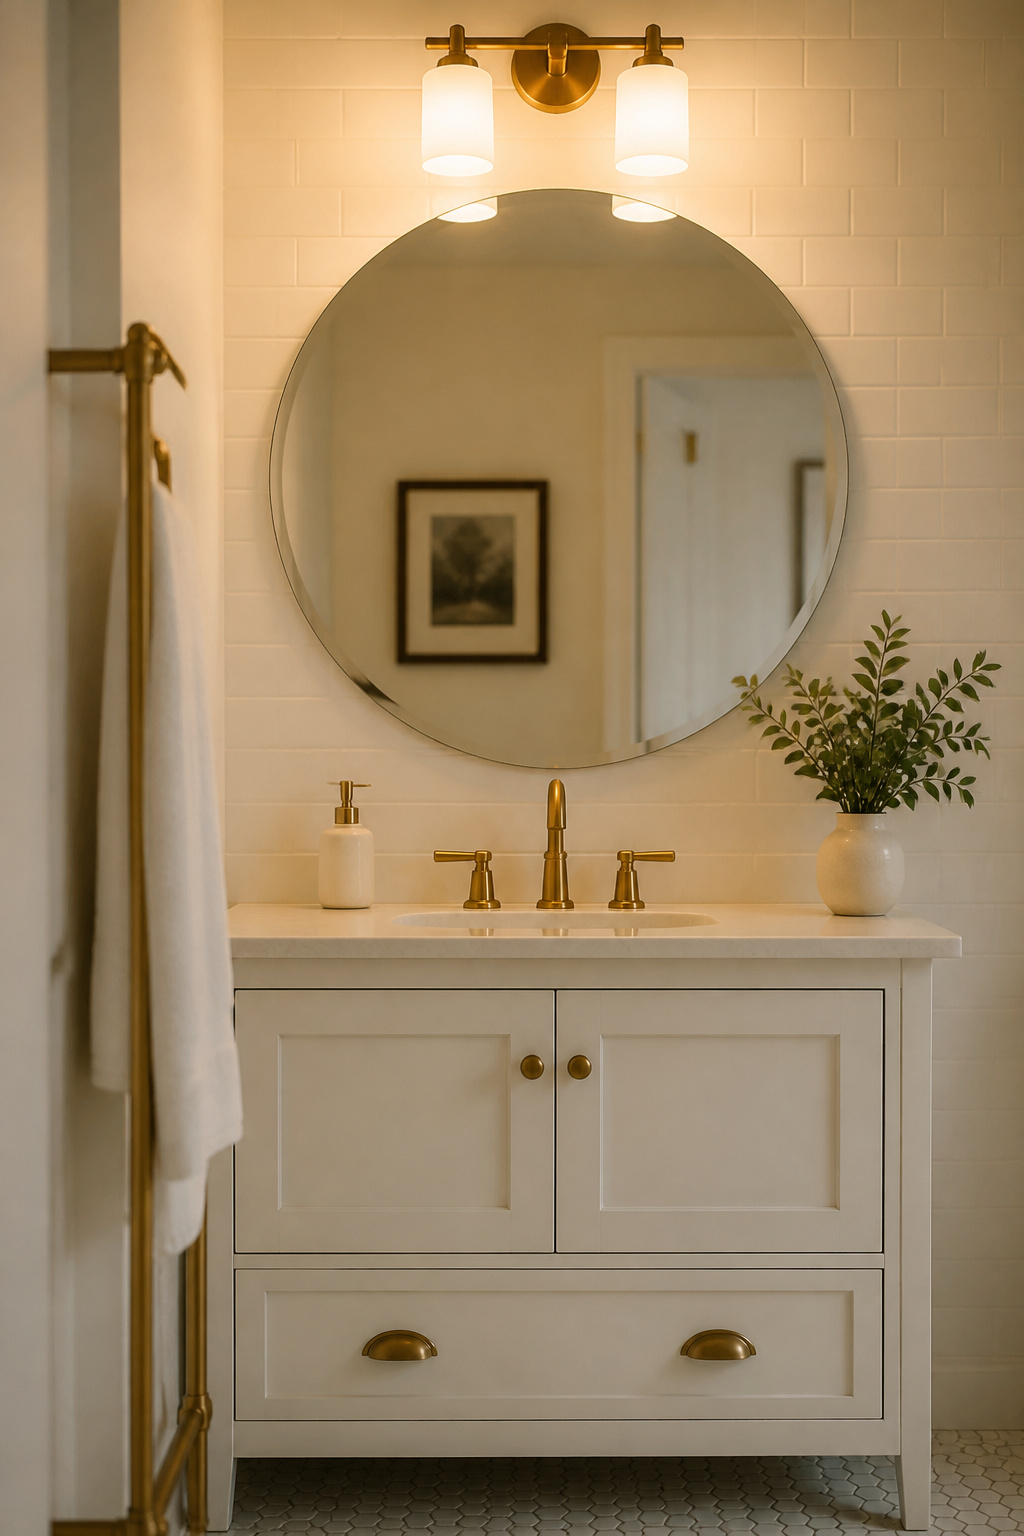
Mirror shape does something disproportionate to room character. A round mirror softens the hard lines of tile-heavy bathrooms; an arch mirror brings boutique-hotel quality that reads above the price point. Both are widely available frameless from Home Depot and Lowe’s from $20-$30, and from Wayfair and Amazon in shaped formats from $35-$80.
The sizing rule people most often get wrong: the mirror should be 4-8 inches narrower than the vanity cabinet, not the same width or wider. When a mirror runs edge-to-edge with the vanity, it looks like a specification. The gap on each side creates the intentional framing that makes the space feel designed. In this budget bathroom remodel category — the pure aesthetic swap — the mirror is the best value change per visual impact. Hang the bottom of the mirror 5-10 inches above the backsplash: low enough to reflect faces, high enough to avoid splash contact.
This is also the upgrade with the lowest risk on the list. No plumbing. No electrical. No specialist skills. If you don’t love it, you return it within the retailer’s window and try something else.
4. Replace Cabinet Hardware for a Designer Look at Hardware-Store Cost
Pulls and knobs are the jewellery of a vanity. The ones that come with builder-grade cabinets are chosen for cost, not character, and they read that way — a budget bathroom remodel detail that most people overlook entirely.
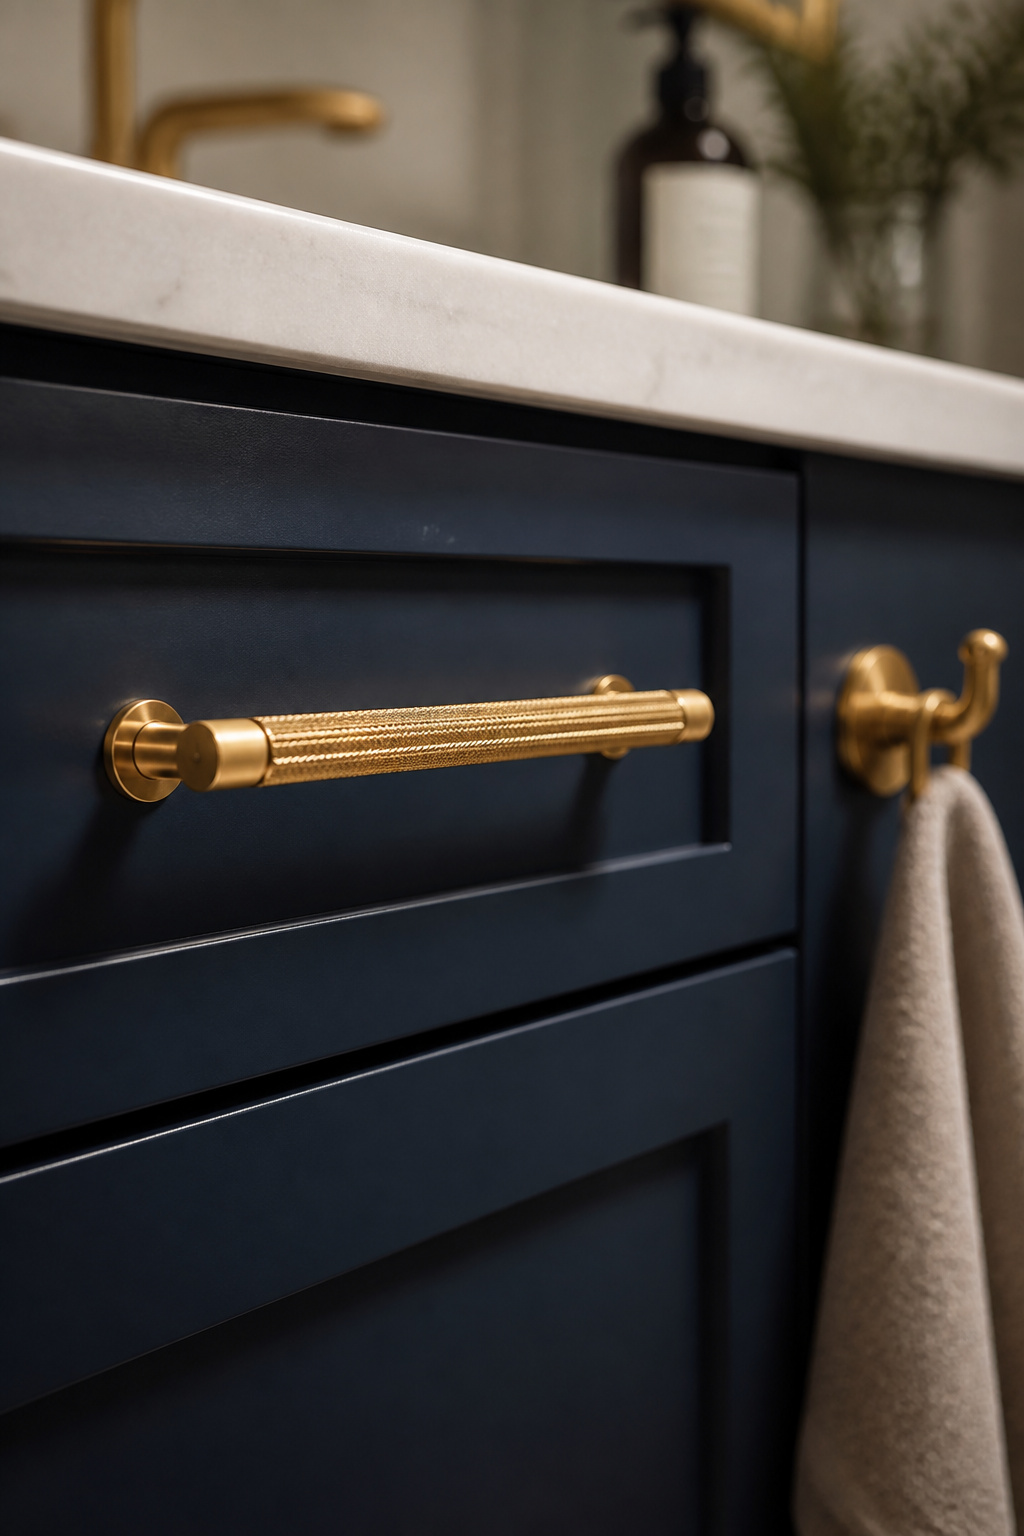
Swapping them takes 20 minutes per piece with a screwdriver. A full hardware refresh — new pulls, a towel bar, toilet paper holder, and a couple of hooks from a matching collection — runs $30-$80 as a set from Amazon or Home Depot’s budget ranges. The effect comes from matching all finishes across the room: coordinating the vanity hardware finish with the light fixture is the specific move most people don’t make. Those two elements are always seen together, always at eye level, and they create the strongest visual anchor in the room. Mismatched finishes read as accidental. Matched finishes read as edited.
Matte black is cooling off as the dominant trend for 2026. Champagne bronze, polished nickel, and unlacquered aged brass are taking its place — warm metallics that photograph well and work across a wide range of wall colours. The rule for mixing metals: one dominant finish at 70% of fixtures, one accent at 30%. Never three competing finishes.
Before ordering, measure the existing hole spacing on your current pulls — standard is 3 inches centre-to-centre, but some older vanities use 3.5 inches.
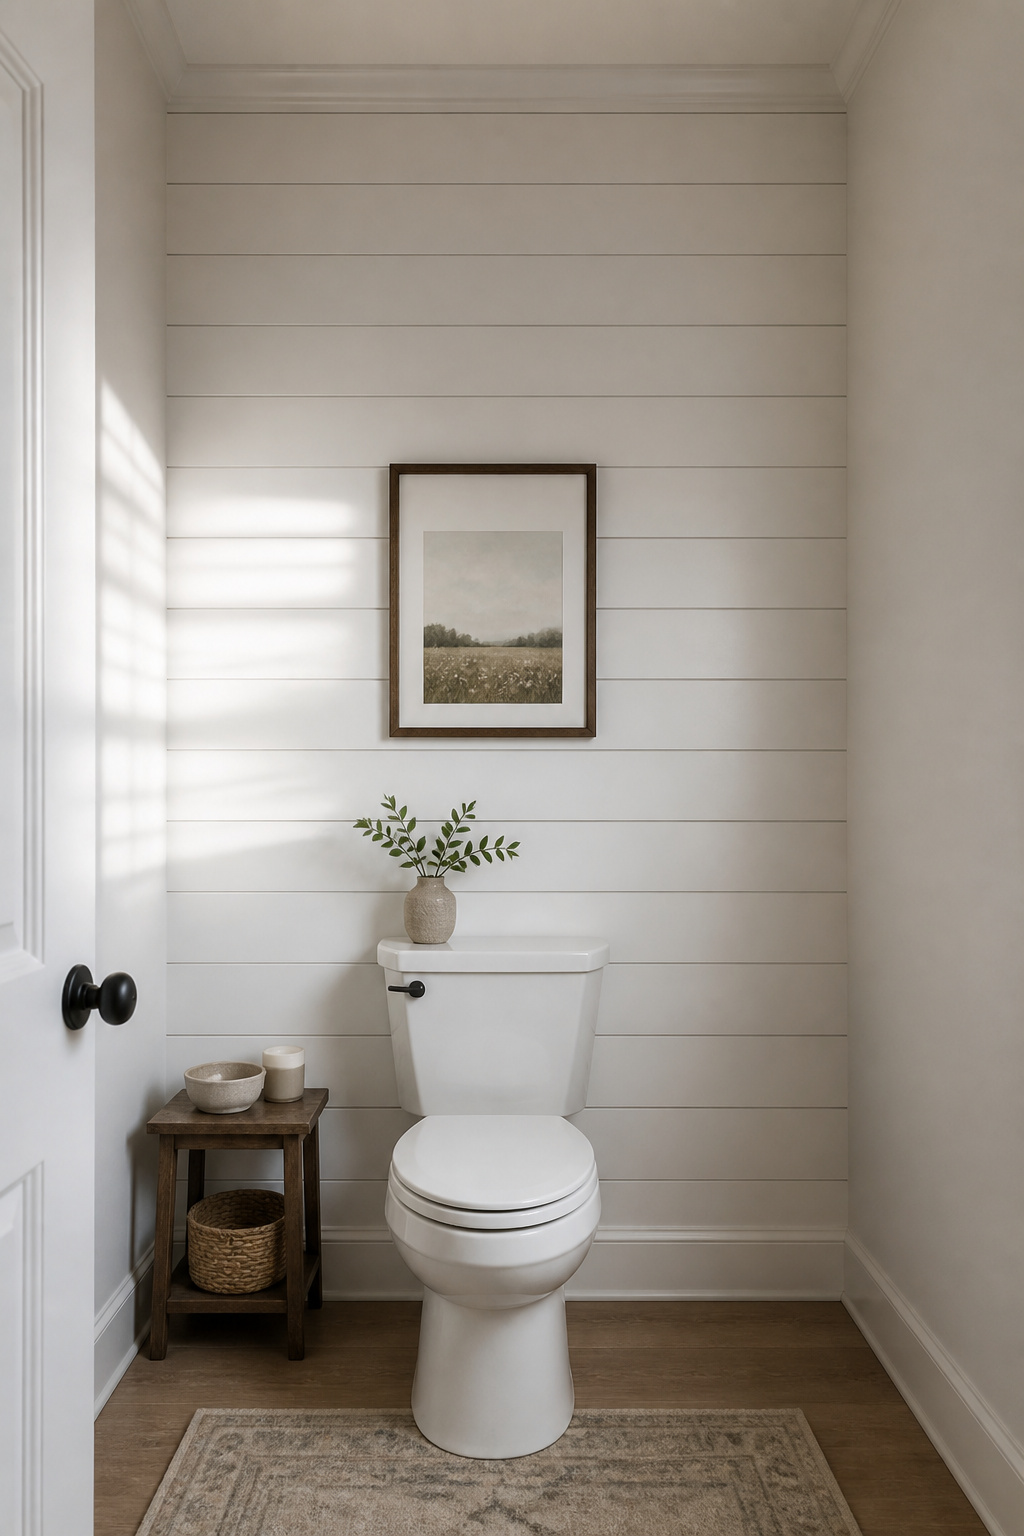
5. DIY Shiplap Accent Wall as Your Budget Bathroom Remodel Statement Piece
A single shiplap accent wall — behind the toilet, behind the vanity, or on the wall facing the door — delivers more visual character than painting all four walls a different colour. It adds texture, dimension, and a sense of intentional material choice to a room that typically has none.
Material selection here is critical, and this is where many DIY projects fail. Standard MDF shiplap is the cheapest option and absolutely the wrong one for a humid environment — it absorbs moisture, swells, and warps within months. PVC shiplap is the correct choice: fully waterproof, dimensionally stable in steam. Cedar is the premium natural option with inherent moisture resistance. For those exploring farmhouse bathroom remodel ideas that lean rustic and warm, cedar painted white or left natural reads beautifully against a classic vanity.
For a 40 sq ft accent wall, PVC shiplap materials run $100-$280. Install into studs — use a stud finder and mark positions before starting, using corrosion-resistant nails. Acclimate panels in the room for 48-72 hours first; temperature and humidity cause enough dimensional movement that skipping this step can leave visible gaps within weeks.
The prep step most people forget: paint the wall behind the panels before installing them. Getting a brush into the gaps after the panels are fixed is technically possible and genuinely miserable. Two coats of mildew-resistant satin paint complete the surface. Run the exhaust fan during and after every shower — ventilation is the biggest longevity factor for any wall treatment in a bathroom.
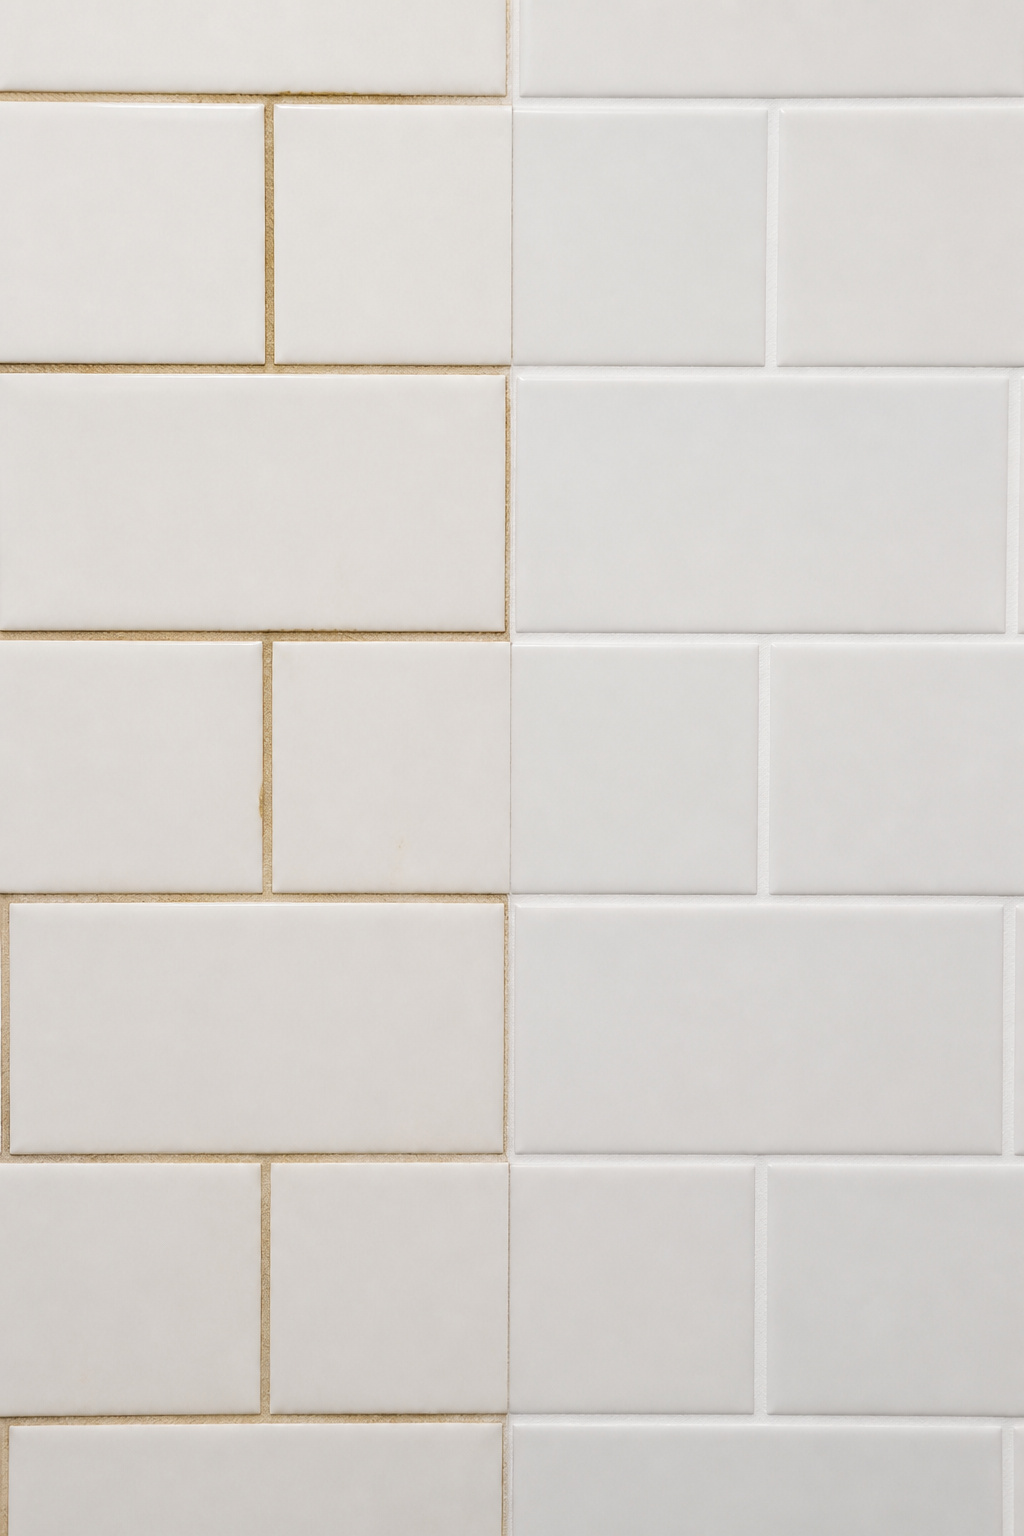
6. Regrout Your Tiles Instead of Replacing Them
If the tiles themselves are in reasonable shape but the grout is stained, cracked, or mildewed, you don’t need to retile. Regrouting delivers 80% of the visual impact of a full retile at about 10% of the cost — one of the most cost-effective budget bathroom remodel moves available.
Professional regrouting costs $700-$1,500 for a bathroom. DIY materials run $100-$200. The gap exists because the labour is tedious, not because it’s technically difficult. An oscillating multi-tool with a grout blade (available to rent for $30-$80 for a day) removes old grout to the right depth. The key is removing to 3mm — deep enough to key the new grout, shallow enough not to risk cracking tile.
Standard cement grout costs $5-$7 per square foot. Epoxy grout costs $8-$12 but doesn’t require sealing, resists staining permanently, and is effectively maintenance-free long-term. For a bathroom floor or shower surround, epoxy is the better investment despite the higher upfront cost. For walls above the splash zone, sealed cement grout works well. The colour change is where the transformation happens: switching from stained beige grout to bright white gives the impression of completely new tile. Charcoal grout with white tiles creates a graphic, contemporary look that’s one of the cleanest design moves in any budget toolkit.
7. Open Shelving in Place of a Bulky Medicine Cabinet
A recessed medicine cabinet makes efficient use of wall space but tends to close a bathroom in visually. Replacing one with floating shelves opens the wall plane, adds display depth, and creates an opportunity to curate rather than just store.

Surface-mounted floating shelves cost $15-$60 each. Two or three staggered at different heights feel more intentional than a single horizontal line. Sealed pine, oak, or bamboo work in bathrooms when properly finished. Powder-coated steel brackets resist moisture better than uncoated iron. Keep any shelf at least 12-18 inches from direct splash zones — the wall above the toilet, beside the vanity, or opposite the shower are all good placements.
For bathroom shelf decor ideas that stay curated rather than becoming storage overflow: the rule of three. One tall element (a plant or tall candle), one medium container (a cotton ball jar, a ceramic soap dispenser), one small accent (a folded washcloth, a smooth stone). Decant everyday products into matching dispensers — a $12 pump bottle set transforms the shelf’s appearance. Keep half the shelf empty. Negative space is what separates a styled shelf from a cluttered one.
8. A New Faucet and Fixtures for an Affordable Bathroom Remodel Feel
The faucet is touched every day and sits at eye level. It signals the room’s quality more directly than almost anything else — and the gap between a $90 entry-level faucet from Delta or Moen and a $300 designer piece is much smaller than the price difference implies.
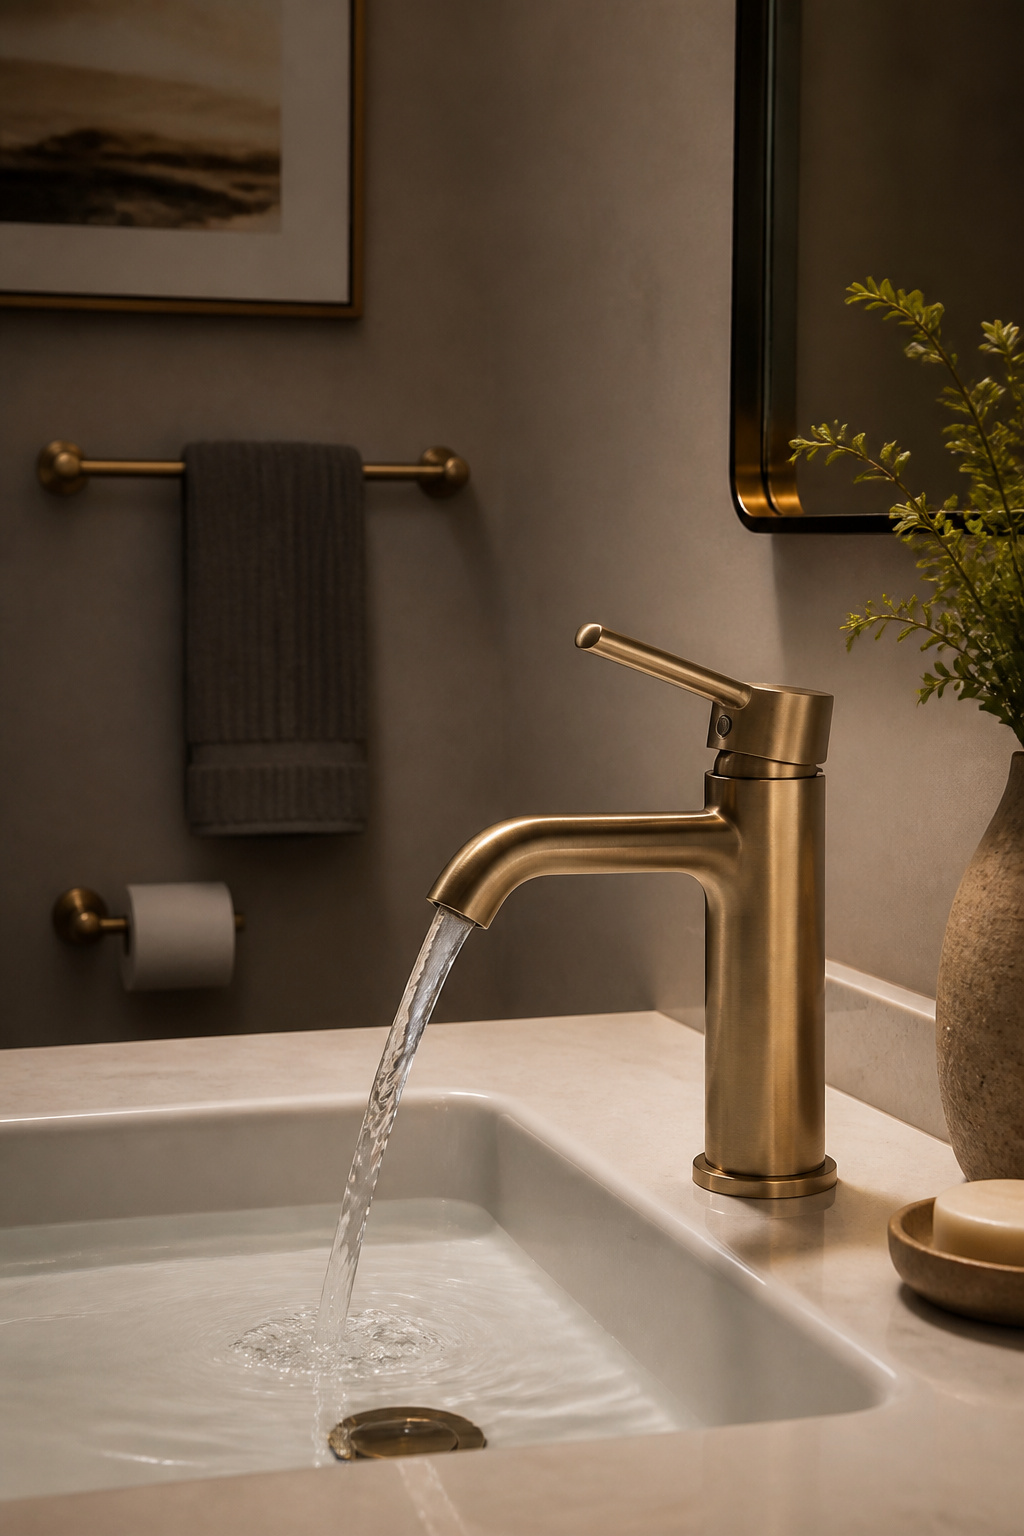
Delta’s entry-level single-hole faucets start under $100 and carry lifetime warranties. Moen’s equivalent range includes Spot Resist finish technology — which keeps the faucet looking clean longer between wipes. Both brands install the same way, and the total job time for a first-timer is 45-90 minutes with an adjustable wrench and a basin wrench (the basin wrench is the tool for reaching the mounting nuts under the sink — $12-$25 at any hardware store).
The design move most people skip: match the faucet finish to the light fixture. Those two elements are always seen in the same sightline and together they create the visual coherence that makes a room feel edited rather than assembled. This isn’t about spending more — it’s about choosing deliberately within your budget. The 2026 finish direction is worth noting: champagne bronze, brushed nickel, and polished nickel are moving forward; matte black is stepping back. A warm-toned faucet works with warm wall colours and aged wood elements. If you’re unsure, brushed nickel is the most versatile bridge finish available.
9. Paint Your Vanity Cabinet Instead of Replacing It
A standard bathroom vanity replacement costs $300-$800 installed. A painted cabinet makeover costs $30-$80 in materials. Done correctly, the result is indistinguishable from new — and this is where the resource-minded maker instinct pays off most directly.

The product choice matters. Rust-Oleum Cabinet Transformations ($80-$100 kit) offers a no-sand approach — a deglosser replaces the sanding step, and one-year real-world reviews confirm no chipping or fading with proper prep. Benjamin Moore Advance ($70-$90/gallon) requires light sanding with 120-grit and a bonding primer but cures to a harder, more scratch-resistant finish over 3-6 months. Both are valid; Rust-Oleum is faster, Benjamin Moore is more durable long-term.
The critical step that determines whether either product succeeds or fails: deep cleaning. TSP substitute scrubbed across every surface removes the soap scum, oil, and residue that bathroom environments accumulate. Paint applied over any contaminated surface will lift within weeks regardless of brand. Remove the doors before painting — attempting to paint cabinet doors in place always produces drips and inadequate edge coverage. Deep navy and hunter green are the most popular vanity paint colours because they create a jewel-box effect and hide the awkward proportions of older vanity profiles. White and soft sage are the safest choices when the countertop is staying.
10. Add Beadboard or Wainscoting for Instant Architectural Character
Wall panelling adds the architectural language of older, characterful homes to any plain bathroom. It’s a budget bathroom remodel move that references Victorian and Arts & Crafts building traditions and signals the kind of ‘built over time’ quality that new construction can’t replicate by any other means.
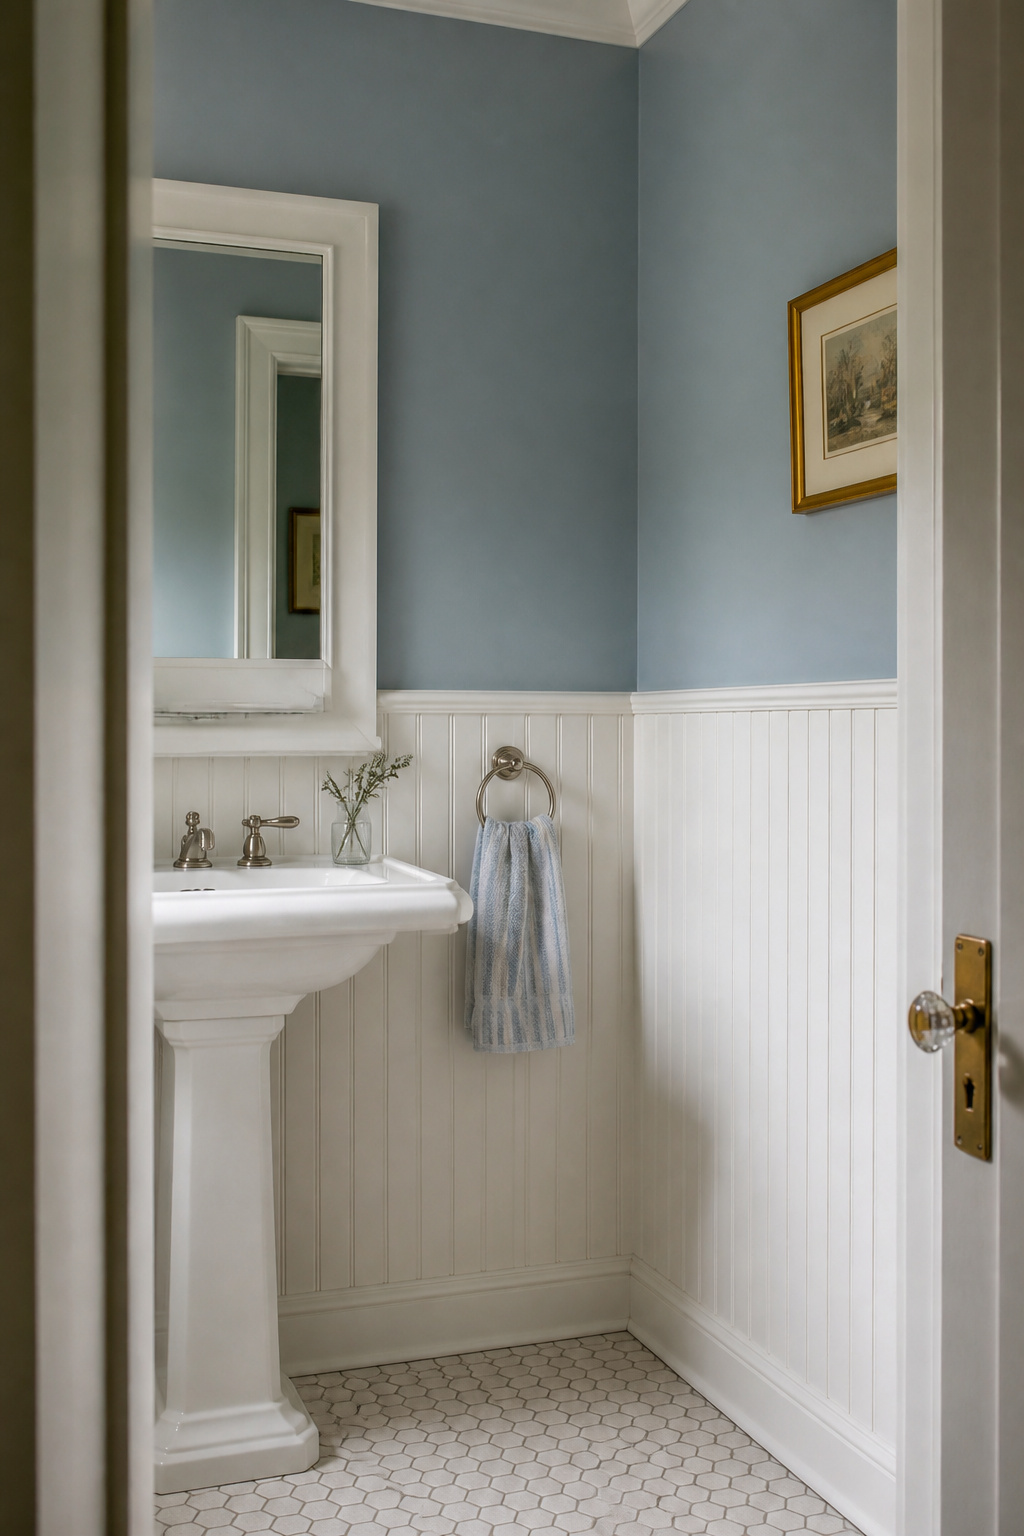
Installed at the standard height — one-third of ceiling height, so 32 inches for an 8-foot ceiling — beadboard panels protect the most moisture-vulnerable zone of the wall while adding texture to an otherwise flat surface. The finishing detail that separates professional results from DIY is the chair rail moulding at the top. Without it, the panelling looks unfinished. With it, the room looks designed.
PVC beadboard panels ($8-$15/sq ft) are the correct choice for wet environments — fully moisture-resistant and paintable. Peel-and-stick options from Stikwood ($8-$12/sq ft) require zero nails. Standard MDF beadboard is the cheapest and the one that will swell, warp, and fail in a humid bathroom — avoid it here regardless of price. Paint the lower panels a contrasting tone to the upper wall for the most effective result: white panels with a coloured upper wall is the classic approach, and it works in virtually any bathroom colour scheme.
11. New Lighting: The Budget Bathroom Remodel Upgrade Most People Miss
Outdated lighting makes a clean bathroom look dull — actively dull, in the way that bad light makes skin tones look off and surfaces look grimy regardless of how recently they were cleaned. And yet replacing a vanity fixture is consistently the most overlooked upgrade in any budget bathroom remodel plan.
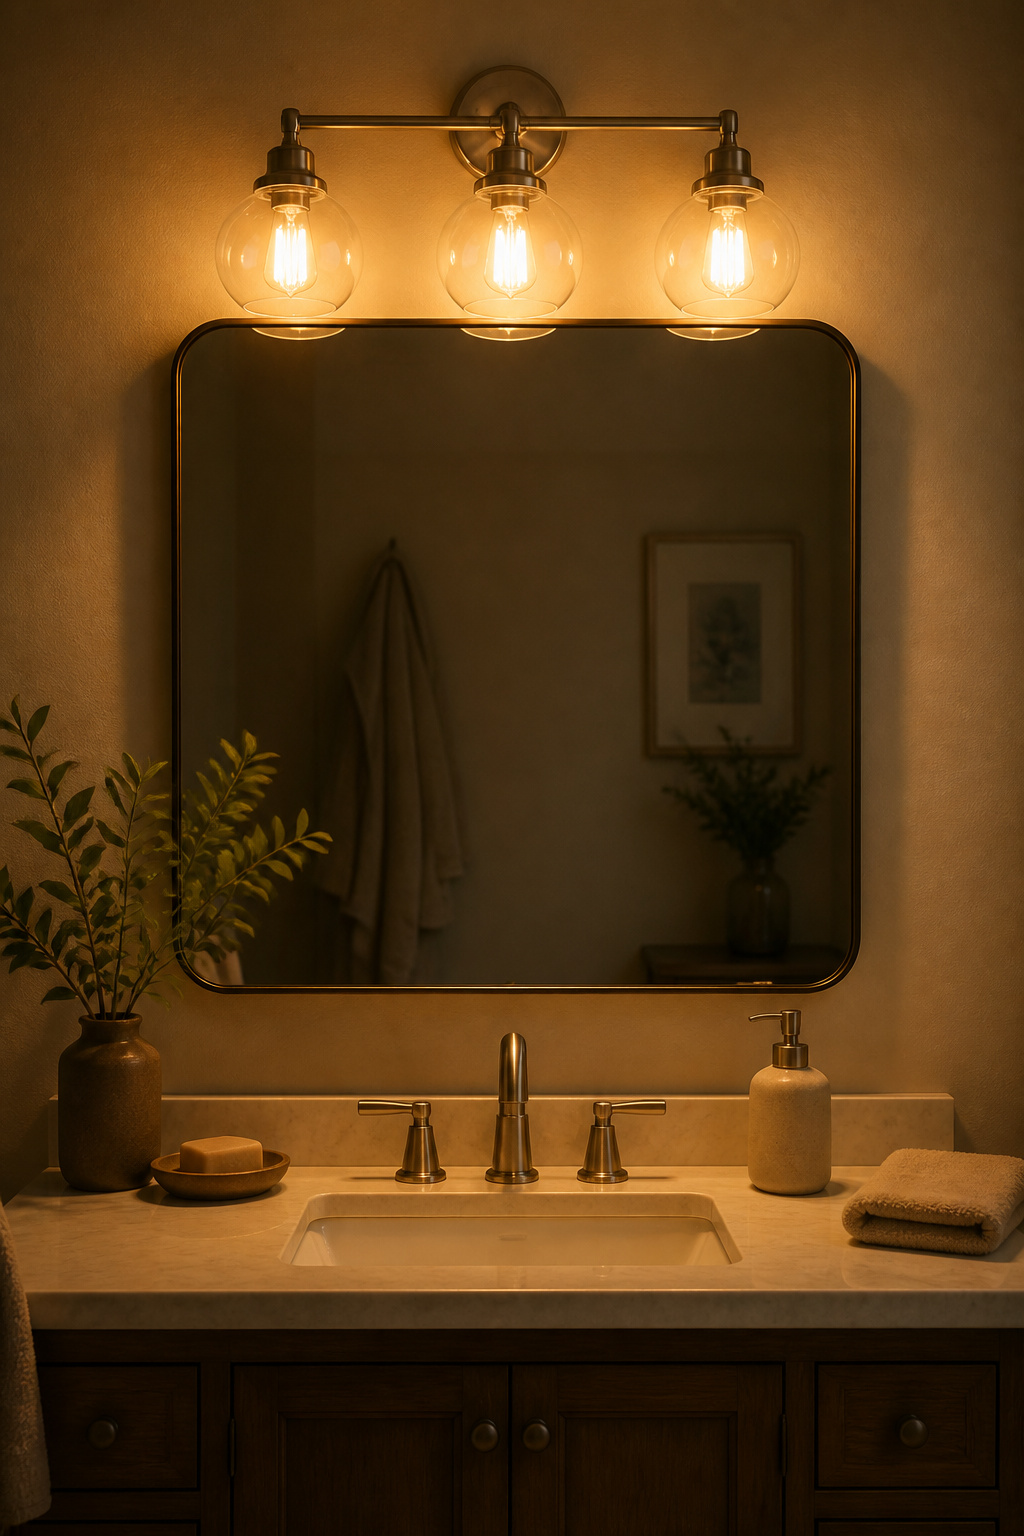
A standard vanity fixture replacement takes 30-60 minutes. The tools required are a screwdriver and the confidence to turn off the circuit breaker. Most fixtures mount to a standard electrical box with four screws and three wire connections. Budget options at Walmart and Home Depot start at $40-$60 in satin nickel or matte black. Mid-range options from Progress Lighting or Kichler at $80-$150 offer better build quality and more current silhouettes.
The single most impactful decision in bathroom lighting is colour temperature. 2700K-3000K (warm white) is the right choice: universally flattering to skin tones, creating a spa-like warmth that invites you to linger rather than hurry. Anything above 4000K makes a bathroom feel clinical — technically bright, deeply unflattering. If the fixture budget is genuinely tight, start with just the bulbs. Switching to 2700K warm white LEDs costs $8-$15 and immediately changes the room’s character without changing any hardware. For a layered effect, an LED strip under a floating shelf or behind a mirror runs under $20 and adds dimension that a single overhead fixture cannot.
12. Install a Rainfall Showerhead for a Spa Feeling Under $60
The shower is often the first experience of the day. Upgrading from a weak, pinhole stream to wide rainfall coverage changes that experience in a way that’s hard to overstate — and at this price point, the options are better than you’d expect.
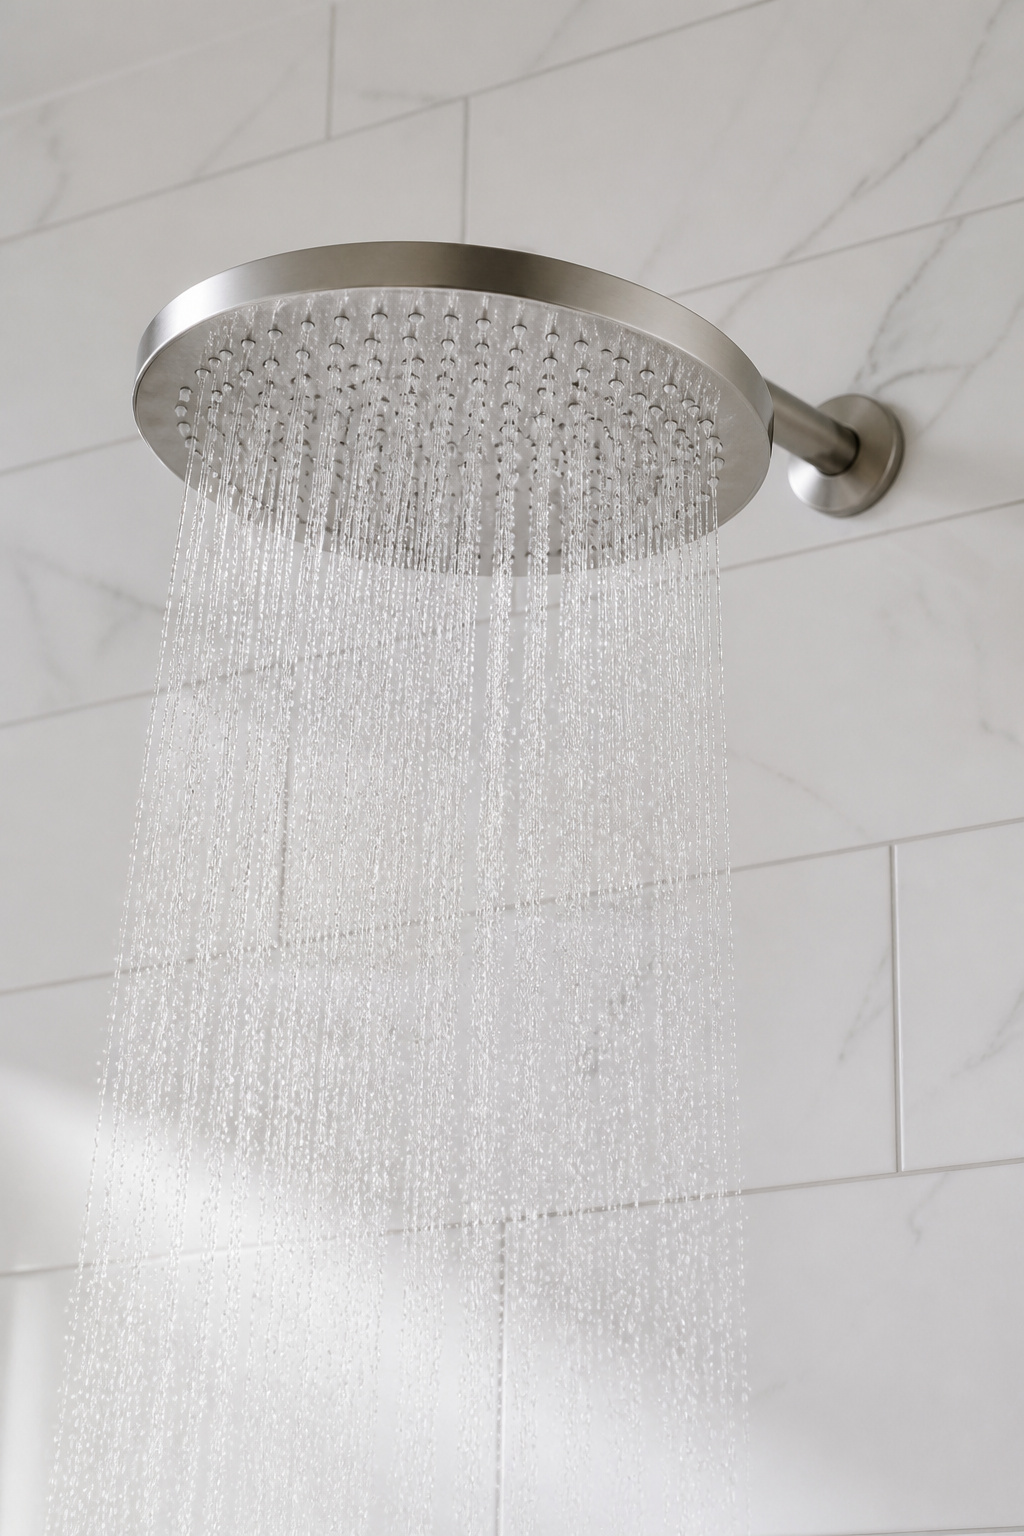
The BESy 12-inch rainfall showerhead at $28.99 delivers 12×12 inches of coverage, uses stainless steel construction rather than plastic, and works at pressures as low as 20 PSI. The NearMoon at $19.99 offers genuine stainless steel at the lowest price point in this category. Both perform well above their price bracket.
Installation is a 10-minute job. Turn off the water supply. Unscrew the old head counterclockwise with a cloth-wrapped wrench to protect the arm finish. Wrap the arm threads with plumber’s tape — clockwise, 2-3 times. Screw on the new head hand-tight, then a half-turn with the wrench. Check for drips when the water is turned back on. One note on flow rates: California caps at 1.8 GPM, Colorado and New York City at 2.0 GPM, and the federal standard for all other states remains 2.5 GPM — check local regulations before purchasing.
For the shower space itself, the bathroom shower tile ideas that complement a rainfall head best tend to be clean and simple — large-format plain tile or classic subway. The water should be the feature, not the tile pattern competing for attention.
13. Swap the Toilet Seat for a Soft-Close or Bidet Attachment Model
The toilet seat is one of the most ignored upgrade opportunities in home improvement — and one of the clearest signals of whether a budget bathroom remodel has been fully thought through.
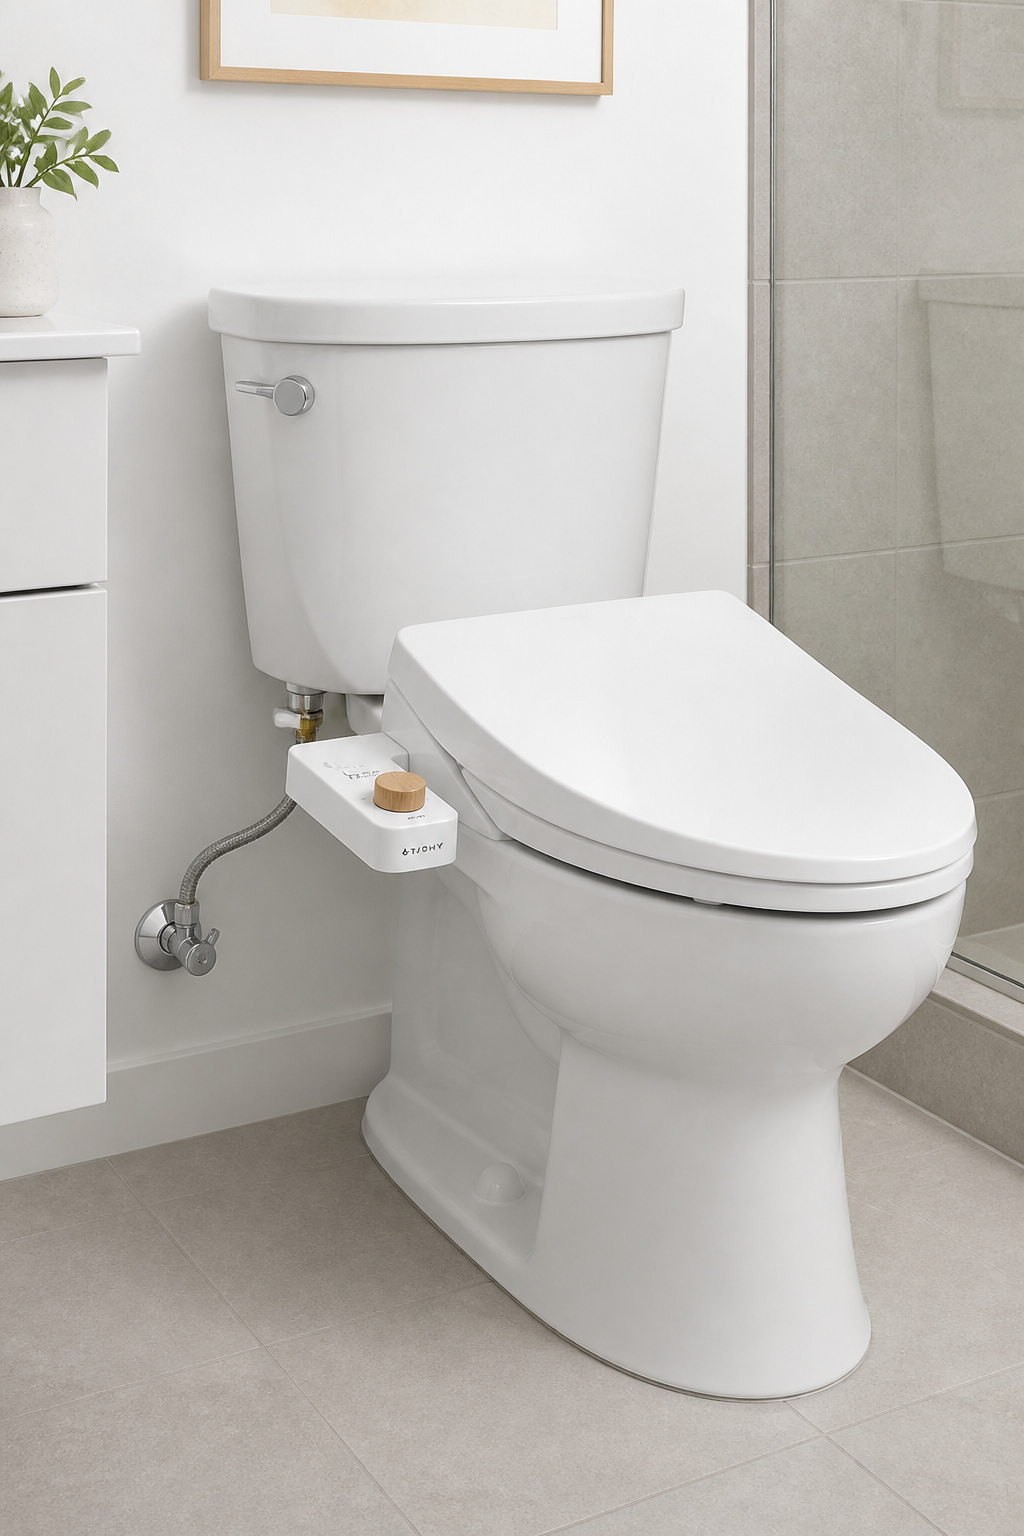
Toilet seats crack, yellow, and deteriorate on a 5-7 year cycle driven by UV exposure and cleaning product contact. Most people never replace them as a deliberate design decision. A new white soft-close seat costs $25-$60 and installs in 10 minutes with no tools. The soft-close mechanism signals that someone thought about the details — a small daily pleasure that accumulates into a better bathroom experience.
For those interested in a bidet attachment: non-electric models (TUSHY, LUXE Bidet) run $40-$120, connect to the existing water supply via a T-valve that slides in without any plumbing modification, and fit between the existing seat and bowl. Installation takes 30 minutes the first time. No electrical outlet required. Before ordering any new seat, measure your bowl: 16.5 inches from front to bolt holes equals round, 18.5 inches equals elongated. Seats are not interchangeable between these configurations — it’s a common ordering mistake worth a 30-second check.
14. Rethink Towel Storage for a Budget Bathroom Remodel That Feels Organised
How you store towels is both functional and aesthetic — and the two reinforce each other directly. Visible, well-styled towel storage becomes part of the room’s character. Towels stuffed into a cabinet or thrown over a shower rod become visual noise.
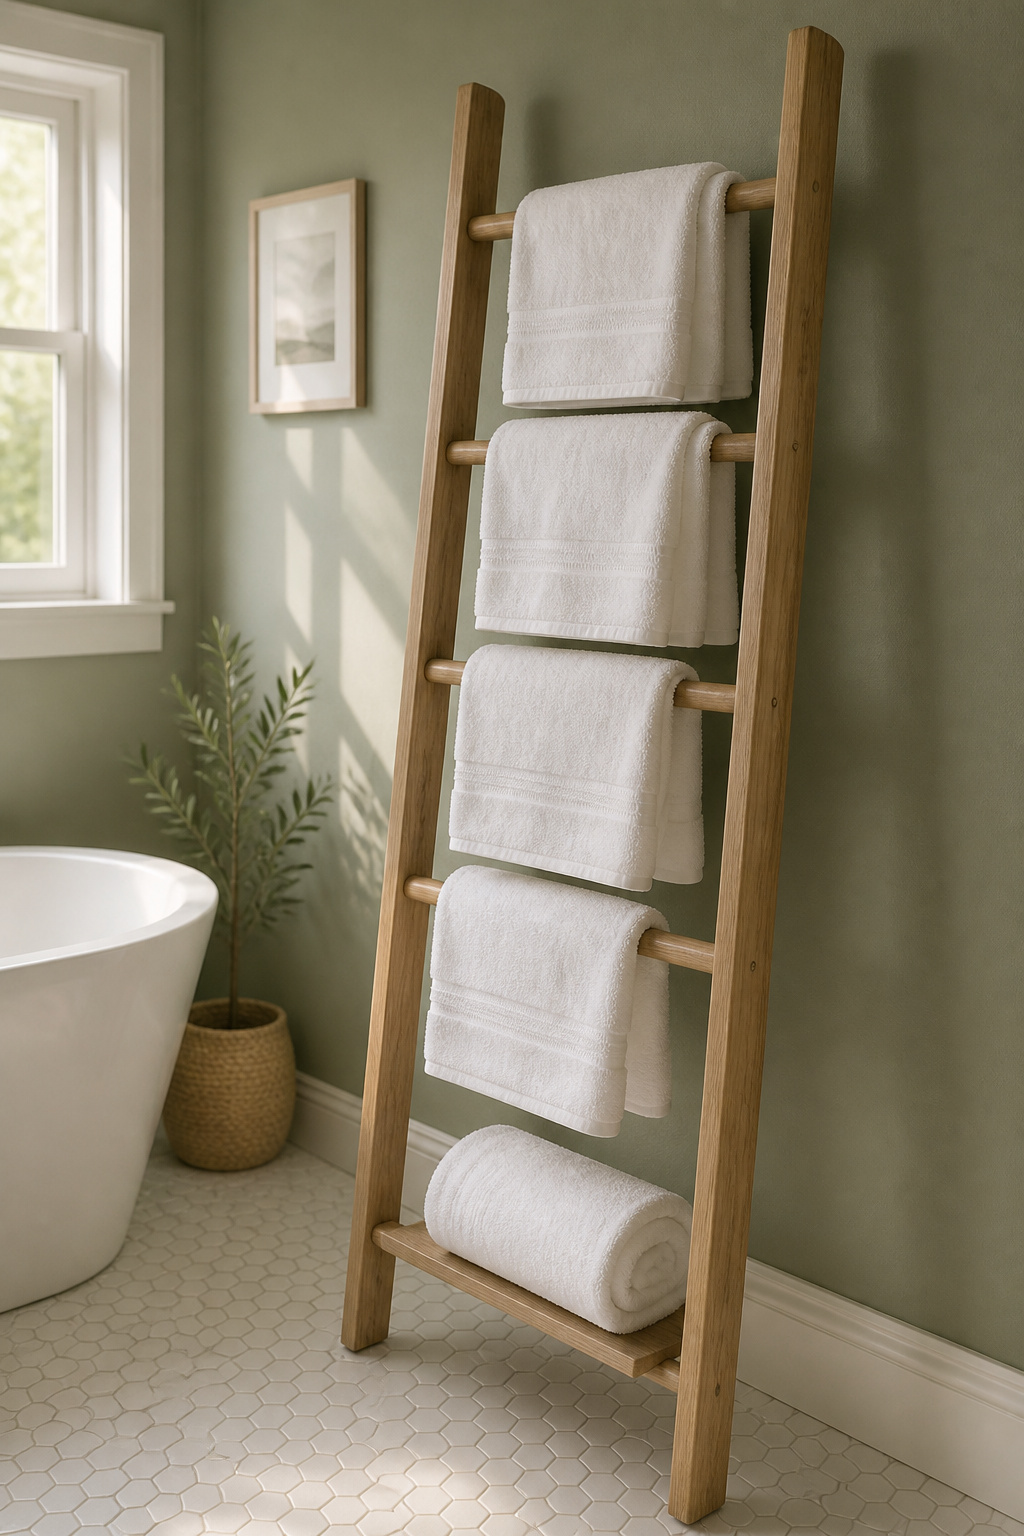
A freestanding ladder rack requires zero wall holes and costs $30-$60. It holds 4-6 towels, can be moved, and suits renters or anyone not ready to commit to permanent hardware. A wall-mounted hotel-style train rack (shelf above, bar below, hooks at sides) costs $40-$80 and provides the most storage per square inch. Over-door hooks cost $15-$40 and have zero wall impact.
For bathroom storage ideas that turn a functional element into a design feature, the towel styling matters as much as the rack choice. The spa fold — fold in thirds lengthwise, then fold in half — creates a uniform rectangle that stacks cleanly on a shelf rail. Rolling works for baskets and open cubbies. On a ladder rack, drape with the fold edge facing outward so the smooth side faces the room. Matching towels are not a luxury requirement. A $20-$30 set of matching white or natural-linen towels in two sizes is enough — using mismatched sizes and colours is what makes a bathroom look permanently half-finished.
15. Hang Artwork or Build a Small Gallery Wall Above the Toilet
Most bathrooms have zero art. Adding a single framed piece above the toilet immediately distinguishes the room from an undesigned functional space — and the wall above the toilet is one of the most consistently under-used surfaces in any home.
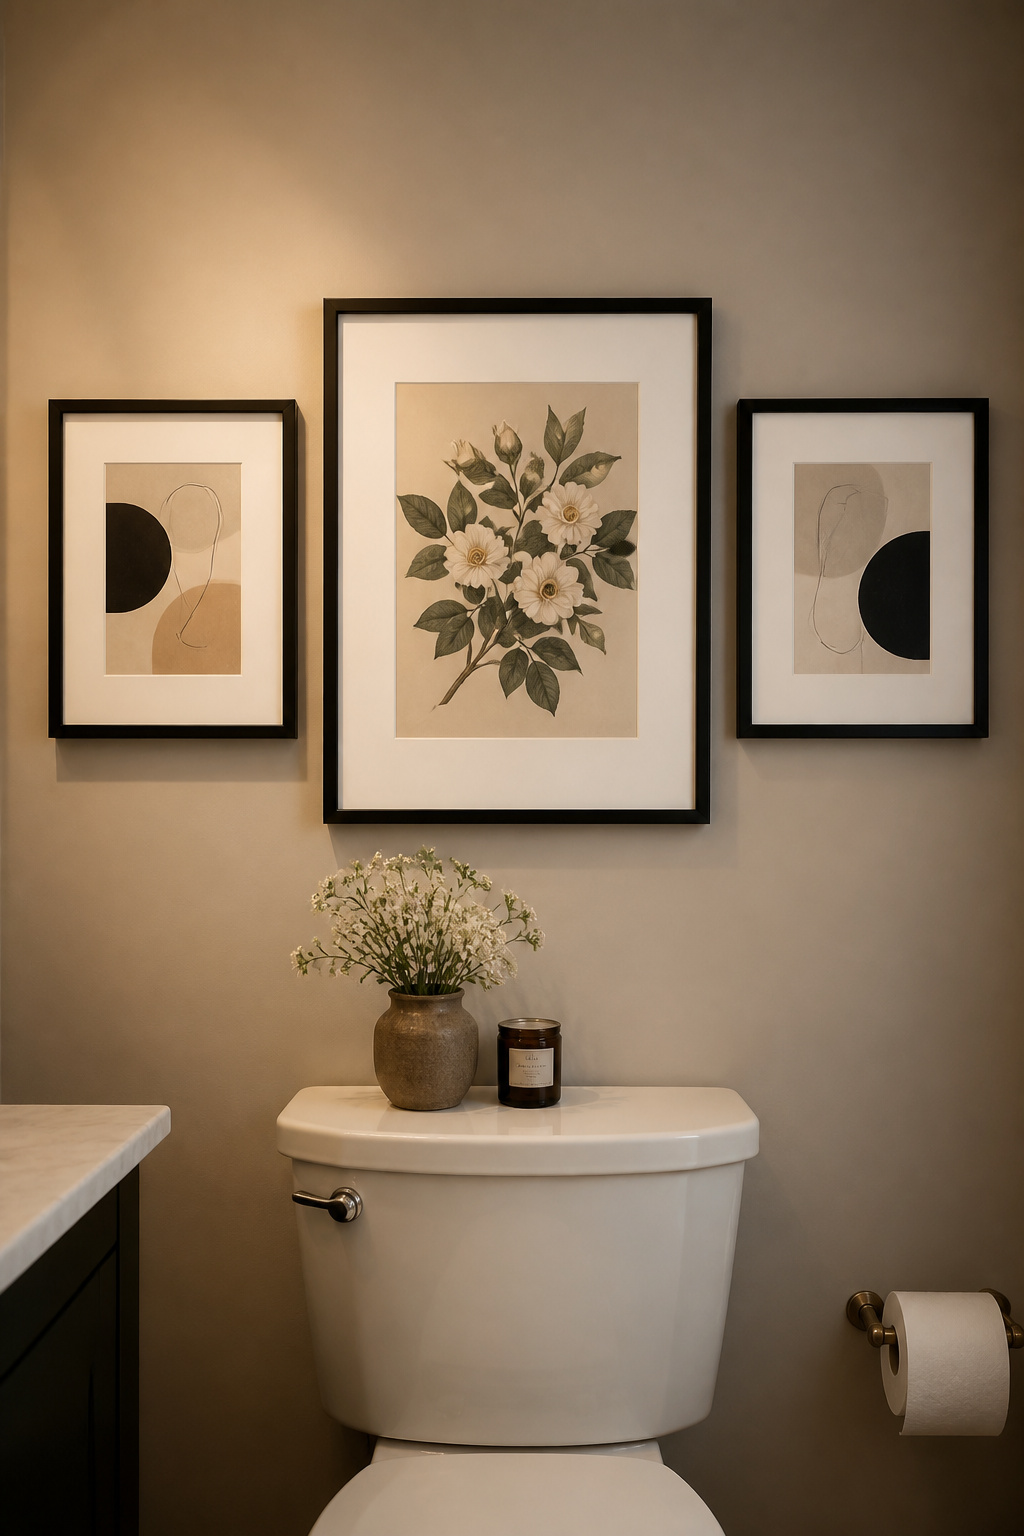
That wall is typically 18-24 inches wide and 30-36 inches tall. A single A3 or 30x40cm canvas print makes a strong, clean statement. If you prefer a grouped arrangement, three pieces work well: one 20x30cm framed print flanked by two 13x18cm — compose the arrangement on the floor first before making any holes, then transfer to wall.
Canvas gallery wraps are the safest art choice for this budget bathroom remodel category: breathable, don’t trap condensation behind glass, and handle ambient humidity well. Framed prints with acrylic glazing are the second-best option — acrylic is lighter, shatter-resistant, and more moisture-tolerant than standard glass. Avoid unframed paper prints in a consistently humid room — they bubble and yellow within months. Budget sources: Society6, Desenio, and IKEA’s BILD range carry prints from $10-$30 that frame into something that looks carefully chosen. Hang the centre of the piece at 57-60 inches from the floor. The viewer in this zone is often seated, so the standard standing-height rule doesn’t apply.
16. Introduce Humidity-Tolerant Plants for Biophilic Style on No Budget
A living plant in a bathroom does something no other object manages: it makes the room feel genuinely warm in a way that surface treatments and accessories can gesture toward but not quite reach.
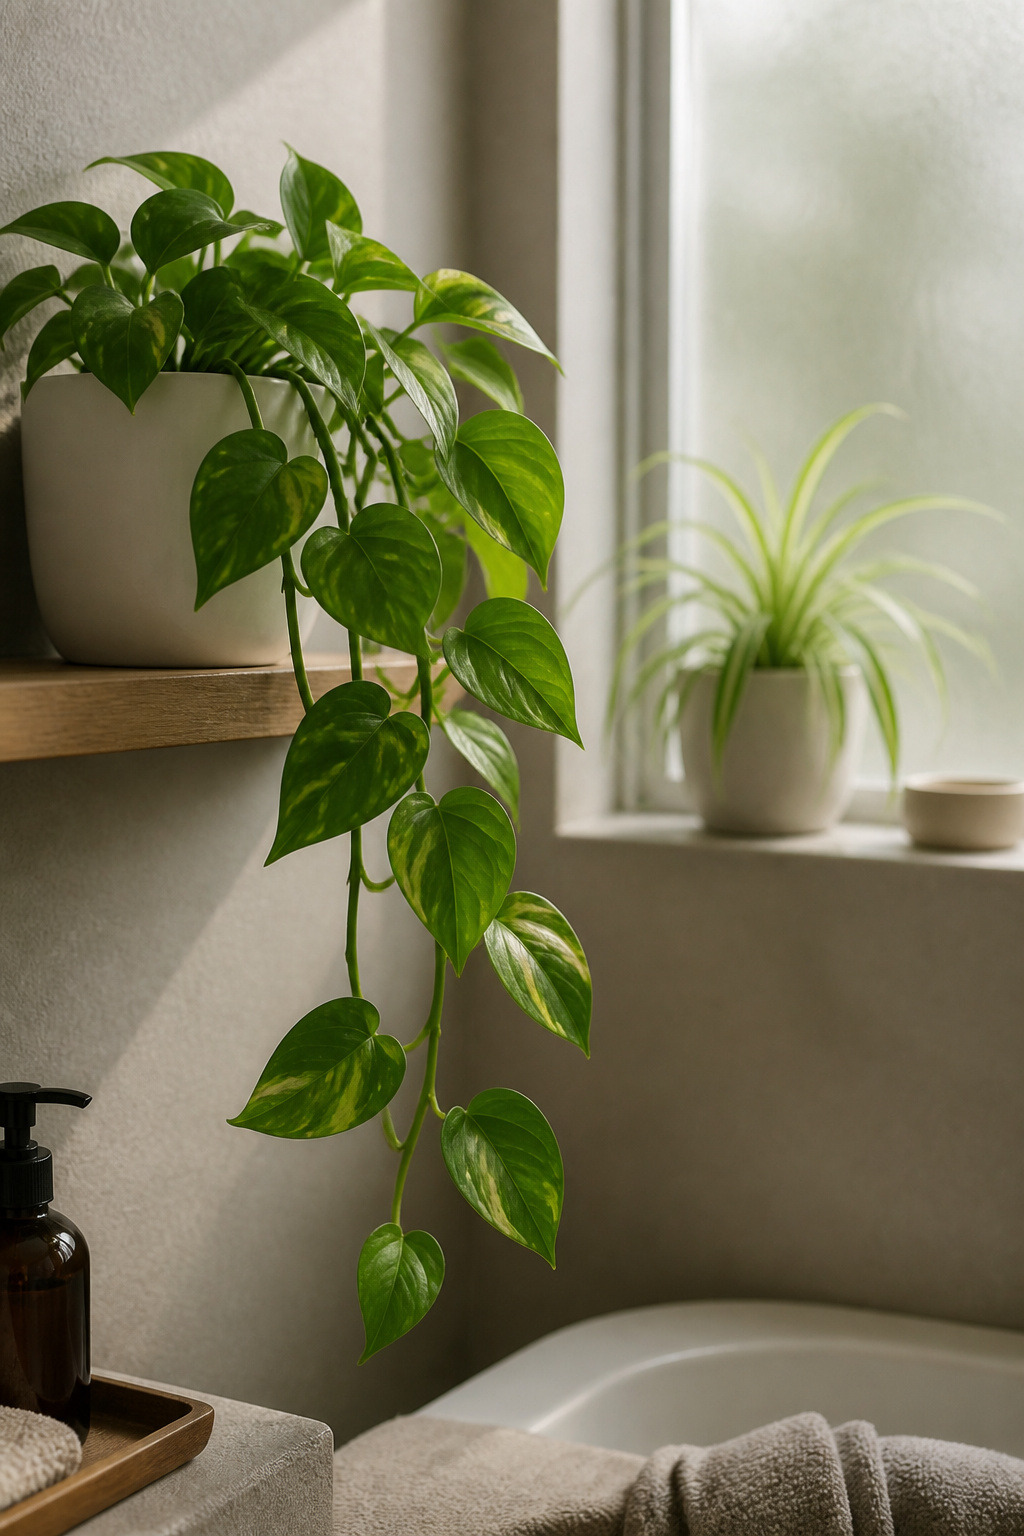
In a bathroom environment, several common houseplants don’t just survive — they thrive. Golden pothos tolerates low light and handles irregular watering; high ambient humidity reduces its needs significantly. It trails attractively from a high shelf and propagates from node cuttings in water with near 100% success. Peace lily handles near-total shade, prefers warmth and humidity, and communicates thirst by drooping slightly — an unusually honest plant. Spider plants produce spiderette offshoots continuously, each ready to propagate. ZZ plants store water in thick rhizomes and survive windowless conditions with only occasional attention.
The pot selection matters more than people admit. White pots with white-dominant bathrooms. Terracotta with warm earthy schemes. Matte black with minimal or dramatic rooms. A single large plant (a peace lily at 14-16 inches, a snake plant at 18 inches) makes more design impact than three small ones scattered around. One committed plant choice beats several tentative ones. Always use drainage — a pot with a hole inside a decorative outer pot. Roots sitting in standing water kill even the hardiest bathroom plants eventually.
17. Contact Paper Countertops: Bathroom Remodel on a Budget Without Demolition
A bathroom countertop replacement costs $200-$800. Contact paper costs $15-$25 for the same surface area. At arm’s length — which is where most people interact with a bathroom counter — the quality of current contact paper finishes is impressive enough to have passed 18-month real-world tests in active bathrooms.
DC-fix is the brand that comes up repeatedly in real-world reviews: heat-resistant to 170°F, fully waterproof, and stable in bathroom humidity without peeling, bubbling, or colour shifting. Marble patterns — Calacatta white, grey-veined Carrara — are the most convincing at distance. Concrete grey reads authentically because real concrete countertops have irregular patterning that contact paper mimics well. Wood grain is the least convincing option in a bathroom.
Application technique determines success or failure. Spray the countertop lightly with diluted Windex first — this lets the paper slide and reposition before the adhesive sets. Apply in sections from back to front, using a credit card or squeegee to push air from centre to edges. For rounded or curved edges, a hair dryer on low softens the vinyl enough to stretch around curves without creasing. The critical finishing step: silicone caulk around every faucet base and sink edge. Water infiltration under the edges is the only meaningful failure point of this technique. Properly sealed, the surface is 100% waterproof — vinyl is non-porous and water sits on top rather than soaking through.
18. Source Vanities, Mirrors, and Tile From Architectural Salvage and Thrift
Every flat-pack vanity on the market carries the same DNA: engineered wood carcass, laminate top, brushed chrome hardware. They’re functional, predictable, and add no character to a room. An architectural salvage find carries visual weight and history that mass production never will.
Habitat for Humanity ReStore locations stock cleaned and inspected bathroom vanities, sinks, and mirrors at 30-60% below retail — stock changes weekly and the prices are competitive with budget retail. Facebook Marketplace is the best source for larger items where local pickup avoids shipping costs; filter by “bathroom” and “vanity” within a 30-mile radius and check listings daily. Architectural salvage specialists carry more curated inventory at higher prices, appropriate for distinctive period pieces that anchor a room.
When buying secondhand, inspect vanity cabinet corners carefully for soft wood or discolouration that signals water damage at the base. Check that drawer slides work smoothly. Run a hand around the entire basin interior checking for hairline cracks — cracked porcelain is not repairable and will worsen over time. Avoid secondhand toilet bowls and tanks entirely; seals degrade invisibly and the saving isn’t worth the risk.
For tile sourcing secondhand: confirm you can match the quantity needed before committing. Running short on a discontinued tile mid-project is among the most frustrating renovation problems there is. Buy 10-15% more than the calculated coverage to allow for cuts and breakage. The best salvage finds add vintage bathroom inspiration that can’t be sourced from a catalogue — a period pedestal sink, a hand-cut tile set, a cast iron towel rail — and they do it at prices that make the rest of your budget stretch further.
Choosing Your Budget Bathroom Remodel Starting Point
Eighteen ideas is useful for building a list. It’s less useful for building a plan. So here’s how to approach prioritisation in a budget bathroom remodel.
The highest visual impact per dollar, in order: paint, lighting fixture, vanity hardware, mirror swap, showerhead. These five upgrades collectively change the room’s character more than anything structural — and their combined cost can run under $300 with careful selection. Paint returns $1.71 for every $1 spent in measurable home value. Lighting and hardware are what designers call “jewellery changes” — high impact, minimal disruption, consistently underestimated by homeowners who’ve been conditioned to think renovation means demolition.
A practical sequence: start with the changes that cost the least and teach you the most. Swap the lightbulbs to 2700K warm white. Replace the hardware. Add a towel ladder. Hang one piece of art. Add a plant. That’s an under-$100 first pass that changes how the room feels in a single afternoon. Then tackle paint and mirror in a second weekend. Then surface upgrades — floor tile, vanity painting, showerhead — in a third.
Each of these is a standalone project. None requires the others to be done first. The real trick of a budget bathroom remodel isn’t finding one big move — it’s stacking several small, specific ones until the room no longer resembles the bathroom it used to be.


