There’s a moment, usually in a kitchen you’re visiting for the first time, when you notice that everything feels right. The surfaces are the same surfaces. The cabinets are just cabinets. But the air feels warmer, more settled. Nine times out of ten, the difference is the lighting. Not expensive lighting. Not elaborate lighting. Just considered kitchen light ideas applied with some intention.
Most kitchens are lit with one overhead fixture wired to a single switch. That system was designed for the 1950s, when kitchens were utility rooms. Today’s kitchen is where the household gathers before anyone is awake and where people decompress at the end of the day — and flat overhead light at full blast serves neither of those moments well. The same circuit that makes chopping at noon feel clear and safe makes dinner feel like eating under an exam-room fluorescent.
These 15 kitchen light ideas cover the full range of what’s possible — from structural interventions like skylights to five-minute swaps like changing a bulb’s colour temperature. Some require an electrician. Some require only a screwdriver. All of them will change how your kitchen feels before they change how it looks.
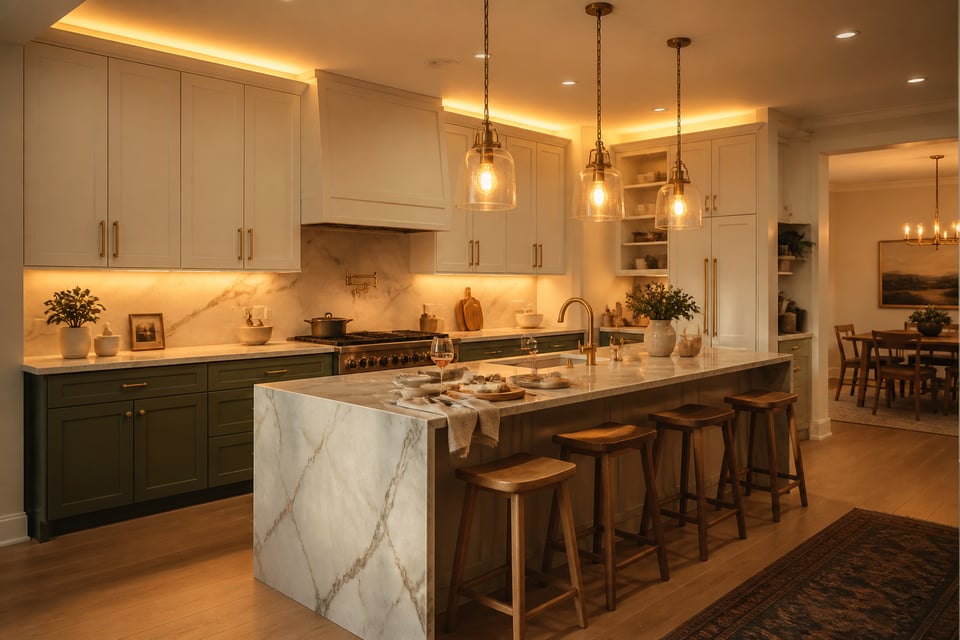
1. Pendant Lights Over the Island: A Kitchen Light Idea With Real Impact
Every kitchen has a moment where a decision reveals its design intent. For island kitchens, that moment is the pendant. Recessed cans and under-cabinet strips are invisible when off — they’re infrastructure. The island pendant is the only kitchen fixture people actually see, and it communicates whether the room was designed or just assembled.

The number people always get wrong is size. The instinct is self-protective — choose something smaller than feels necessary rather than something that actually matches the island’s proportions. The rule that works: pendant diameter should be 25 to 33 percent of the island’s length. For a 48-inch island, that’s a 12 to 16-inch pendant. For a 72-inch island, an 18 to 24-inch pendant diameter reads correctly from across the room.
Hanging Height and Spacing
Height matters as much as diameter. Standard hanging height is 30 to 36 inches above the countertop. If your ceiling is above 9 feet, add 3 inches for every additional foot — a 10-foot ceiling calls for 33 to 39 inches of clearance, not the standard 30. Pendants hung too high lose their visual connection to the island and stop working as task lights. Hung too low, they interrupt sightlines across the room.
For islands under 5 feet, one pendant is usually enough. Six to seven feet calls for two, spaced 24 to 30 inches apart center-to-center. For islands 8 feet or longer, three pendants is standard. If you’re weighing options for over a dining table rather than an island, the same principles that govern kitchen table pendant lights apply directly.
2. Under-Cabinet LED Strips for Shadow-Free Prep Work
Most people don’t realise their kitchen prep lighting problem has a name: self-shadowing. When the main light source is directly overhead, your own torso blocks the light from reaching the cutting board exactly when you need it most. Under-cabinet LED strips solve this by projecting light forward from above the work surface rather than down from the ceiling.
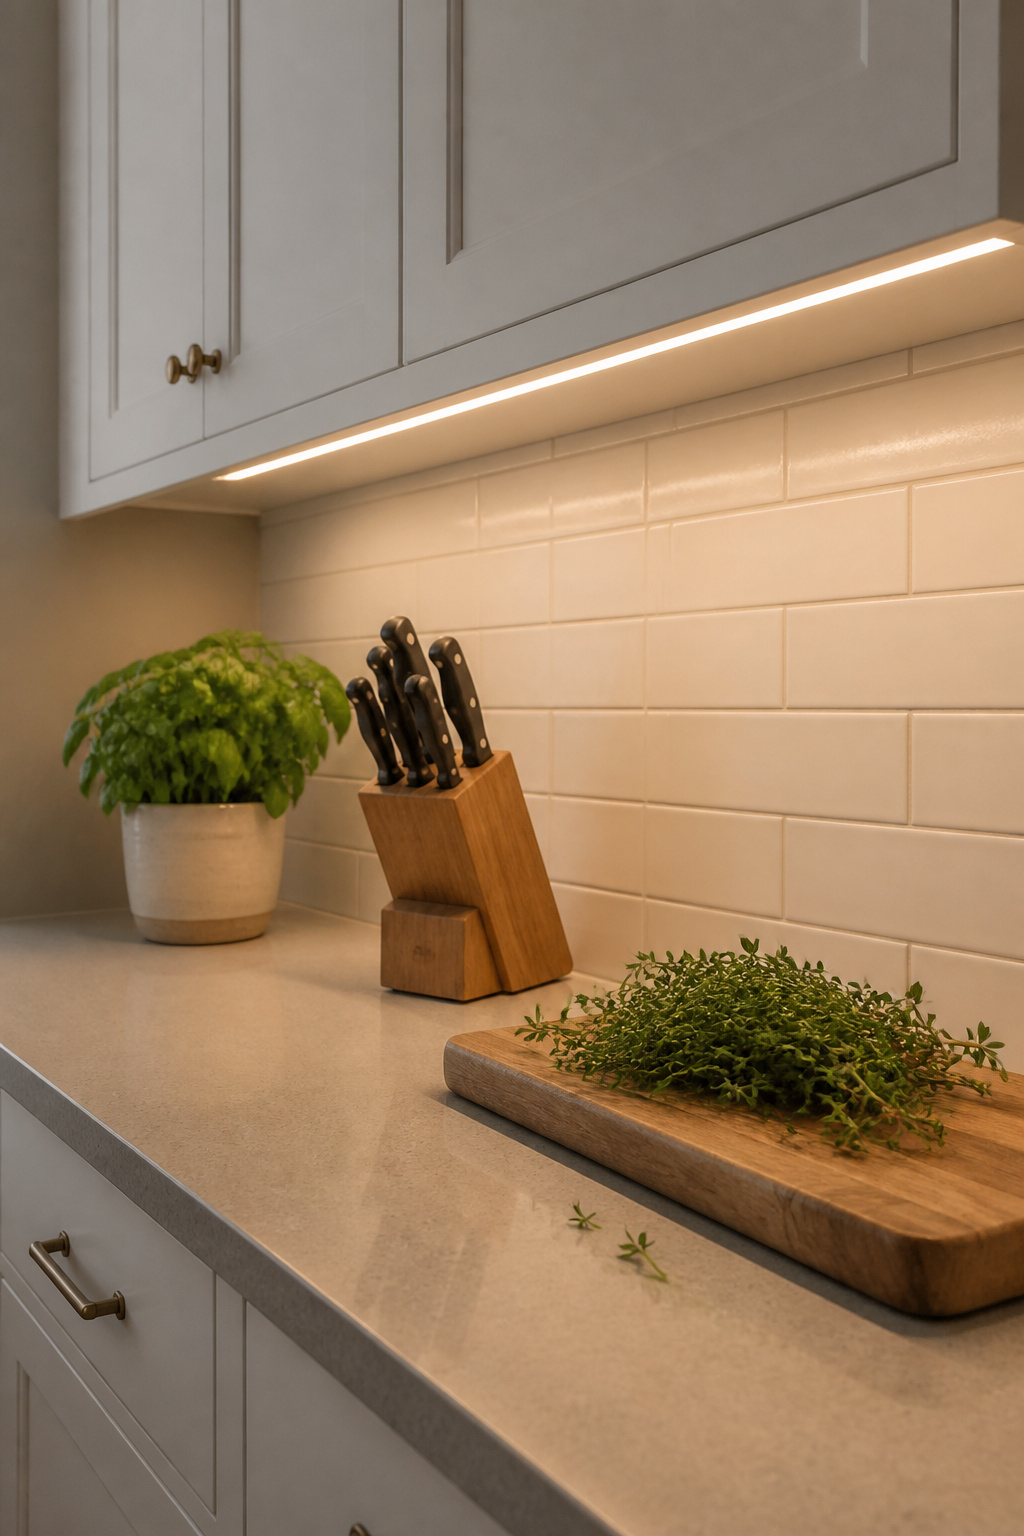
The difference is immediate. With under-cabinet strips, the counter is lit at a low angle that makes every surface visible — you can see whether the chicken is fully cooked, whether the knife cut is clean. For kitchen applications, never go below CRI 90. Below that threshold, a ripe avocado and an underripe one look the same greenish colour. For serious cooks, Diode LED’s VALENT series achieves 95+ CRI with a high R9 value — R9 measures red saturation, which determines whether meat looks natural or oddly pale. Armacost RibbonFlex Pro is a reliable mid-range option at CRI 90+. Waveform UNDERCAB is purpose-built for kitchen countertops at 95 CRI and 3000K.
Colour temperature: 2700K to 3000K for most kitchens. Cool white at 4000K and above maximises visibility but clashes visually with warm pendants overhead — the mixed temperatures make the space feel unresolved.
For renters or quick upgrades, Govee and DAYBETTER both offer smart plug-in strips that connect to phone apps. IKEA OMLOPP is the closest thing to a universal recommendation at the budget end — it comes in 40 cm and 80 cm lengths, includes a cord cover, and requires no electrician.
3. Recessed Downlights: Kitchen Light Ideas for Clean-Lined Minimalists
Recessed lighting is the only kitchen fixture that adds zero visual weight to the room. When off, it’s invisible. When on, the light exists without a visible source. For minimalist and Japandi kitchens where the goal is to remove rather than add, this makes recessed downlights the natural ambient choice — the approach that modern kitchen decor and minimalist zen principles consistently return to.
The common mistake is over-specifying: too many fixtures at too low an output, creating a grid of bright spots that looks commercial. The better approach is fewer, larger-aperture fixtures — 6-inch over 4-inch — at higher lumen output per unit.
Spacing and Placement Rules
Spacing formula: ceiling height divided by two equals the distance between fixtures. An 8-foot ceiling calls for 4 feet between cans; a 9-foot ceiling calls for 4.5 feet. For counter illumination specifically, position fixtures 12 to 18 inches from the face of the upper cabinets — this angle directs light onto the counter surface rather than the cabinet doors.
Trim choices matter more than most homeowners realise. Baffle trim reduces glare, which is right for kitchens with shiny surfaces like marble or high-gloss cabinetry. Reflector trim maximises light output. For ceilings 8 feet or below, wafer-style recessed lights like the Halo HLBSL series are only half an inch deep and install without attic access. One specification that rarely appears on packaging but always appears in design review: CRI 90 or above. Below that, fresh produce looks flat and food preparation becomes harder than it needs to be.
4. Oversized Statement Pendants as the Room’s Visual Anchor
The counterintuitive truth about scale in kitchen lighting: most homeowners choose fixtures that are too small. A pendant that’s too small reads as an oversight, while one properly proportioned reads as designed. This is the kitchen light idea that costs nothing extra to execute correctly — it just requires choosing size with intention rather than caution.
For a single statement pendant over an island or dining area, the working range is 1/3 to 2/3 of the island or table width. Over a 60-inch island, a 20 to 40-inch pendant diameter is correct. This reads aggressively on paper and looks right in the room. The ceiling height requirement is a firm 9-foot minimum for pendants 30 inches and above.
Choosing the Right Material
Rattan has the lightest visual weight of the statement options. The open weave prevents the fixture from blocking the space above, so large sizes work in rooms that couldn’t handle a solid shade. Smoked or amber glass creates a warm architectural glow when lit. Unlacquered brass develops a patina over two to five years that makes a new kitchen feel lived-in — it pairs equally well with white cabinets and warm wood tones.
One thing to avoid: large opaque solid shades in rooms with standard ceiling heights. A oversized solid pendant in a 9-foot kitchen blocks light and drops the ceiling visually. If scale is the goal, choose materials that let light pass through or around them, and the proportions take care of the rest. Related farmhouse kitchen island design ideas offer useful visual examples of scale done well across different kitchen styles.
5. Natural Light First: Skylights and Solar Tubes for Kitchens
Before the first LED strip is ordered or the first pendant chosen, there’s a more fundamental kitchen light idea worth addressing: how much natural light does the kitchen actually have, and what’s blocking more of it?
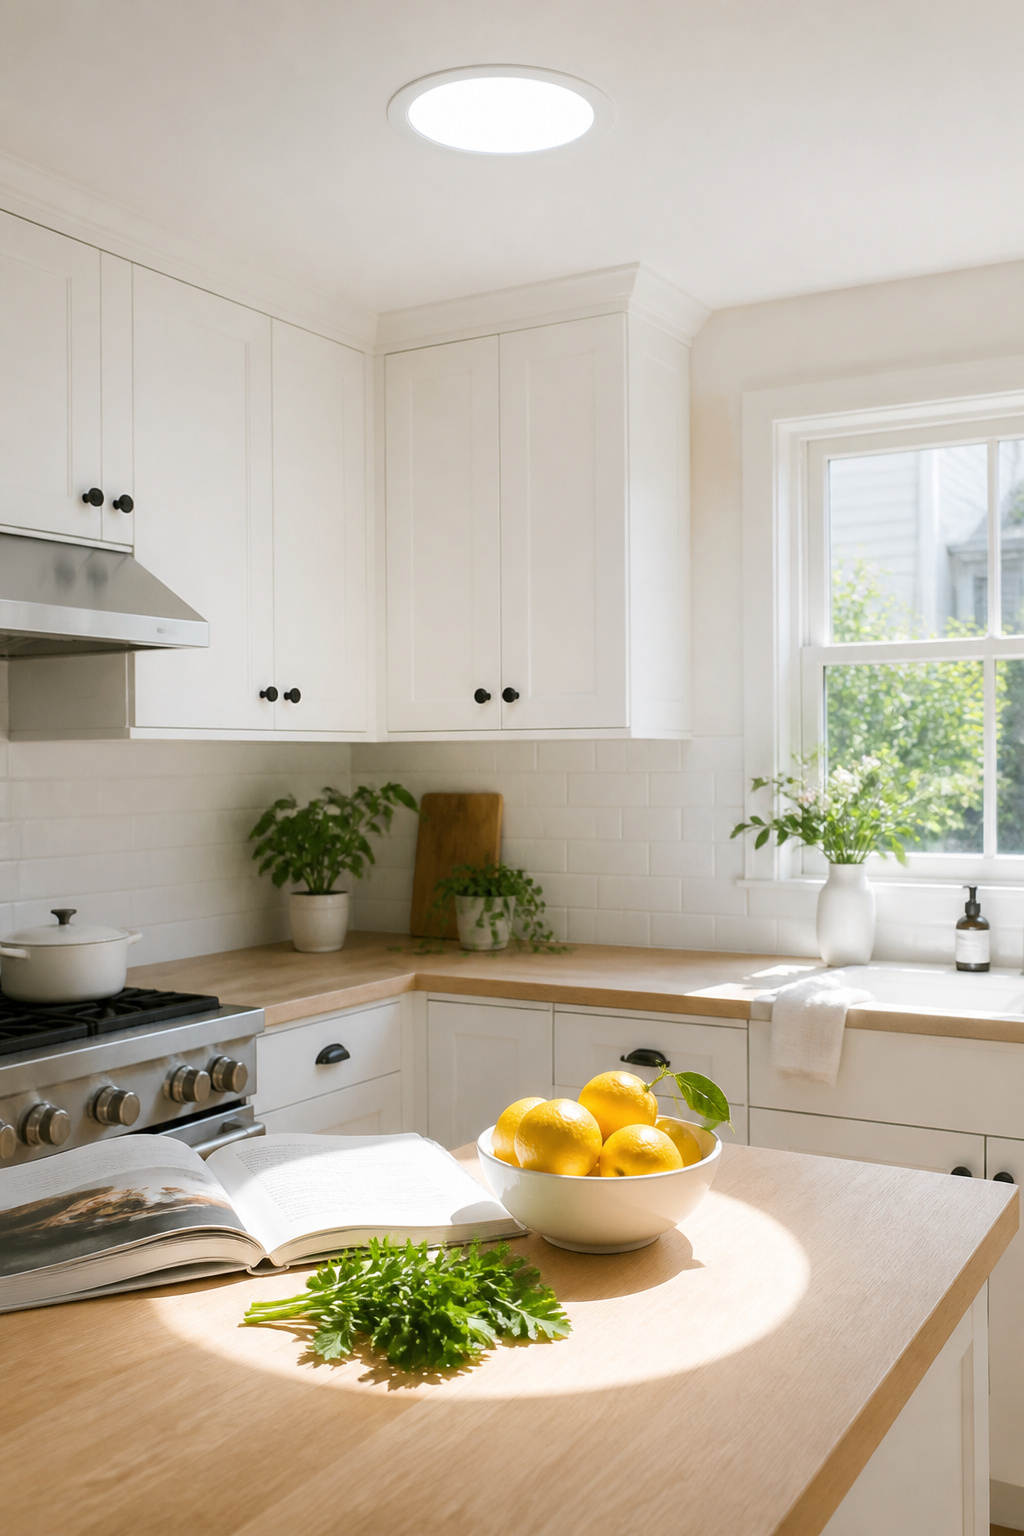
Natural light is categorically different from artificial light in ways that matter here. CRI is 100 — food looks exactly as it is. Light quality shifts through the day in ways the brain tracks, supporting circadian rhythms and mood in ways even the best artificial systems can’t replicate. Research consistently shows that people in naturally lit environments report better mood and productivity — in a room where many households spend one to two hours daily, that’s worth weighing.
For kitchens without direct skylight access, solar tubes are the practical route. The Solatube 160 DS captures sunlight through a 10-inch dome on the roof and channels it through a mirrored tube to a diffuser in the ceiling. Installation takes 2 to 4 hours without structural changes. A 14-inch tube eliminates 300 watts of artificial lighting during daylight hours, saving $136 to $204 annually at current electricity rates. Installed cost runs $600 to $1,500, compared to $2,000 to $5,000 for a full skylight with structural modification.
For window placement: north-facing windows deliver consistent, glare-free light throughout the day — ideal for prep counters. East-facing windows bring morning light but create direct glare on shiny countertops between 7 and 9 AM. A diffusing film like 3M Fasara applied to east or west windows allows natural light in while cutting direct solar glare, which is a practical alternative to repositioning windows in an existing kitchen.
6. Warm Edison Bulbs for Kitchen Lighting That Feels Human
The kitchen runs at 2700K. The dining area shifts to 2200K. This one-degree-of-warmth difference, invisible in isolation, creates a gradient across an open-plan space that the eye reads as a transition from work zone to social zone — without a single wall doing the separating. As kitchen light ideas go, this is one of the lowest-cost, highest-impact changes available.
The 2200K to 2700K range is where kitchens start feeling less like rooms and more like places. At these temperatures, skin tones read warmer, food looks natural and appetising, and the evening light stops competing with the idea of winding down.
LED Edison vs True Incandescent
LED filament bulbs have largely resolved the trade-off between Edison aesthetics and energy efficiency. The Modvera T30 and Hudson Vintage both achieve 2200K at 4 to 5 watts — equivalent to a 40-watt incandescent at 90 percent energy savings, with a 20,000-hour lifespan. Both are dimmable, which matters: Edison bulbs at full brightness in an open cage pendant over an island can be uncomfortably bright; at 60 percent, they read correctly.
One authentic limitation: LED filaments don’t shift colour when dimmed the way true incandescents do. A real incandescent deepens to orange as it dims; LED filaments dim to a lighter version of the same temperature. If the slowly deepening amber of a dimming incandescent is specifically what you’re after, a handful of real incandescent bulbs in one fixture is a considered choice rather than an oversight.
Fixture pairing: Edison bulbs belong in fixtures that show them. Open cage pendants, wire mesh shades, clear glass globes. Opaque or frosted shades waste the filament entirely — at that point, any warm LED produces the same result at a fraction of the cost.
7. Smart Lighting Systems: Kitchen Light Ideas for Modern Homes
The kitchen problem that smart lighting actually solves isn’t novelty. It’s transition. A kitchen cycles through more functional modes in a single day than any other room — 6 AM prep (bright, clear, energising), noon cooking (full task light), 7 PM dinner (dim ambient, warm, relaxed), 10 PM late snack (low, unhurried). A single overhead circuit at one brightness level serves none of these moments well.
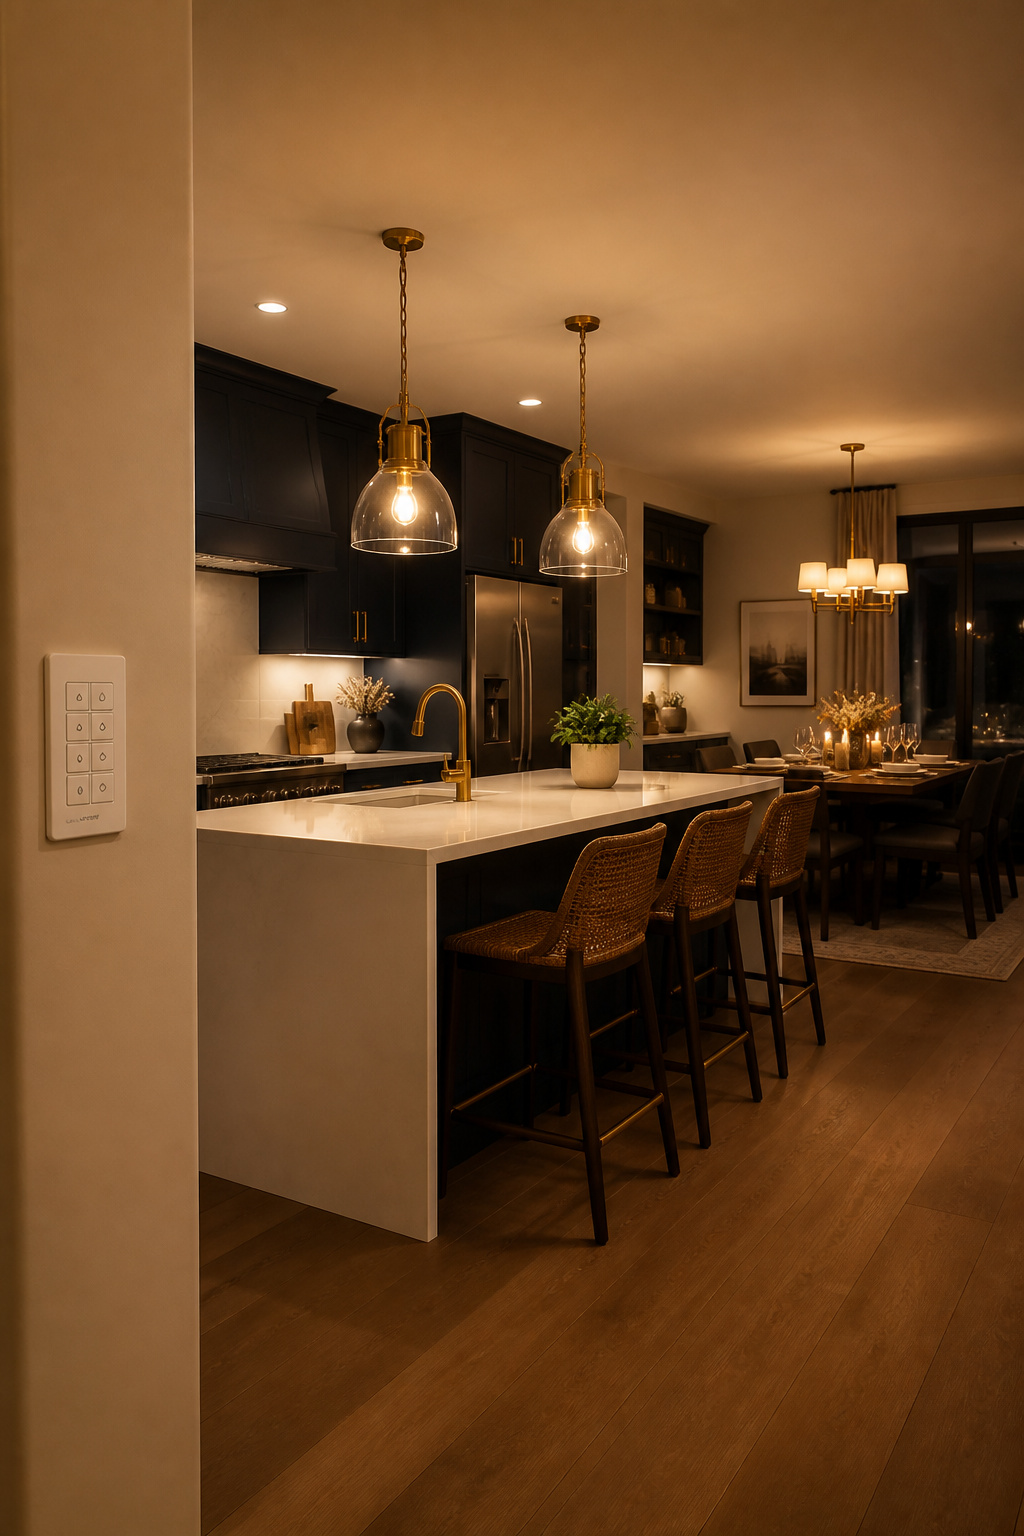
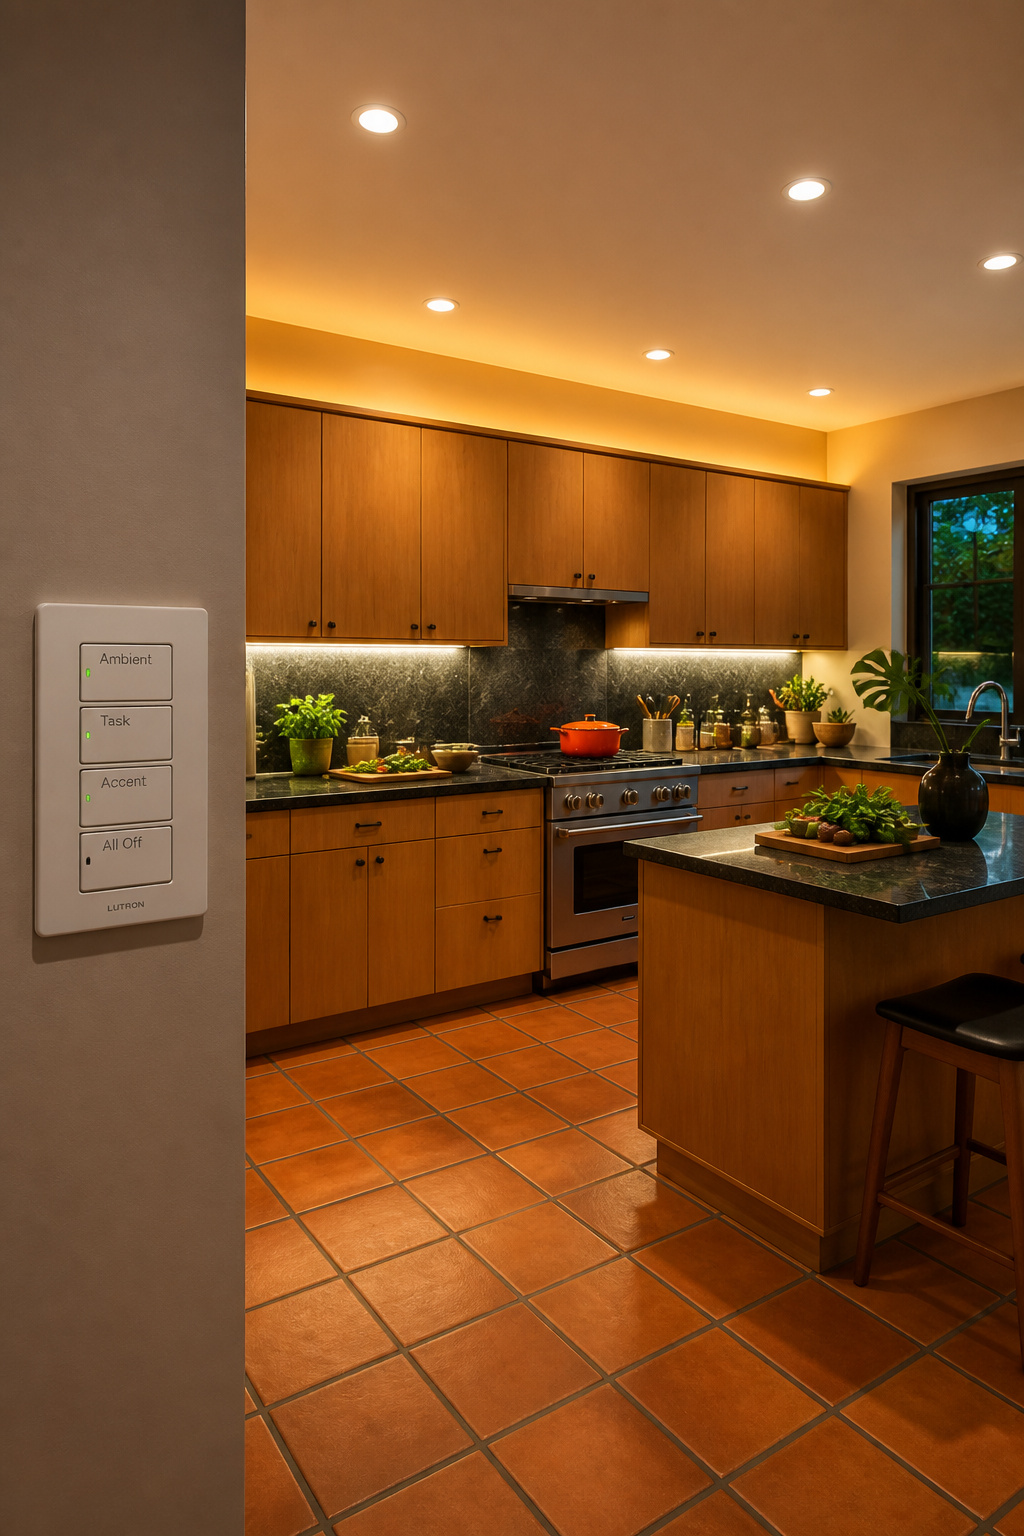
Smart systems solve the transition problem through scene presets. A “Cook” scene runs ambient at 100 percent and under-cabinet strips at full. A “Dinner” scene dims ambient to 40 percent, switches off the under-cabinet strips, and brings island pendants to 70 percent. A “Night” scene activates toe-kick lighting only, at 5 percent warm. Each scene takes one button press.
The Technical Architecture
For the infrastructure: Lutron Caseta handles the overhead circuits. It’s the most reliable smart switch available, works without a neutral wire (which older homes often lack), and syncs with Apple Home, Google Home, and Alexa without a separate hub. For anyone exploring the full scope of this approach, the kitchen light ideas within a kitchen remodeling ideas for a modern zen sanctuary framework help illustrate where smart lighting fits in a larger kitchen upgrade strategy.
Philips Hue handles accent strips and pendants with colour-tunable bulbs — the Gradient Lightstrip for under-cabinet, standard bulbs in pendants that benefit from tunable warmth. LIFX A19 offers higher CRI than standard Hue bulbs and connects directly over Wi-Fi without a hub.
The integration note to flag: Hue bulbs require an uncontrolled circuit — they should not be on a standard dimmer switch. Use Caseta for existing fixtures, and add Hue bulbs on circuits that are either switched (not dimmed) or controlled through Hue’s own bridge.
8. Track Lighting for Flexible Coverage Over High-Use Zones
Track lighting is the most underrated kitchen light idea in the toolkit. Not because it looks better than other options — in a standard rectangular kitchen with a clear layout, recessed lighting is cleaner. But because real kitchens often don’t cooperate with a symmetric recessed grid. The island isn’t centred. The counter layout changed after the original wiring was planned. In these cases, track wins.
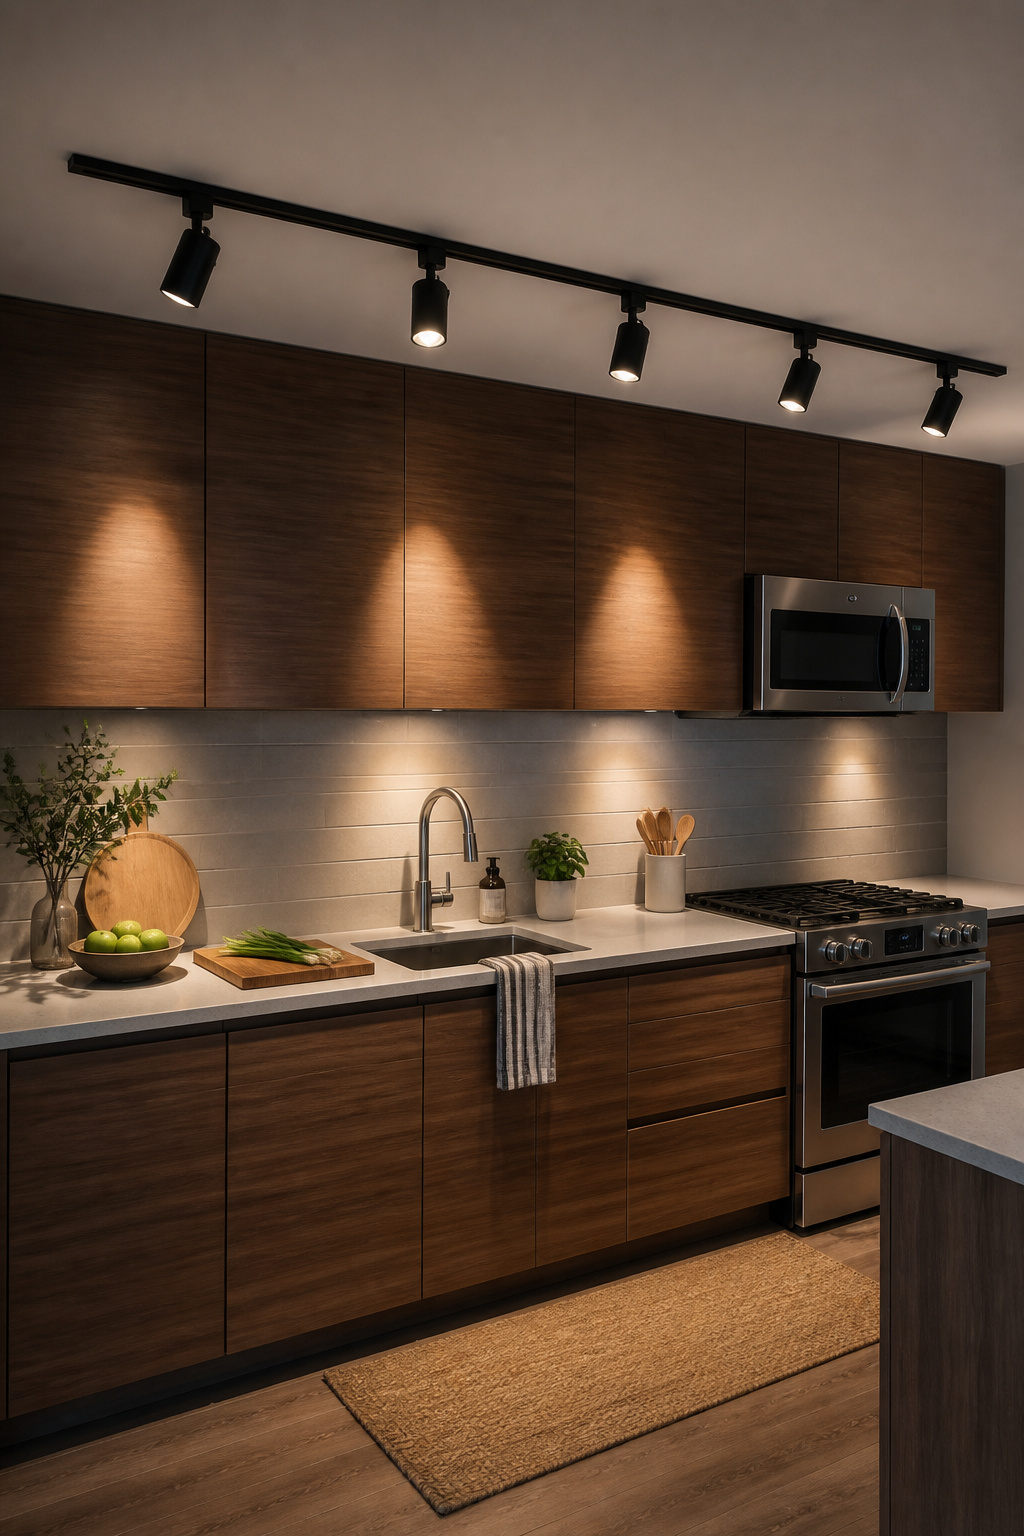
A single track run directly above a counter line can be aimed at the chopping area, the sink, and the cooktop — each head independently adjusted, directionally precise, without any additional electrical work beyond the one track circuit. Standard H/J/L track at 120V is right for most kitchens: straightforward installation, wide range of head styles, compatible with standard electrical boxes. Monorail systems — which run on 12V or 24V through a hand-bendable rail — are better suited to open-plan spaces where the rail itself becomes a visual feature, curving around an island or following a vaulted ceiling.
Aiming the Heads Correctly
The critical error with track lighting is aiming all heads straight down. The result is the same flat overhead light as recessed fixtures, without the clean aesthetic. Each head should point at a work surface — countertop, sink, island — at roughly 30 to 45 degrees from vertical. Mix flood heads with a 60-degree beam over large counter expanses with spot heads at 25 degrees for specific task points. Overlapping coverage along any single work zone ensures no one failed head creates a shadow that interrupts work.
9. Wall Sconces as Kitchen Accent Lighting: Ideas for Unexpected Warmth
The kitchen wall is almost always overlooked as a lighting plane. Most kitchen fixtures live in the ceiling — pendants, recessed cans, track systems. A wall sconce does something no ceiling fixture can: it illuminates vertical surfaces from the side, catching the texture of backsplash tile, the profile of cabinet moulding, the grain of a wood range hood in ways that overhead light physically cannot produce.

This is why photographing a kitchen with natural daylight from a window looks more interesting than the same kitchen under artificial overhead light — the window’s lateral quality reveals texture and dimension that ceiling fixtures flatten. Wall sconces replicate this effect after dark.
Best Sconce Placements in a Kitchen
The most effective placements are consistently passed over. Flanking a range hood: two sconces above the hood line create a composed vignette from the kitchen’s most utilitarian feature. Framing a window over the sink: sconces at window height cast light toward the sink surface and create symmetry that reads as planned rather than accidental. Flanking a section of open shelving: the lateral light separates the objects from each other and from the wall — a simple shelf of ceramics suddenly reads as a still life.
Standard sconce height is 60 inches from the floor — eye level when standing, 24 inches above counter height. For renters avoiding a full electrical installation, plug-in sconces with cord covers allow wall mounting without touching the wiring. The cord runs inside a paintable PVC channel to a nearby outlet. Near the sink, verify the fixture is labelled “damp rated” — protection against cooking steam, which is all that’s needed here.
10. The Three-Layer Lighting Plan Every Kitchen Actually Needs
The single most impactful kitchen light idea on this list costs nothing to understand and nothing to implement immediately: your kitchen needs three independent lighting layers, each on its own dimmer circuit, each controlled separately. If you do nothing else, add dimmers. The infrastructure change enables every other improvement.
The three layers: ambient (general fill light that makes the room safe and welcoming), task (direct, focused light on work surfaces — the layer that prevents accidents), and accent (anything that adds depth or draws the eye — uplighting, toe-kick, lit shelving). Most kitchens have ambient. Some have task. Almost none have accent, which is why they feel finished but not designed.
Every layer needs its own circuit. Ambient on one dimmer, island pendants on another, under-cabinet strips on a third, accent elements on a fourth. This is what Scandinavian kitchen lighting design consistently gets right — not the particular fixtures, but the intentional separation of lighting functions. Without independent control, you can’t transition from cooking mode to dinner mode without rewiring.
Dimmer compatibility matters. Use dimmable LED bulbs rated 3000K to 3500K for warm light that stays warm when dimmed. Cheap LEDs flicker below 30 percent or shift colour — both are signs of poor driver electronics. A Lutron Pico 4-button remote programmed with four scenes — “Cook”, “Dinner”, “Clean”, “Night” — gives full control in a single press, mounted anywhere in the kitchen.
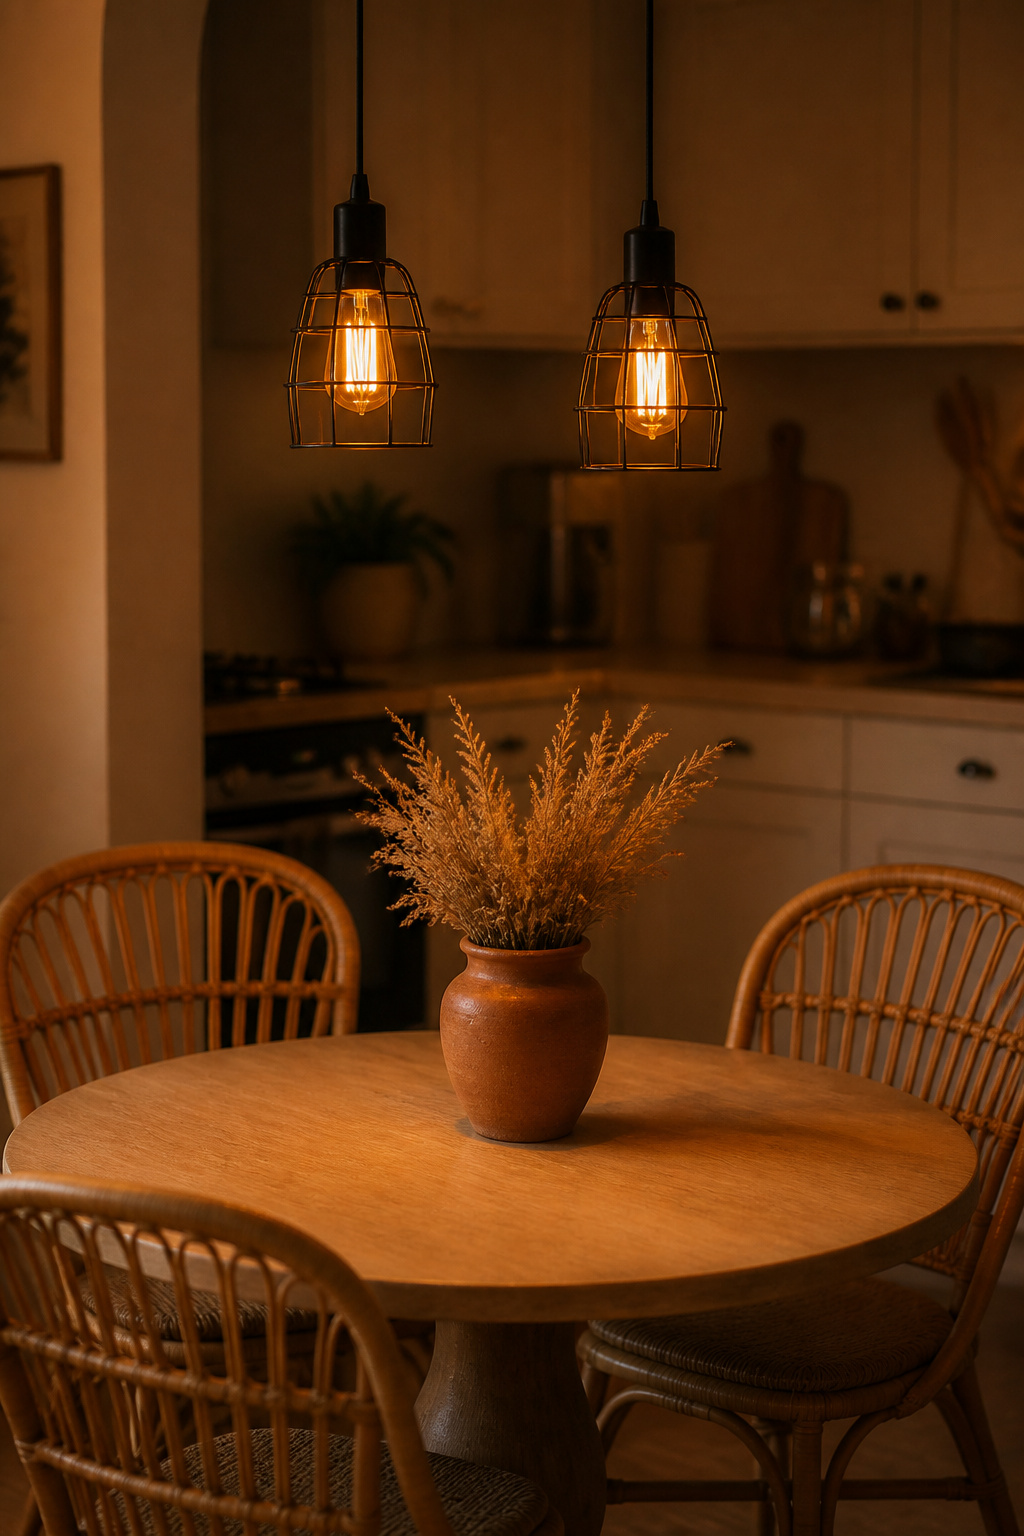
11. Industrial Exposed Filament Pendants for a Raw, Grounded Look
Industrial pendant lighting belongs in a wider range of kitchens than its reputation suggests. The association with exposed brick lofts and concrete floors has kept it out of compatible spaces — kitchens with marble counters, white cabinets, warm wood — where the contrast between raw metal fixtures and polished surfaces creates the kind of material tension that makes a room feel alive.
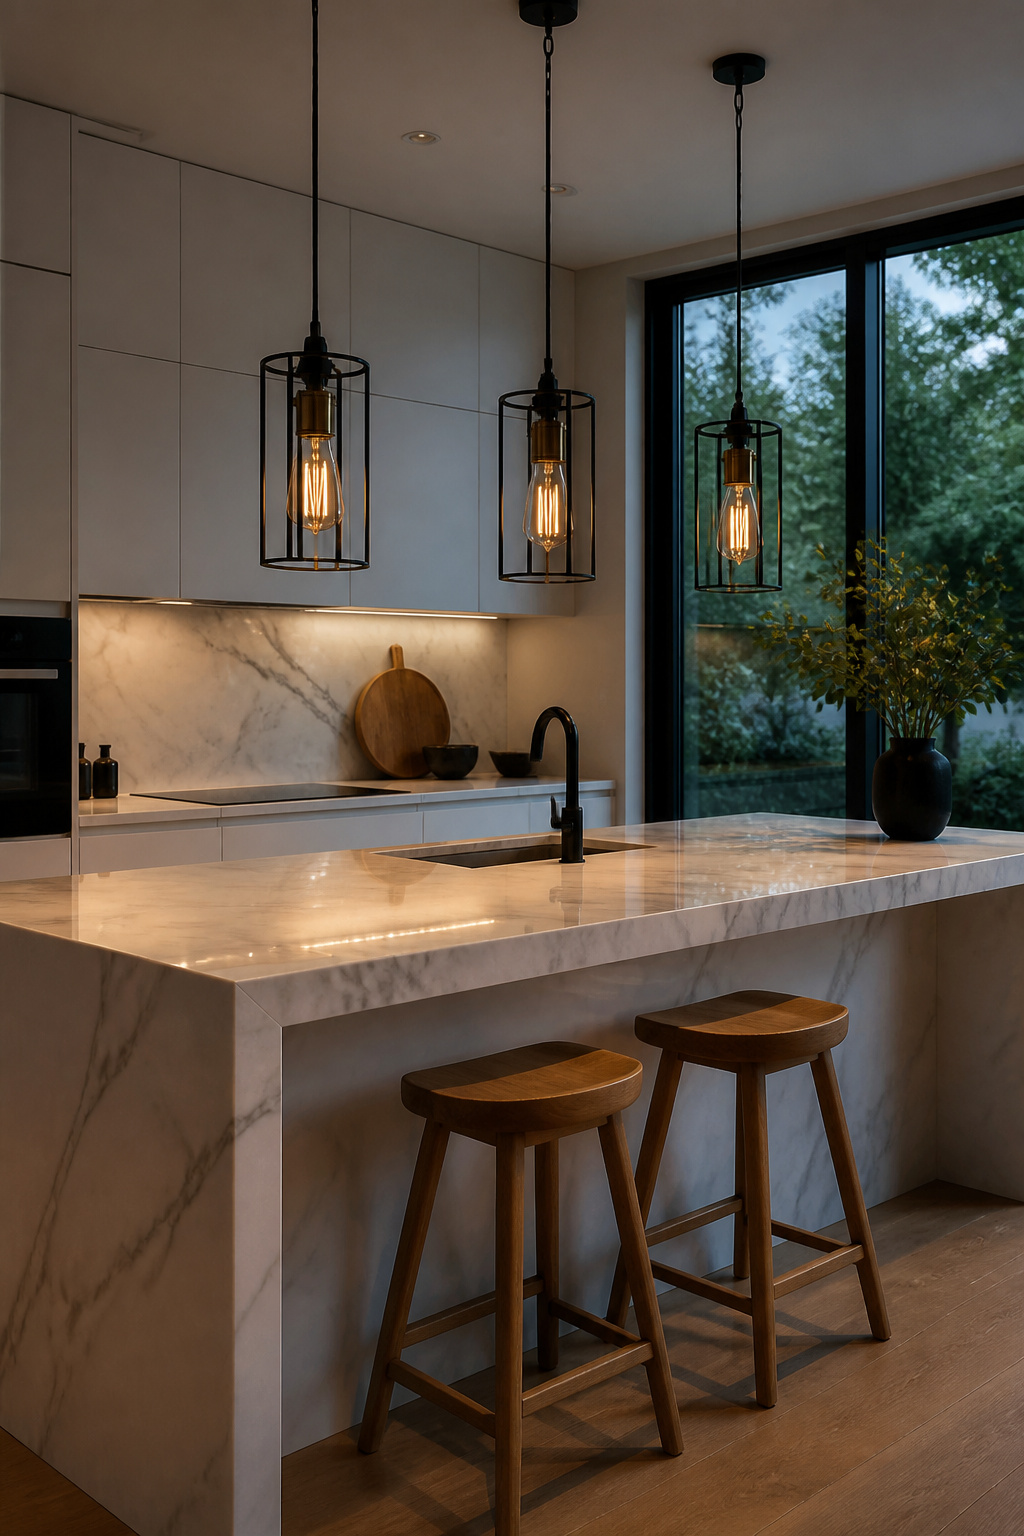
The key is the filament. A black iron cage pendant holds visual warmth because the Edison bulb inside glows amber — the coldness of the metal frame and the warmth of the bulb create a contrast that reads as considered. At 2200K, the light softens the fixture’s harder edges without losing the raw quality worth choosing in the first place.
Materials and Matching
Cage pendants — the Lioren by Residence Supply being the reference point, available in aged brass, matte black, and raw steel — expose the bulb fully. Wire mesh shades diffuse the bulb slightly while maintaining industrial texture and balance better over softer kitchen finishes. Pipe fitting pendants are the most raw expression, suited to kitchens with concrete counters or exposed brick where maximum unfinished material is the point.
The trend in 2025 is material mixing: black iron cage pendants over white quartz countertops and marble backsplashes, aged brass cage lights against sage green painted cabinets. The contrast is doing the work. What to avoid: pairing industrial pendants with stainless steel appliances and grey concrete counters simultaneously. Without a warm material offset somewhere in the room, the kitchen loses all sense of domesticity.
12. Toe-Kick Lighting: The Kitchen Light Idea Most People Never Try
At the base of most kitchen cabinets there’s a shallow recess — the toe-kick — that serves the sole function of letting your feet approach the counter without hitting the cabinet base. That recess is also the least-used kitchen light idea available, and using it creates an effect worth the effort: the perception that your cabinet boxes are floating.
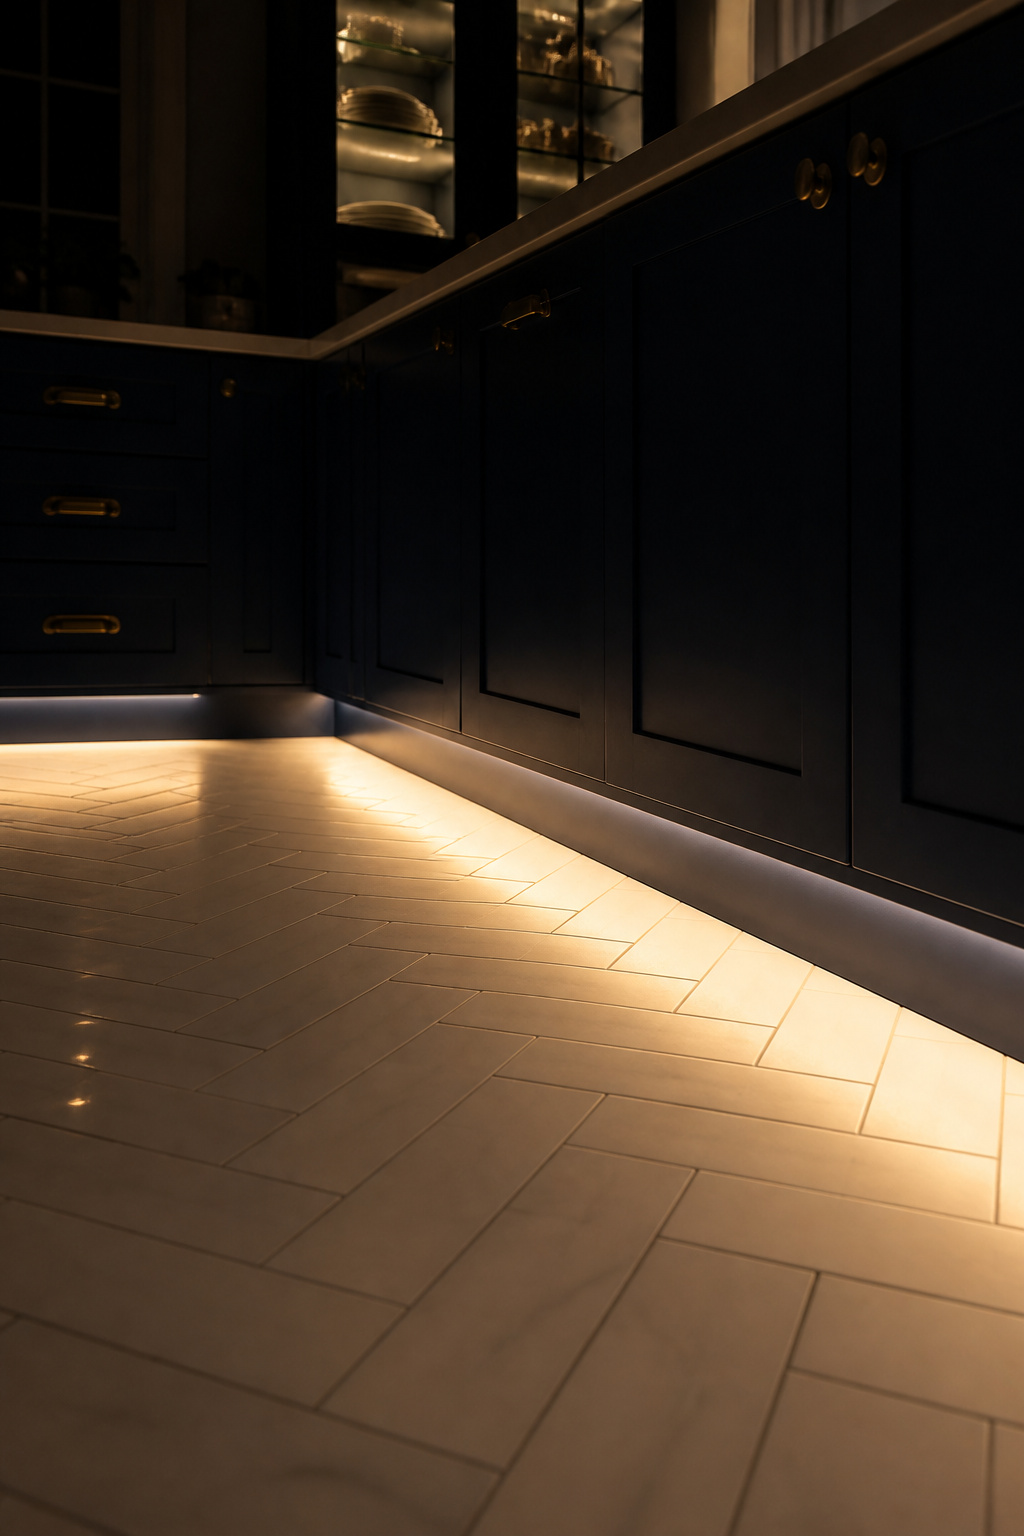
When light sources sit at floor level, the eye interprets the space between the floor and the cabinet base as illuminated and therefore unoccupied by solid material. The cabinet appears to hover. In dark kitchens or rooms where dark cabinets and dark floors would otherwise merge, this separation can make the space feel substantially larger.
Installation and Colour Temperature
The technical installation is accessible for anyone comfortable with basic electrical work. LED tape is mounted in an aluminium channel inside the toe-kick recess, positioned 2 to 4 inches from the floor and oriented to project light forward and down onto the floor surface. The tape itself isn’t visible — only the light pool is. For residential kitchens, 4 to 6 watts per metre is sufficient. IP20-rated tape is adequate unless the kitchen floods regularly.
Colour temperature: 2700K, no exceptions for this application. Cool white at floor level looks clinical — the blue-tinted pool reads as institutional rather than domestic. Warm white at floor level creates the impression of a soft glow from beneath the cabinets, which is exactly what it is. If under-cabinet strips are at 2700K, matching the toe-kick temperature exactly prevents the fractured feel of two different temperatures at different heights. Also critical: give toe-kick lighting its own separate dimmer circuit. The full value of this kitchen light idea is running it at full brightness while overhead lights are dimmed to near-zero — sharing a dimmer defeats the effect entirely.
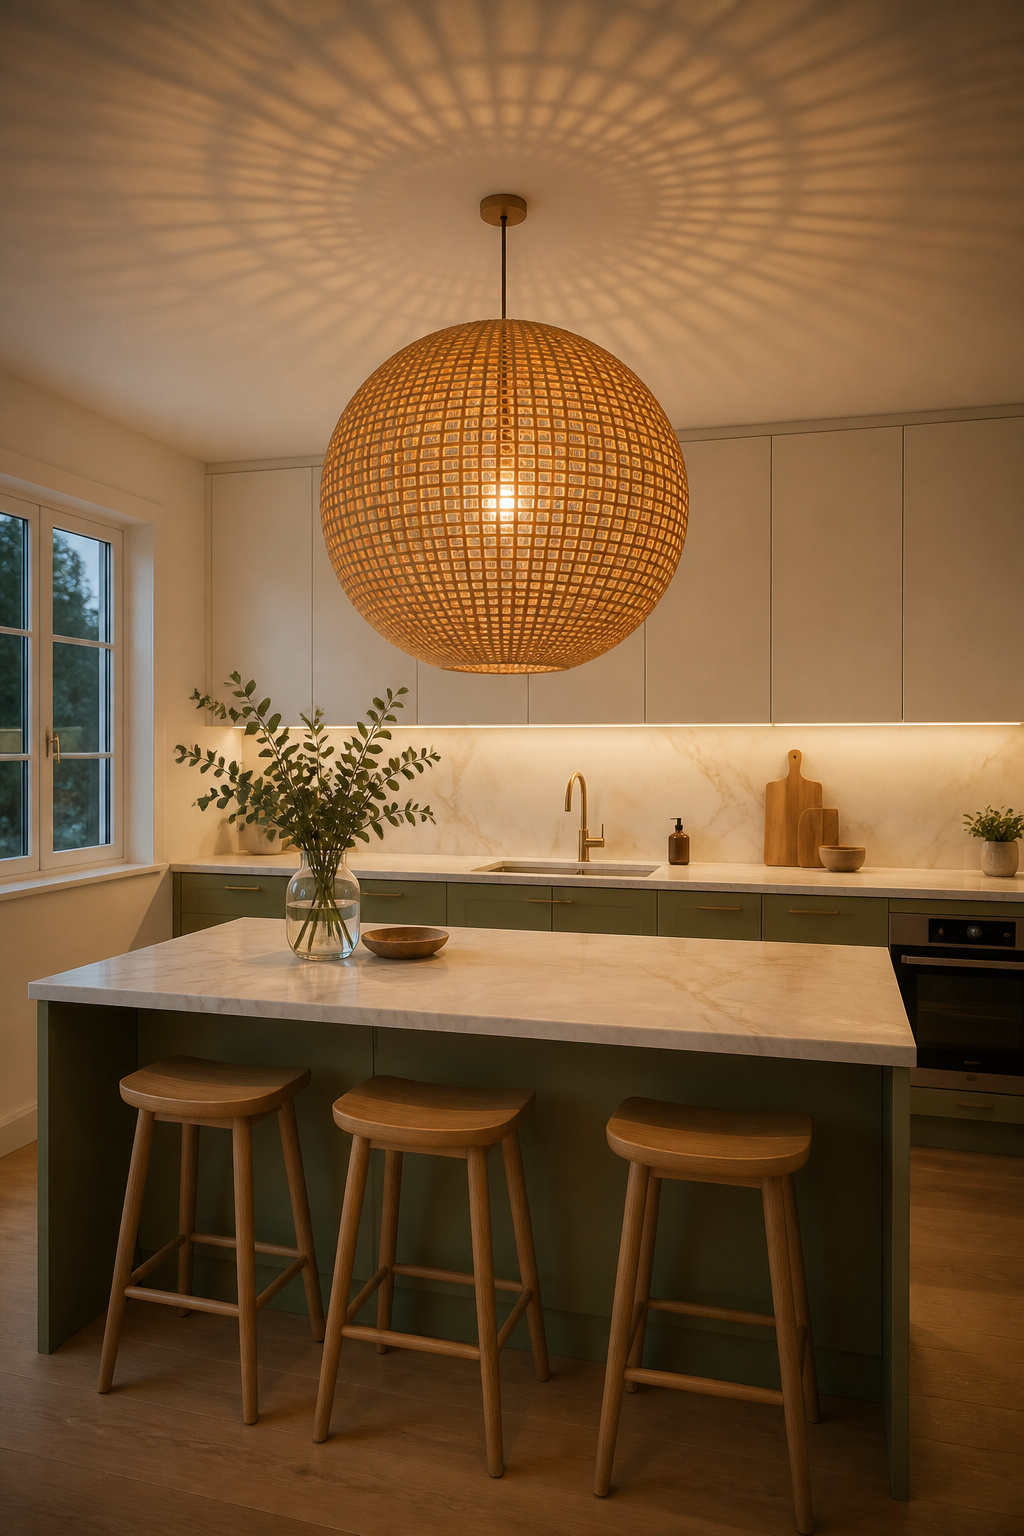
13. Lantern Pendants Over the Eat-In Table for Relaxed Evening Light
Not every kitchen pendant needs to be architectural or minimal. In a kitchen with an eat-in area — whether a proper dining table or a breakfast nook — a lantern-style pendant does something that a more refined fixture can’t: it carries an emotional quality that makes the space feel like somewhere people want to sit rather than somewhere they happen to eat.
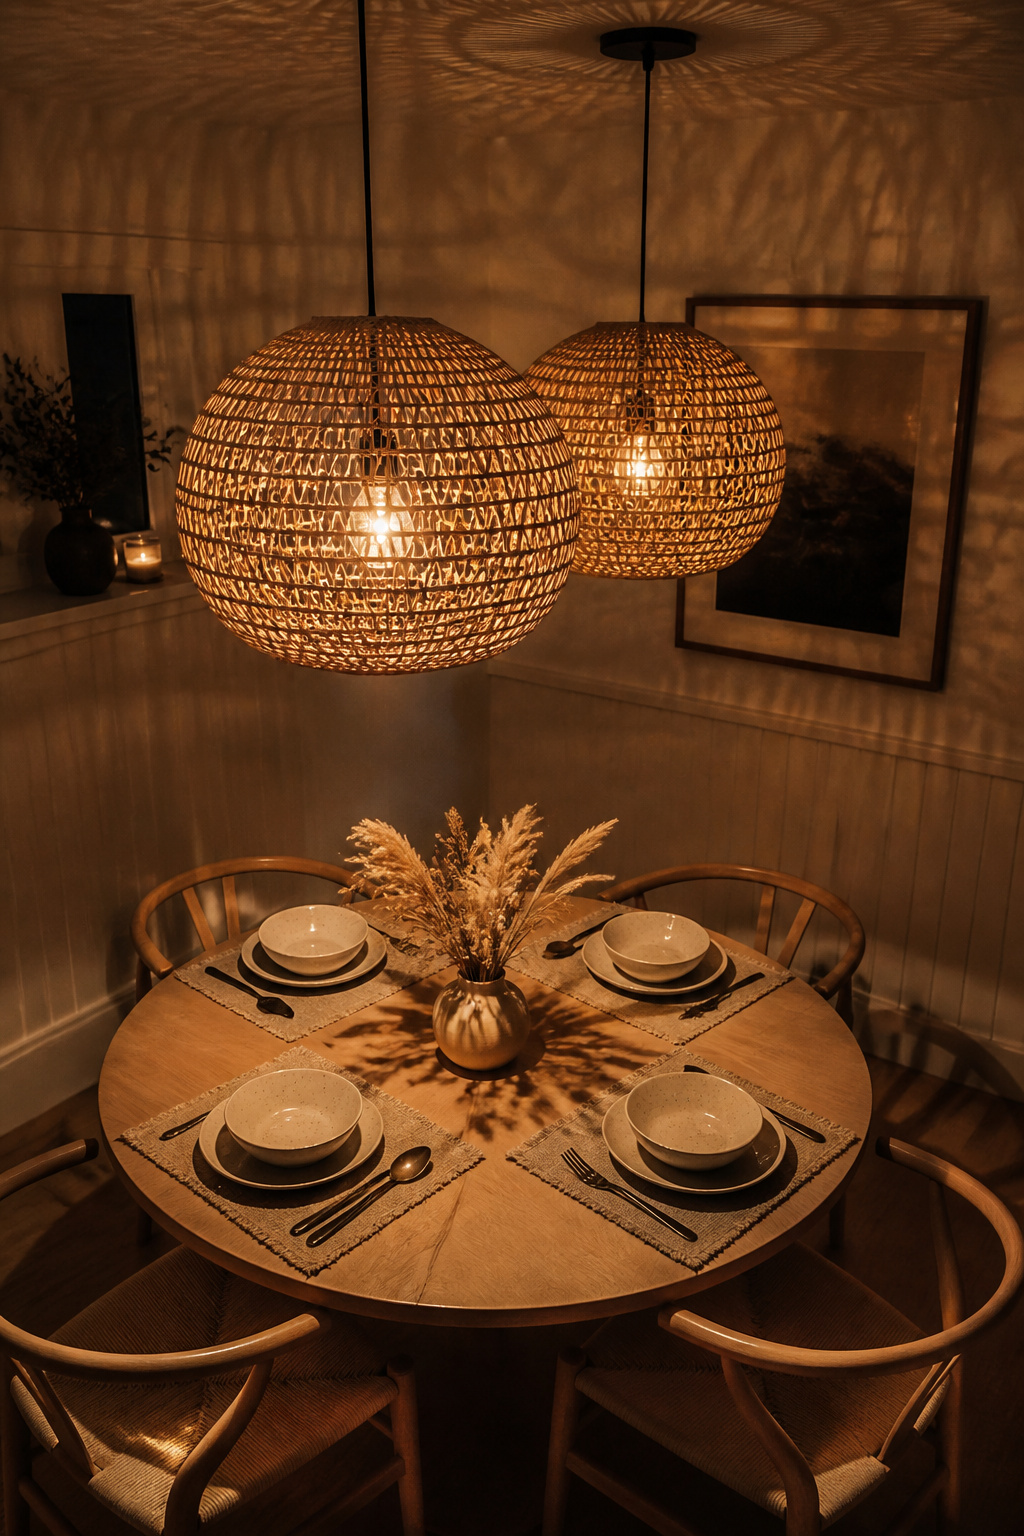
Lanterns work because their enclosed sides scatter light in every direction rather than focusing it downward. The result is an ambient glow rather than a task spot — flattering to people’s faces, warm across the table surface, comfortable to eat beneath. Rattan adds texture to the ceiling shadow play: the woven pattern throws a gentle dappled pattern when lit, which is atmosphere at no additional effort.
Sizing for a Dining Area
Material guidance: rattan pairs with wood, linen, ceramics, and organic surfaces. Black iron lanterns read more formally and pair well with white walls. Seeded glass — with its air-bubble imperfections — creates soft, slightly imperfect diffusion that suits both farmhouse and transitional kitchens. For sourcing: Serena & Lily’s rattan options are the reference standard; World Market carries accessible alternatives at lower price points.
Sizing follows the table: pendant diameter (or total span of a lantern grouping) should be 1/2 to 2/3 of the table width. For a 36-inch round table, a single 18 to 24-inch lantern is correct. For a 60-inch rectangular table, two or three pendants spaced 24 to 30 inches apart and spanning no more than 75 percent of the table length. Hanging height: 30 to 36 inches above the table — which positions the fixture lower in the room than an island pendant at the same measurement, since dining tables sit lower than countertops.
14. Shoji-Inspired Diffused Panels for a Calm Kitchen Glow
In Japanese design philosophy, light is not something you generate and aim. It’s a material — shaped, filtered, and modulated like any other element. The shoji screen exists precisely to perform this modulation: light passes through washi paper diffused in every direction simultaneously, eliminating harsh contrast between the bright source and the shadowed areas beyond. The room glows rather than being lit. As kitchen light ideas go, this is the most considered of the fifteen.
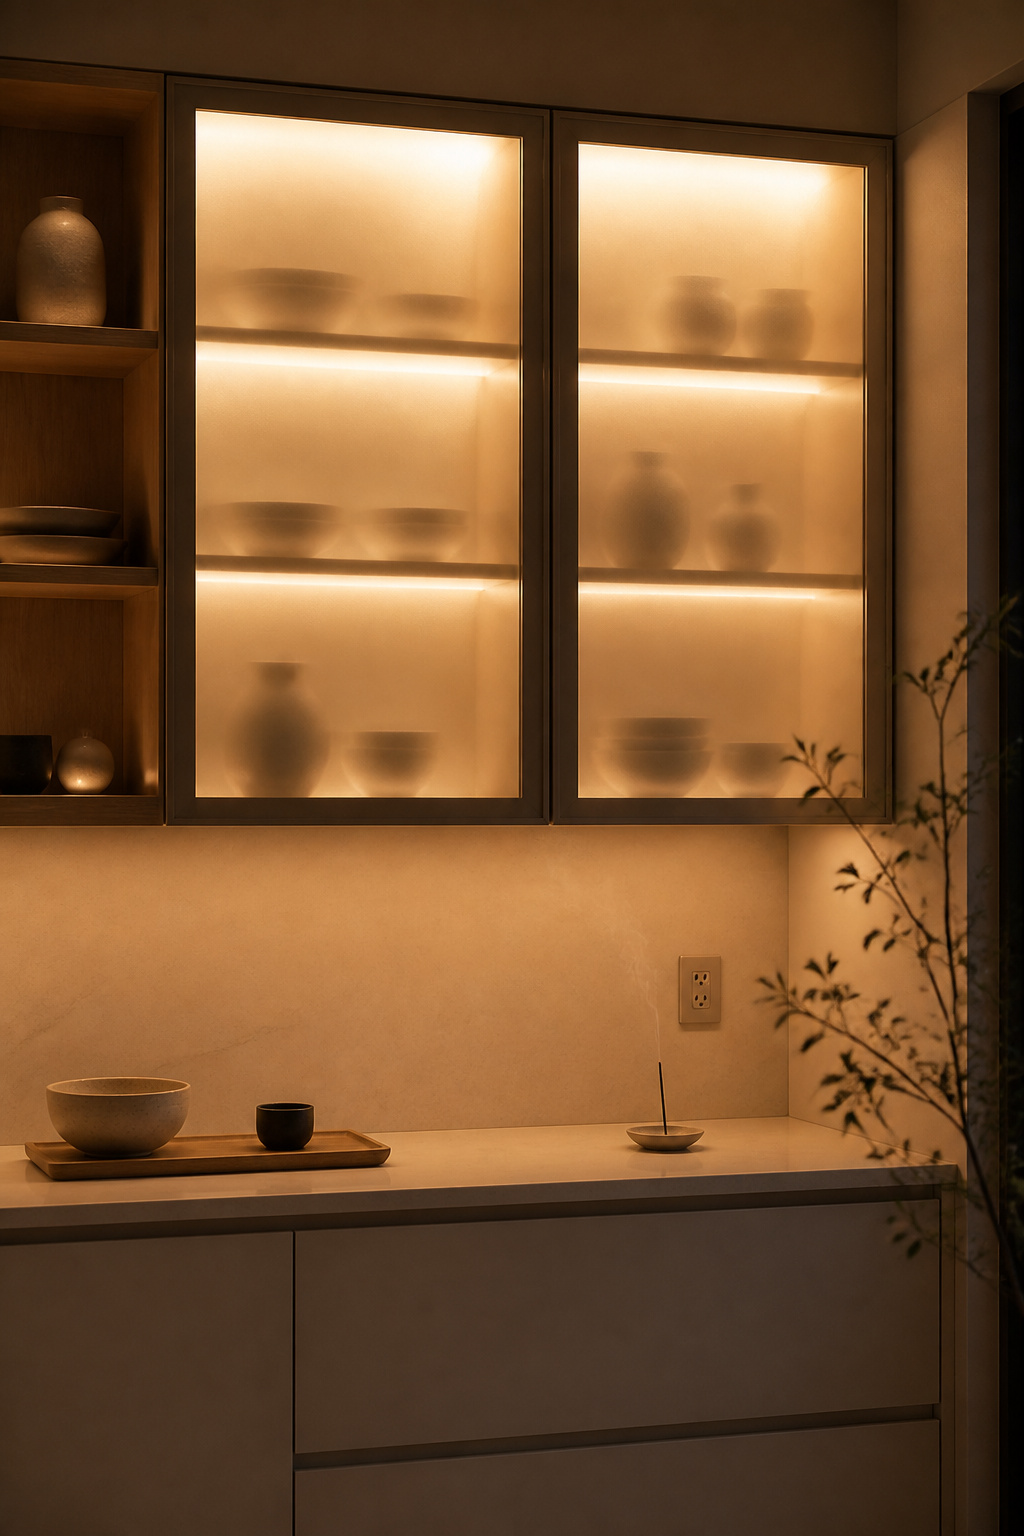
Applied to kitchens, this principle translates most readily through glass-front upper cabinets with interior LED strips. Replace solid cabinet doors with frosted tempered glass, add a LED strip at the top or bottom of the cabinet interior, and the cabinet becomes a light source rather than a storage box. The shelf content is visible but softened; the cabinet reads as a glowing element in the room’s composition. IKEA’s METOD frames with frosted glass doors and an OMLOPP interior strip make this accessible without custom work. For colour temperature inside the cabinet: 2700K, matching every other source in the room. The most common error — and the one that ruins the effect most visibly — is using a cool 4000K or higher strip. The result is a blue-white glow that reads as a commercial refrigerator.
For a more authentic shoji application, frosted acrylic panels (specifically “opal acrylic” or LED diffuser acrylic) can be cut to size and fitted in existing cabinet door frames. This material distributes point-source LEDs evenly across its surface, preventing individual chips from showing through the panel. This is the one modern kitchen lighting to elevate your space technique that addresses the quality of light before its quantity. Everything else makes the kitchen brighter. This makes it more considered.
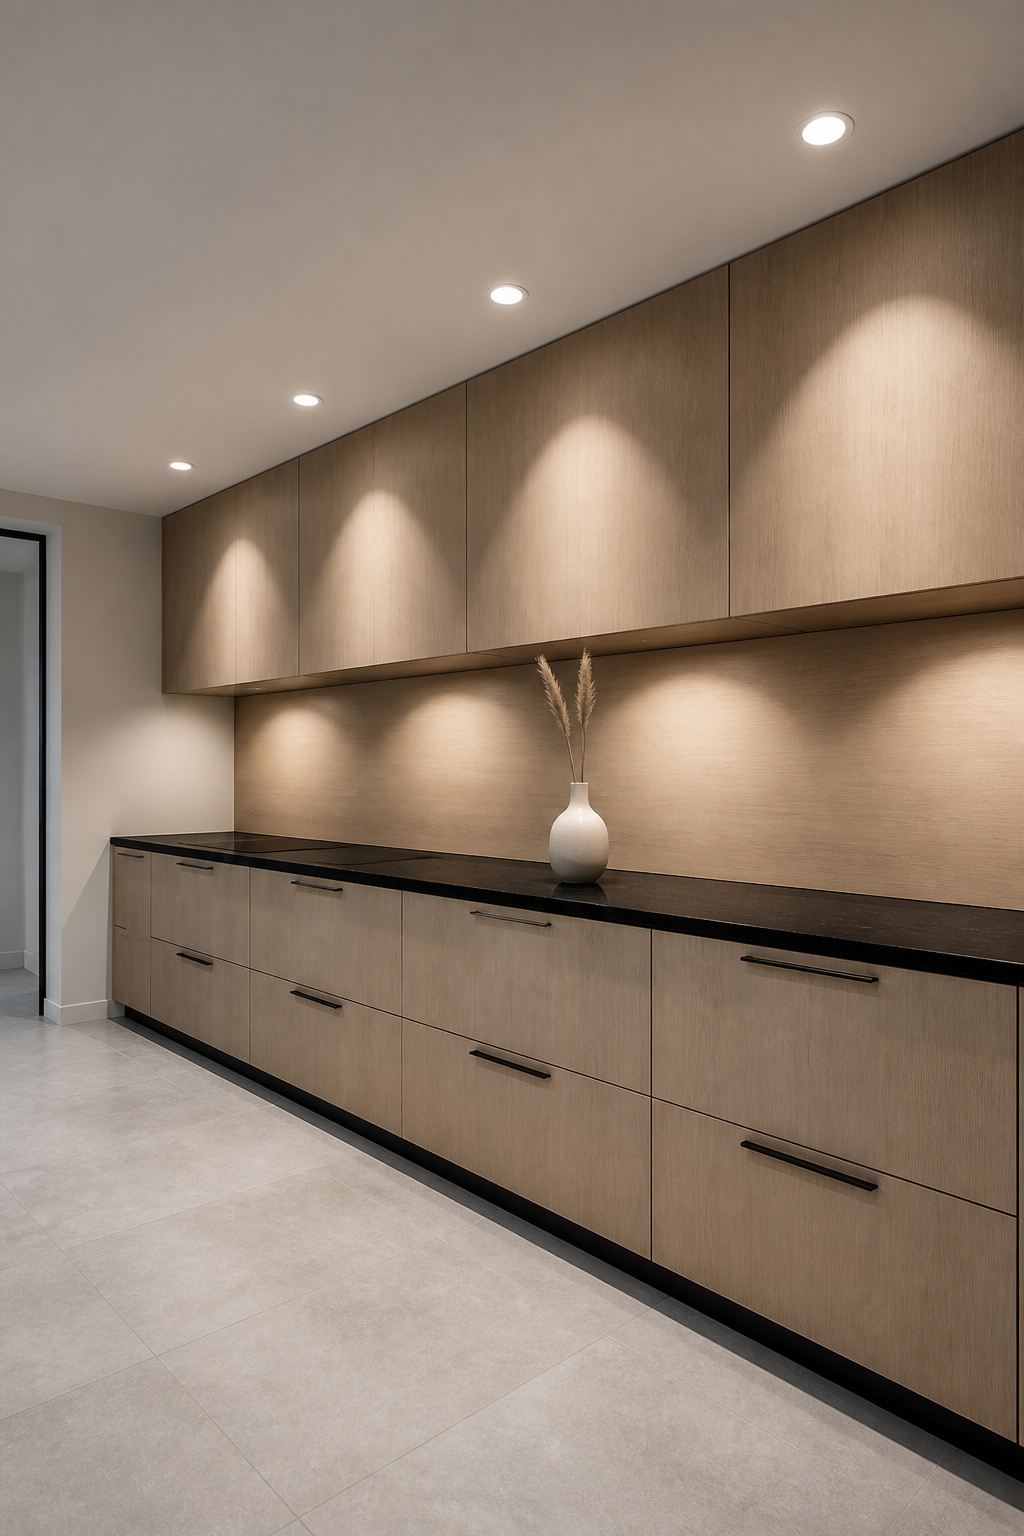
15. Above-Cabinet Uplighting for Depth and Architectural Presence
The ceiling in most kitchens is a white plane that does nothing. Above-cabinet uplighting changes that at minimal cost: LED tape placed on top of upper cabinets, set back 2 to 4 inches from the back wall, casts a gradient of warm light upward onto the wall behind the cabinets and across the ceiling. The upper half of the room becomes the room’s largest accent surface.
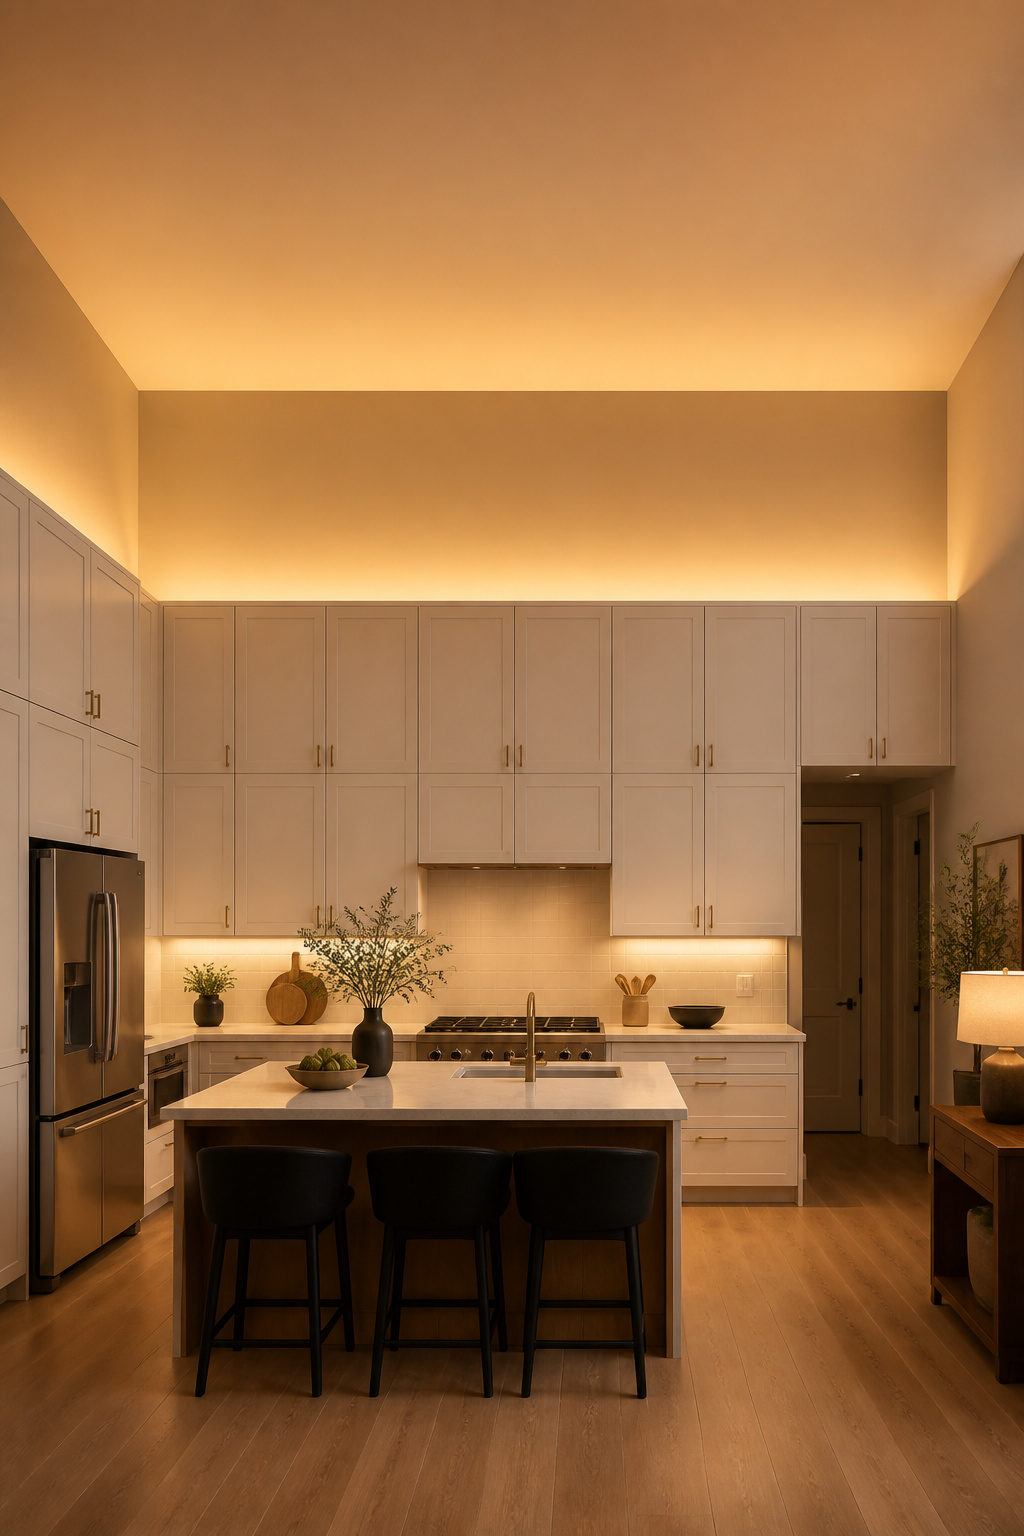
The positioning detail that determines whether this works: the setback from the wall. LED tape placed flush against the back wall illuminates the wall directly and the tape is visible from normal kitchen positions. Tape set back 2 to 4 inches allows the light to diffuse naturally as it travels upward, creating a soft gradient brightest near the cabinet top and fading toward the ceiling center. From a standard viewing position, the light source is invisible.
Specifications and Placement
Wattage: 4 to 8 watts per metre is correct for residential above-cabinet lighting. This isn’t task lighting and doesn’t need to be bright — the effect depends on the gradient, not the output level. Too bright looks commercial; at the right level, it looks like a shadow that happens to glow. Colour temperature: 2700K, the warmest element in the kitchen’s lighting stack, since this layer is purely atmospheric.
Minimum ceiling height for this technique to work correctly: 9 feet. At 8 feet, the halo runs out of ceiling to graduate across and produces a bright line at the cabinet top rather than a gradient. At 10 feet or above, the effect is pronounced enough to become the room’s defining feature after dark. In 2025, integrated lighting built directly into cabinets with no visible hardware has become the leading kitchen lighting trend — above-cabinet uplighting is the original version of that idea, executed with a reel of LED tape and an aluminium channel.
Finding Your Perfect Kitchen Lighting Ideas: A Practical Guide
The most expensive kitchen lighting mistake isn’t choosing a fixture that costs too much. It’s choosing fixtures before understanding the room. Before ordering anything, walk through the kitchen at three different times of day — morning, midday, and evening — and note where shadows fall during the tasks you actually do. Where is the prep counter in shadow during afternoon cooking? Where is the sink unlit after dark? These observations cost nothing and prevent decisions that cost a great deal to undo.
The lighting infrastructure is harder to change than the fixtures themselves. Conduit, junction boxes, dimmer circuits — these define what’s possible. The fixtures can be replaced in an afternoon. So invest more heavily in the electrical infrastructure and budget more conservatively on specific lights initially. A dimmer on every circuit, properly run, enables any fixture upgrade that follows. A beautiful pendant on an undimmed single switch is a beautiful pendant that does exactly one thing.
The combination that consistently outperforms its cost: under-cabinet LED strips and a single well-proportioned pendant over the island, both fitted with dimmers. These two kitchen light ideas — one layer of task light, one layer of atmospheric light, independently controlled — deliver more visible improvement than any other equal investment in kitchen lighting. Both are reversible. Both are accessible without professional help. And both fundamentally change how the kitchen feels at six in the morning and at ten at night, which is when kitchens actually earn their place in a home.


