The grain runs deep in the old timber. You can trace it with your fingers — the tight growth rings of a tree that stood for a century. That is what a rustic kitchen island is made from. That history fills a kitchen with warmth that no paint colour can replicate. I have spent years working with natural materials, and if there is one piece I return to again and again, it is the rustic kitchen island. It anchors the room. It holds the knife marks, the flour dust, and the memory of every Sunday morning. Choosing one is less about following a trend and more about deciding what you want your kitchen to accumulate over time. The fifteen ideas below cover the full range — reclaimed wood, repurposed furniture, live edge slabs, and the lighting that completes the picture.
1. Reclaimed Wood Rustic Kitchen Island with Butcher Block Top
There is something immediately legible about a reclaimed wood island. The nail holes, the saw marks, the colour variation between boards — all of it reads as history. That is exactly the quality a rustic kitchen island should project.
Old-growth reclaimed timber — Douglas fir, elm, or oak — is denser than modern equivalents because the trees grew slowly, producing tighter grain. That density makes the wood harder, more stable, and better at resisting daily kitchen use. Sources like Elmwood Reclaimed Timber (US) and Costwold Reclaim (UK) supply kiln-dried stock. A standard 36″ × 60″ island base uses roughly 25–30 square feet of panelling at $6–$12 per square foot.
Choosing and Caring for the Butcher Block Top
The butcher block top is where function and material meet. A John Boos walnut butcher block (4″ thick, edge-grain) costs $1,200–$1,600 for a standard island size. It will outlast most kitchen renovations with proper care. For a lighter tone, maple is the professional chef’s choice — harder (Janka 1,450), resistant to knife marks, and the material John Boos has used since 1887.
That said, the top needs consistent attention. Apply food-grade mineral oil monthly for the first year. It feels excessive, but end-grain wood absorbs oil like a sponge early on. That saturation prevents cracking over the next two decades. Boos Block Cream with beeswax ($16–$24) is a good follow-up once the wood is fully conditioned.
One practical note on sourcing: buy reclaimed wood at least six months before installation and store it inside your home. Wood adjusted to your home’s humidity level won’t warp or crack after the island is built. It is the detail most people skip, and the one most likely to save an expensive repair later.
A 2022 Houzz Kitchen Trends Study found butcher block countertops in 18% of renovated kitchens, up from 11% in 2018. The material has moved from niche to mainstream without losing its appeal.
2. Painted Vintage Dresser Converted to Island
The logic here is straightforward: a solid wood dresser from the 1950s or 1960s is structurally stronger than most flat-pack kitchen islands costing twice the estate-sale price. So why not use it?
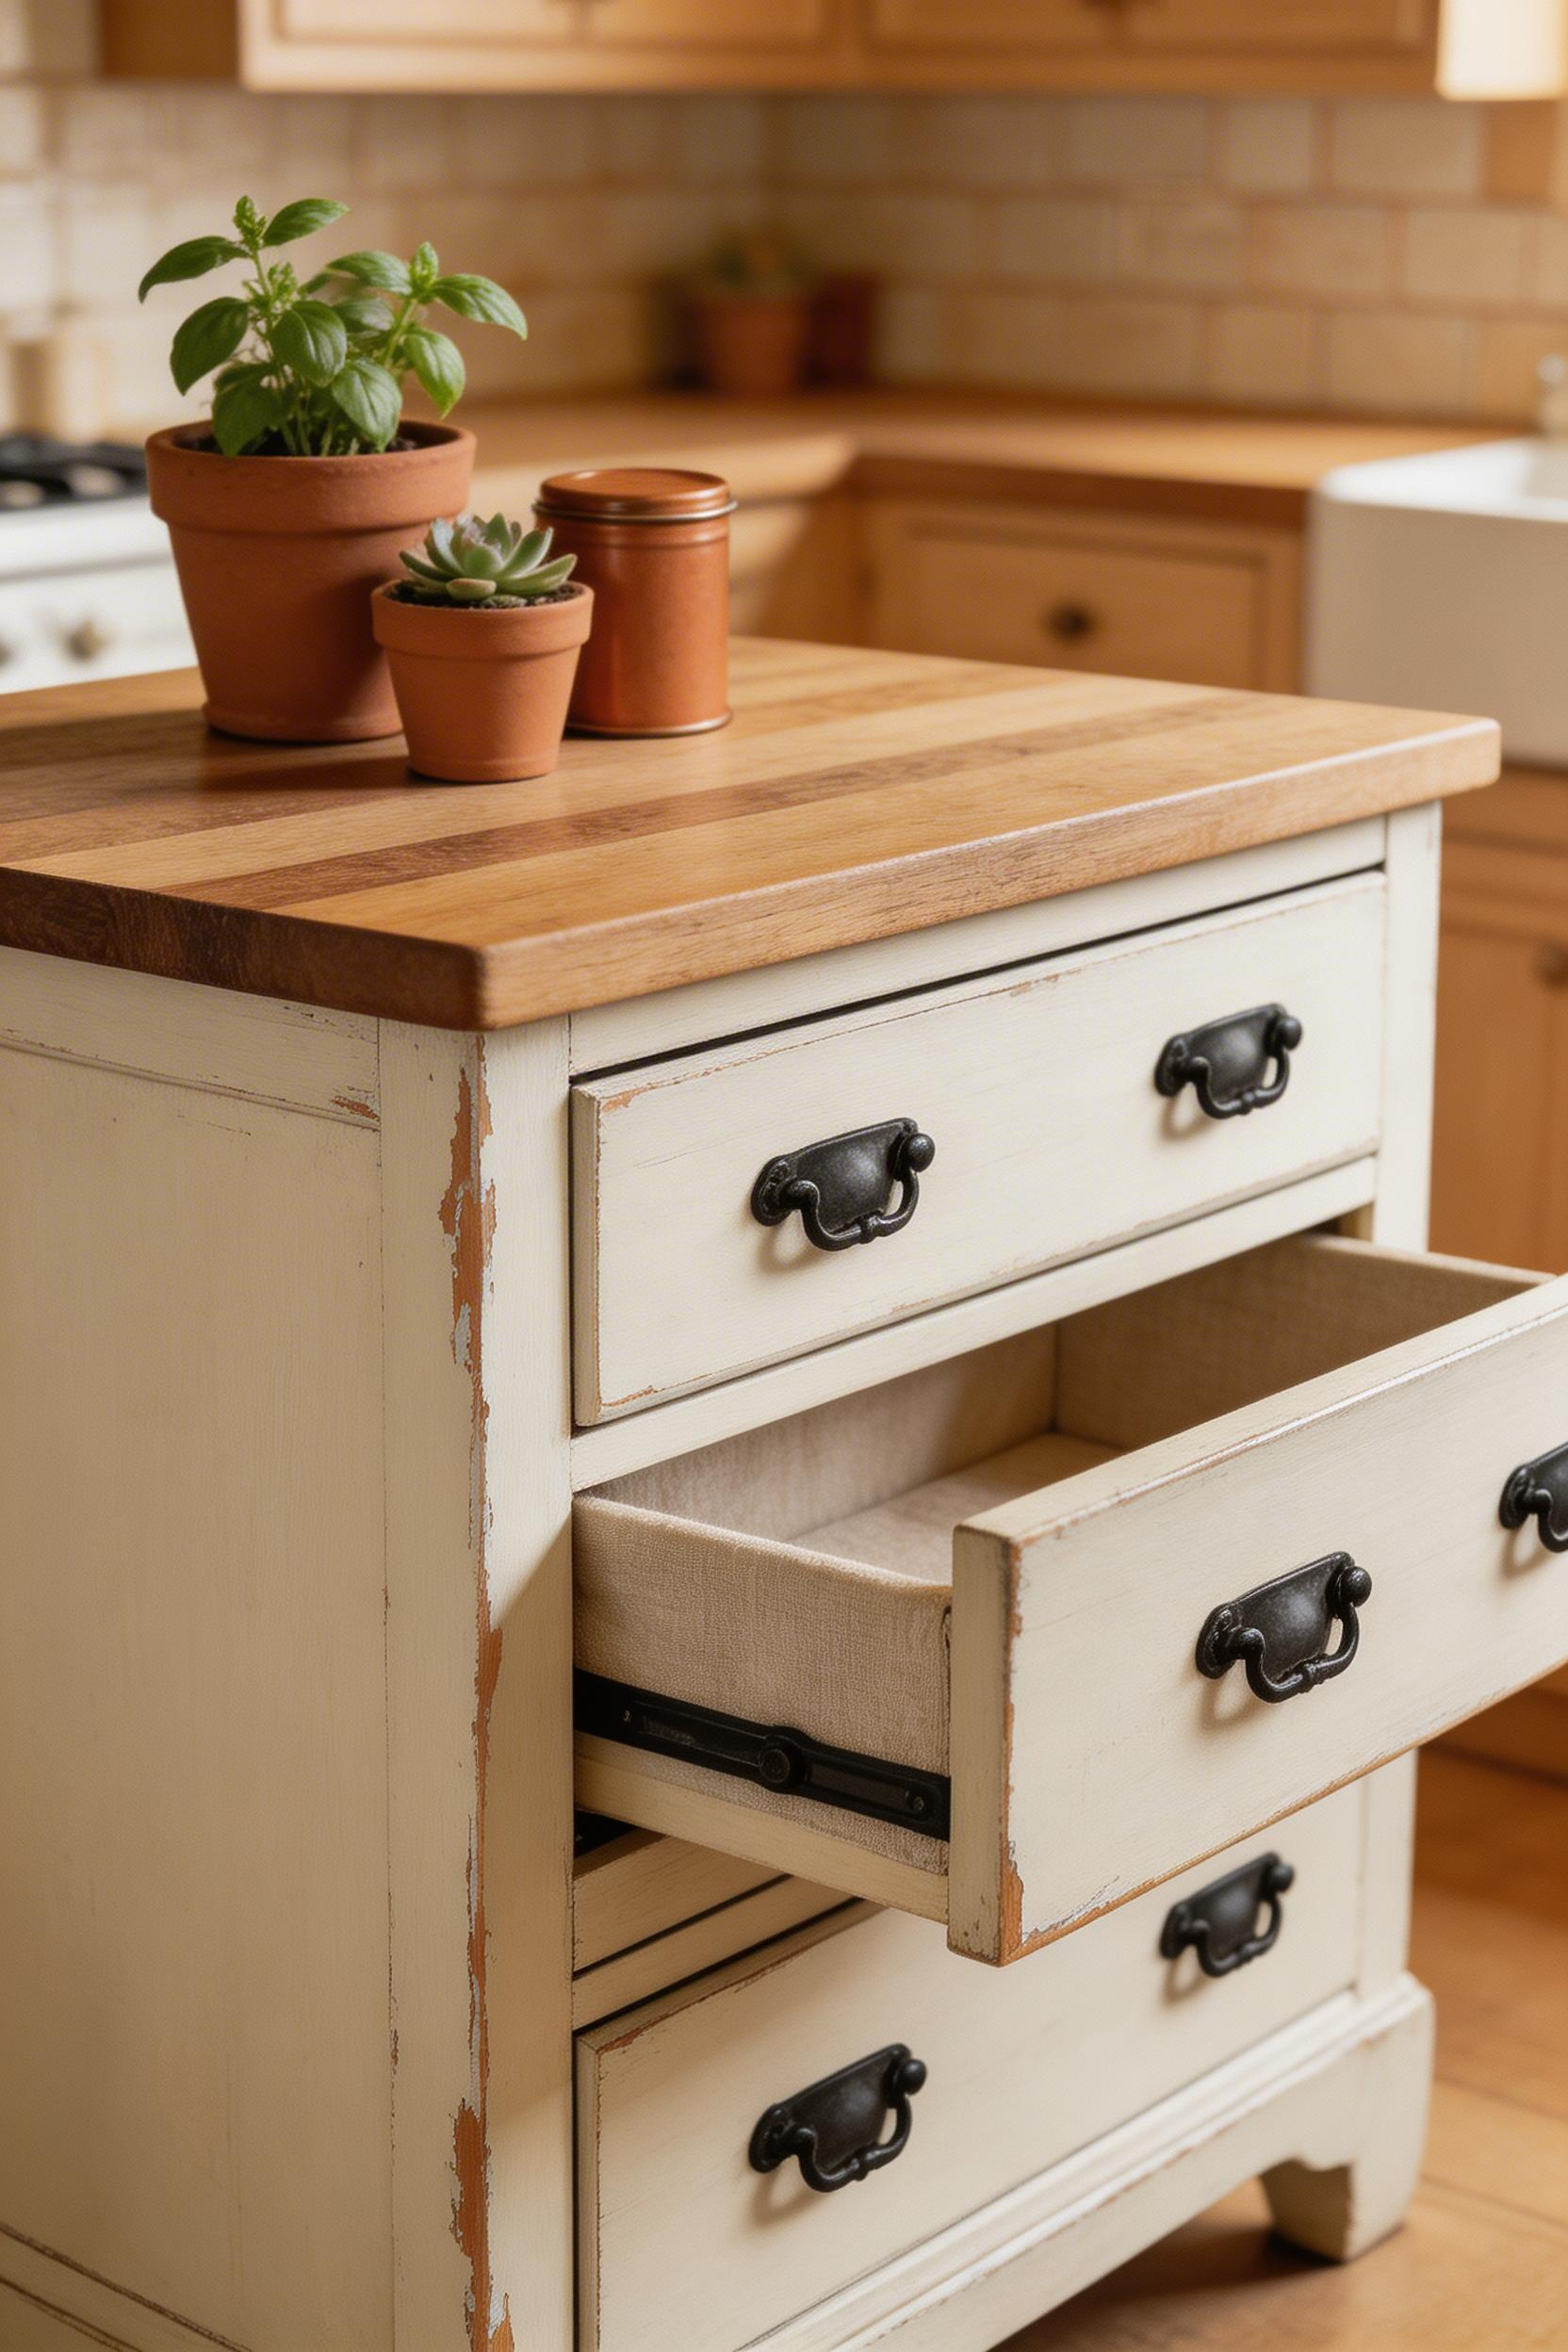
Solid wood dressers from that era — often available at estate sales for $50–$200 — have dovetailed drawer joints and construction that was never designed to fail. The key distinction is drawer box material. Open a drawer and look at the sides. Solid wood (3/4″ thick, visible grain) is what you want. Particleboard crumbles at the staple lines and won’t survive kitchen humidity. Only solid wood is worth the conversion effort.
The Conversion Process
The steps are manageable as a weekend project. Remove all hardware, clean and line the drawer interiors, and add a back panel if the dresser has an open back. Chalk paint — Annie Sloan Old White or French Linen ($45/quart) — adheres to most wood surfaces without priming. It gives the matte finish that reads as authentically aged. Apply two thin coats, then sand lightly at corners with 120-grit paper to create deliberate wear points.
For the top, an Ikea butcher block countertop (BADELUNDA or NUMERÄR, $120–$250) can be cut to the dresser’s width at a local millwork shop for under $40. Secure it from underneath with L-brackets and allow a 1.5″–2″ overhang on the seating side.
Hardware makes or breaks the conversion. Black iron bin pulls from Rejuvenation ($18–$28 each) or aged brass cup pulls from Anthropologie ground the white-painted piece. They prevent it reading as too precious. Also add 3″ locking plate casters to reach 34.5″ working height. This also gives the island mobility — useful for kitchen layouts that change seasonally.
Pinterest furniture upcycling searches increased 47% between 2020 and 2023. “Dresser to kitchen island” ranked consistently as one of the top five searched DIY kitchen conversions. The demand is real and the execution is proven.
3. Barn Wood Shiplap-Sided Island
Shiplap on an island side is one of the most cost-effective ways to bring rustic texture into a kitchen with a neutral base. Because it is applied as cladding rather than built as structure, it works on an existing island frame without a full renovation.
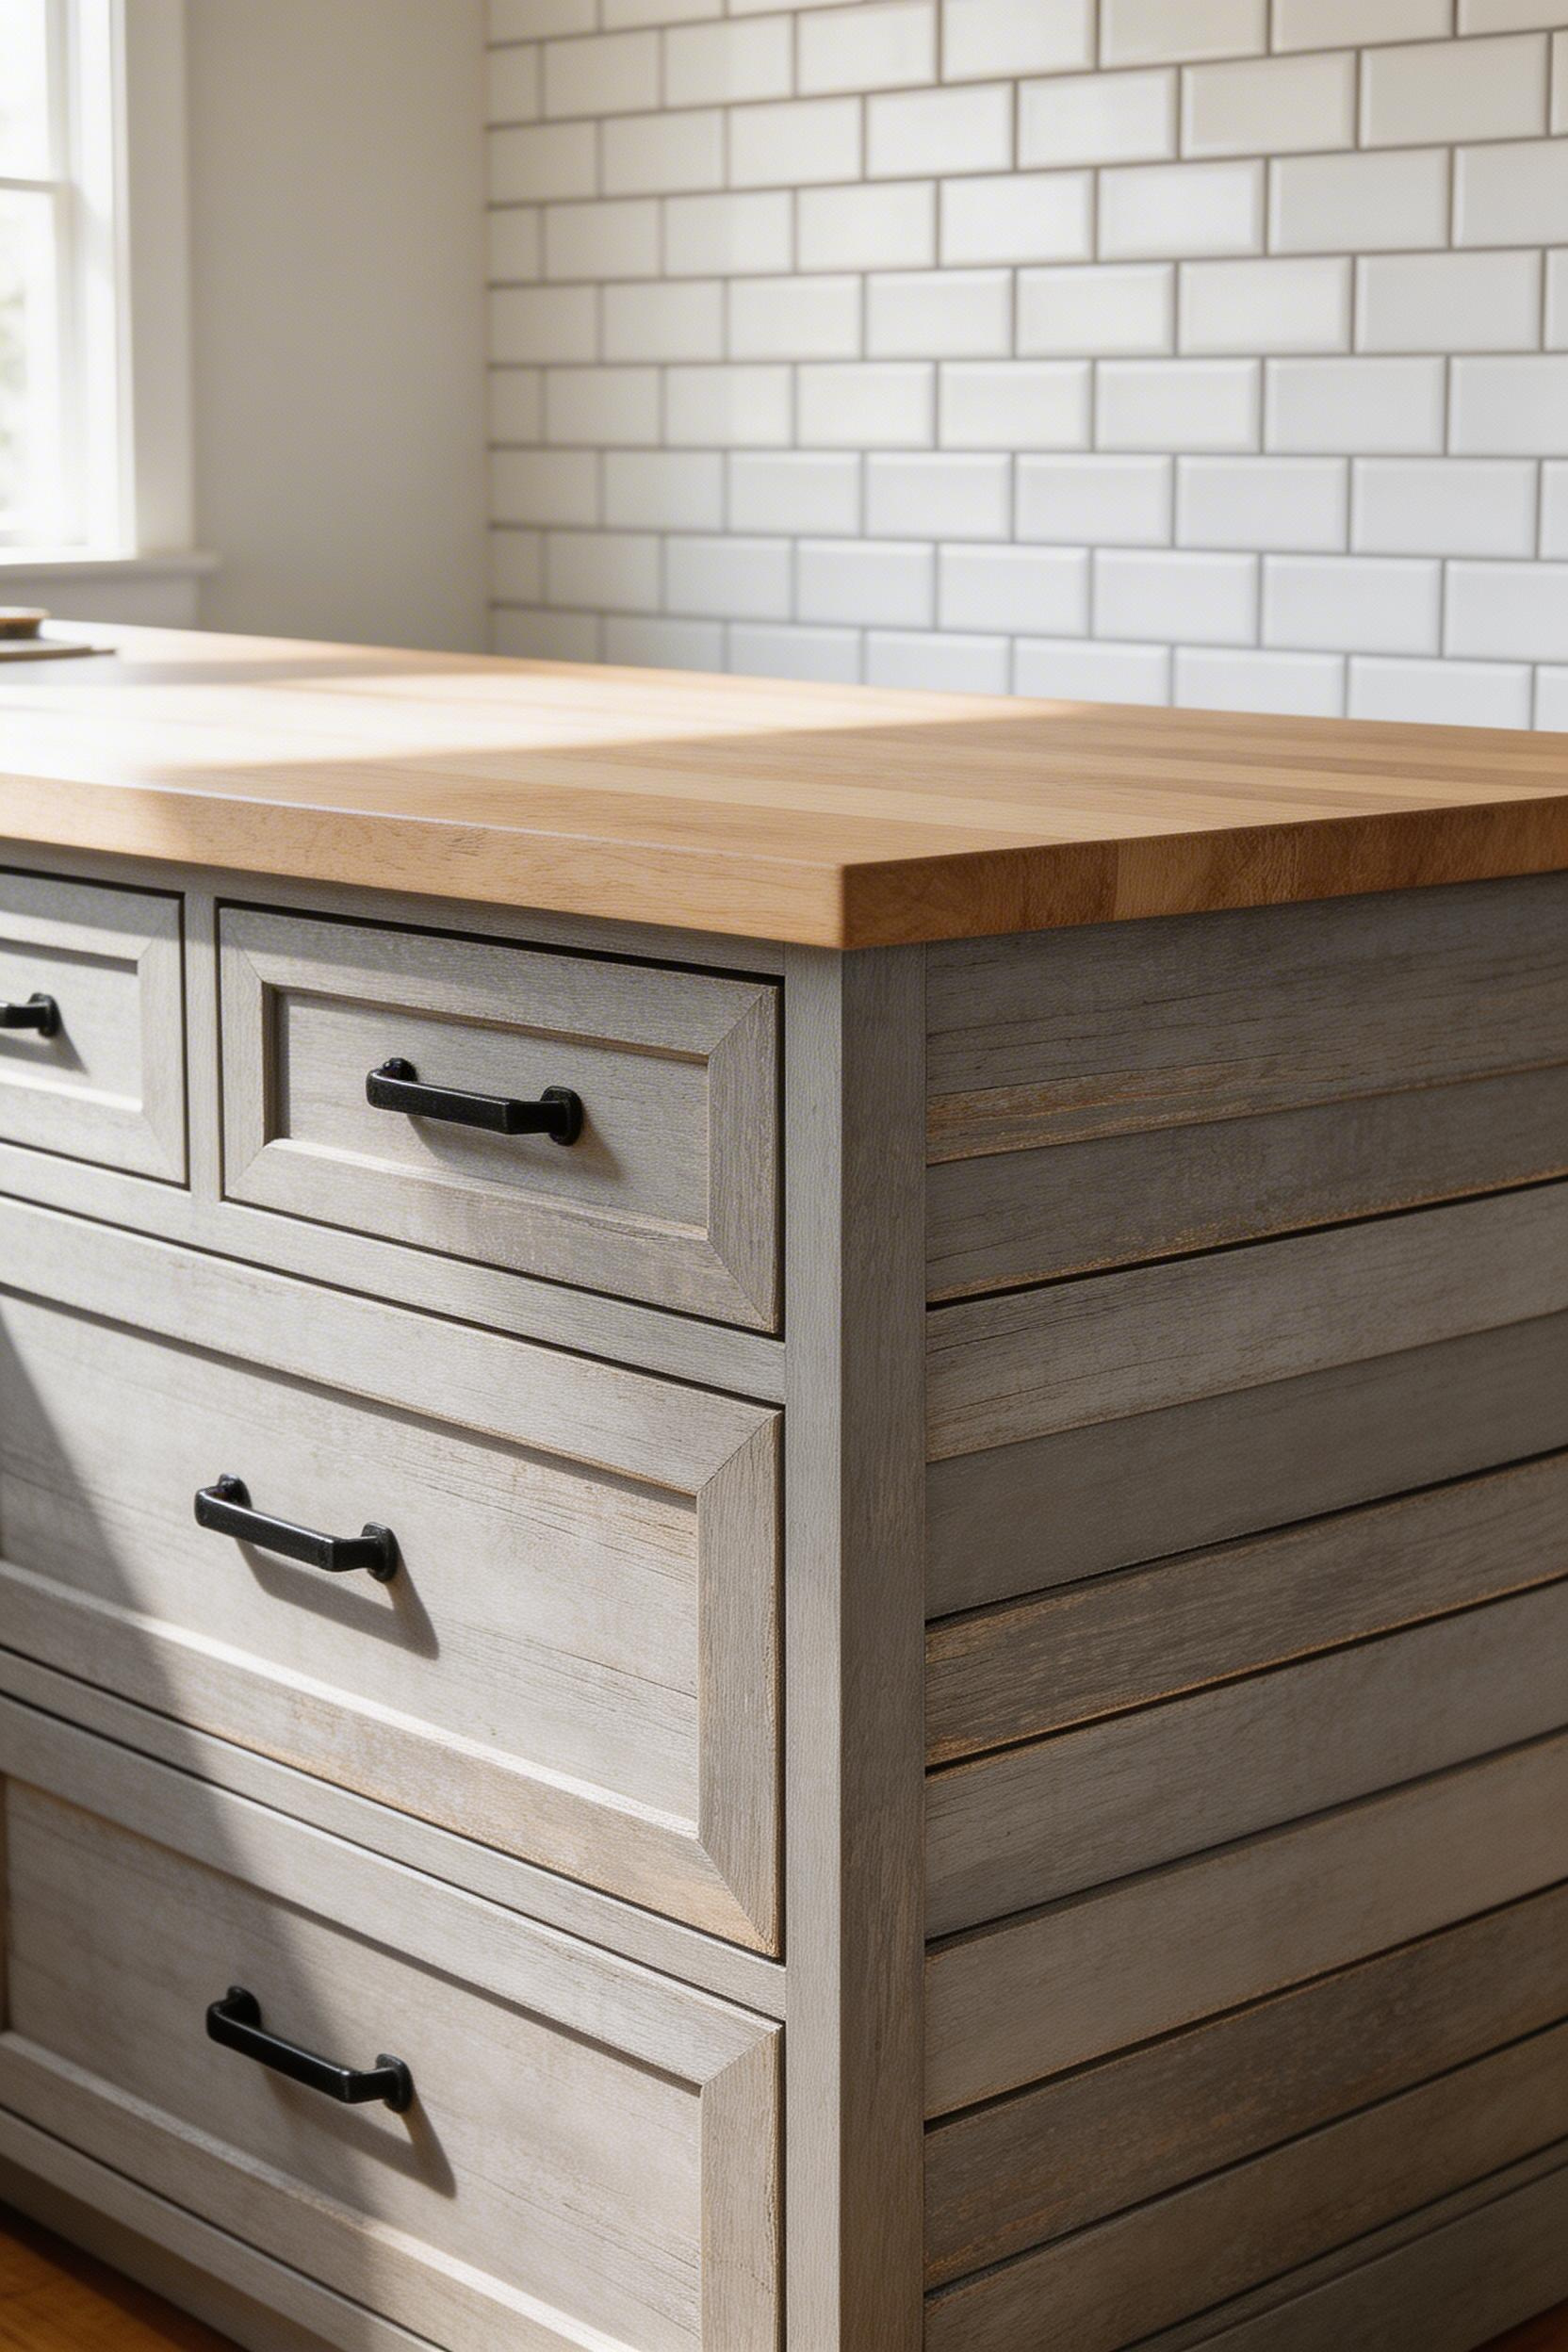
Shiplap boards have a rabbet joint cut into the top and bottom edge so each board slightly overlaps the one below. Originally, the overlap sealed against wind and rain in barn construction. For island cladding, the structural function is irrelevant. However, the visual effect remains — tight rows of overlapping boards read as intentional craft rather than flat panelling.
Applying Shiplap to an Existing Island
For a DIY application, attach horizontal shiplap planks to the island’s existing face panels using construction adhesive and 18-gauge 2″ finishing nails at 16″ intervals. The gap between boards should be 1/8″–3/16″ — enough to show definition without looking accidental. Apply the boards to a 3/8″ MDF substrate if the original surface is uneven.
For authentic salvage barnwood, Rustica House supplies real weathered stock at $8–$15 per square foot, pre-dried and ready to install. For a faster approach, Stikwood’s peel-and-stick weathered grey planks ($10–$14 per square foot) adhere directly to flat MDF island sides with no nailing required.
One sorting step that makes a real difference: before cutting, separate the planks by texture intensity. The most weathered pieces belong on the front face. That is the side you look at daily. Save the flatter planks for the side panels where they’re seen less. The result looks like careful curation rather than random application. For more ideas on building out this farmhouse approach, the farmhouse kitchen island guide covers the full range of styles in that tradition.
Seal the finished surface with Rubio Monocoat or Osmo Polyx — both penetrating oil finishes that protect wood without adding a shiny plastic layer that fights the rustic aesthetic.
4. Chunky Turned-Leg Freestanding Island
The turned-leg silhouette is one of the oldest in Western furniture — Victorian farmhouses, American Colonial kitchens, Shaker workbenches. It signals handcraft over mass production. On a kitchen island, it reads immediately as a piece of furniture rather than a built-in. That distinction matters if you want a rustic kitchen island with genuine character.
Pre-turned island legs are available from Osborne Wood Products, Van Dyke’s Restorers, and D. Lawless Hardware. A 3.5″ × 29″ pine turned leg from Osborne runs $22–$38 each — unfinished, so it can be painted, stained, or oiled to match the top. For islands up to 48″ long, four legs are sufficient. Longer islands need six. A cross-brace 2×4 apron stretcher between the legs adds lateral rigidity. It prevents the island from racking under prep use.
Getting the Proportion Right
Leg diameter matters more than height for visual proportion. A 3.5″ or 4″ diameter leg under a 3″ thick butcher block top reads as properly chunky. A 2.5″ leg under the same top looks spindly and wrong. The rule is that the leg should belong to the same visual weight class as the top — neither competing with it nor disappearing beneath it.
Ready-made options include Pottery Barn’s Benchwright Kitchen Island ($1,799–$2,899), built with pine turned legs and a butcher block top. It is one of their best-selling kitchen lines for good reason. However, building your own from purchased legs and a butcher block top costs $400–$700 and gives more control over dimensions and finish.
For finish, oiled pine ages well in kitchen environments. It darkens slightly over time and develops an honest patina that polished furniture never does. Paint is also a strong option — dark grey or black contrasts well with a lighter top.
5. Live Edge Slab Island Countertop
A live edge slab is a single piece of wood where the natural outer edge of the tree is preserved rather than milled away. The curves, bark indentations, and organic asymmetry stay. Each slab is unrepeatable. On a kitchen island, a live edge top is the one decision that elevates a functional piece into something that genuinely belongs to your kitchen and no other.
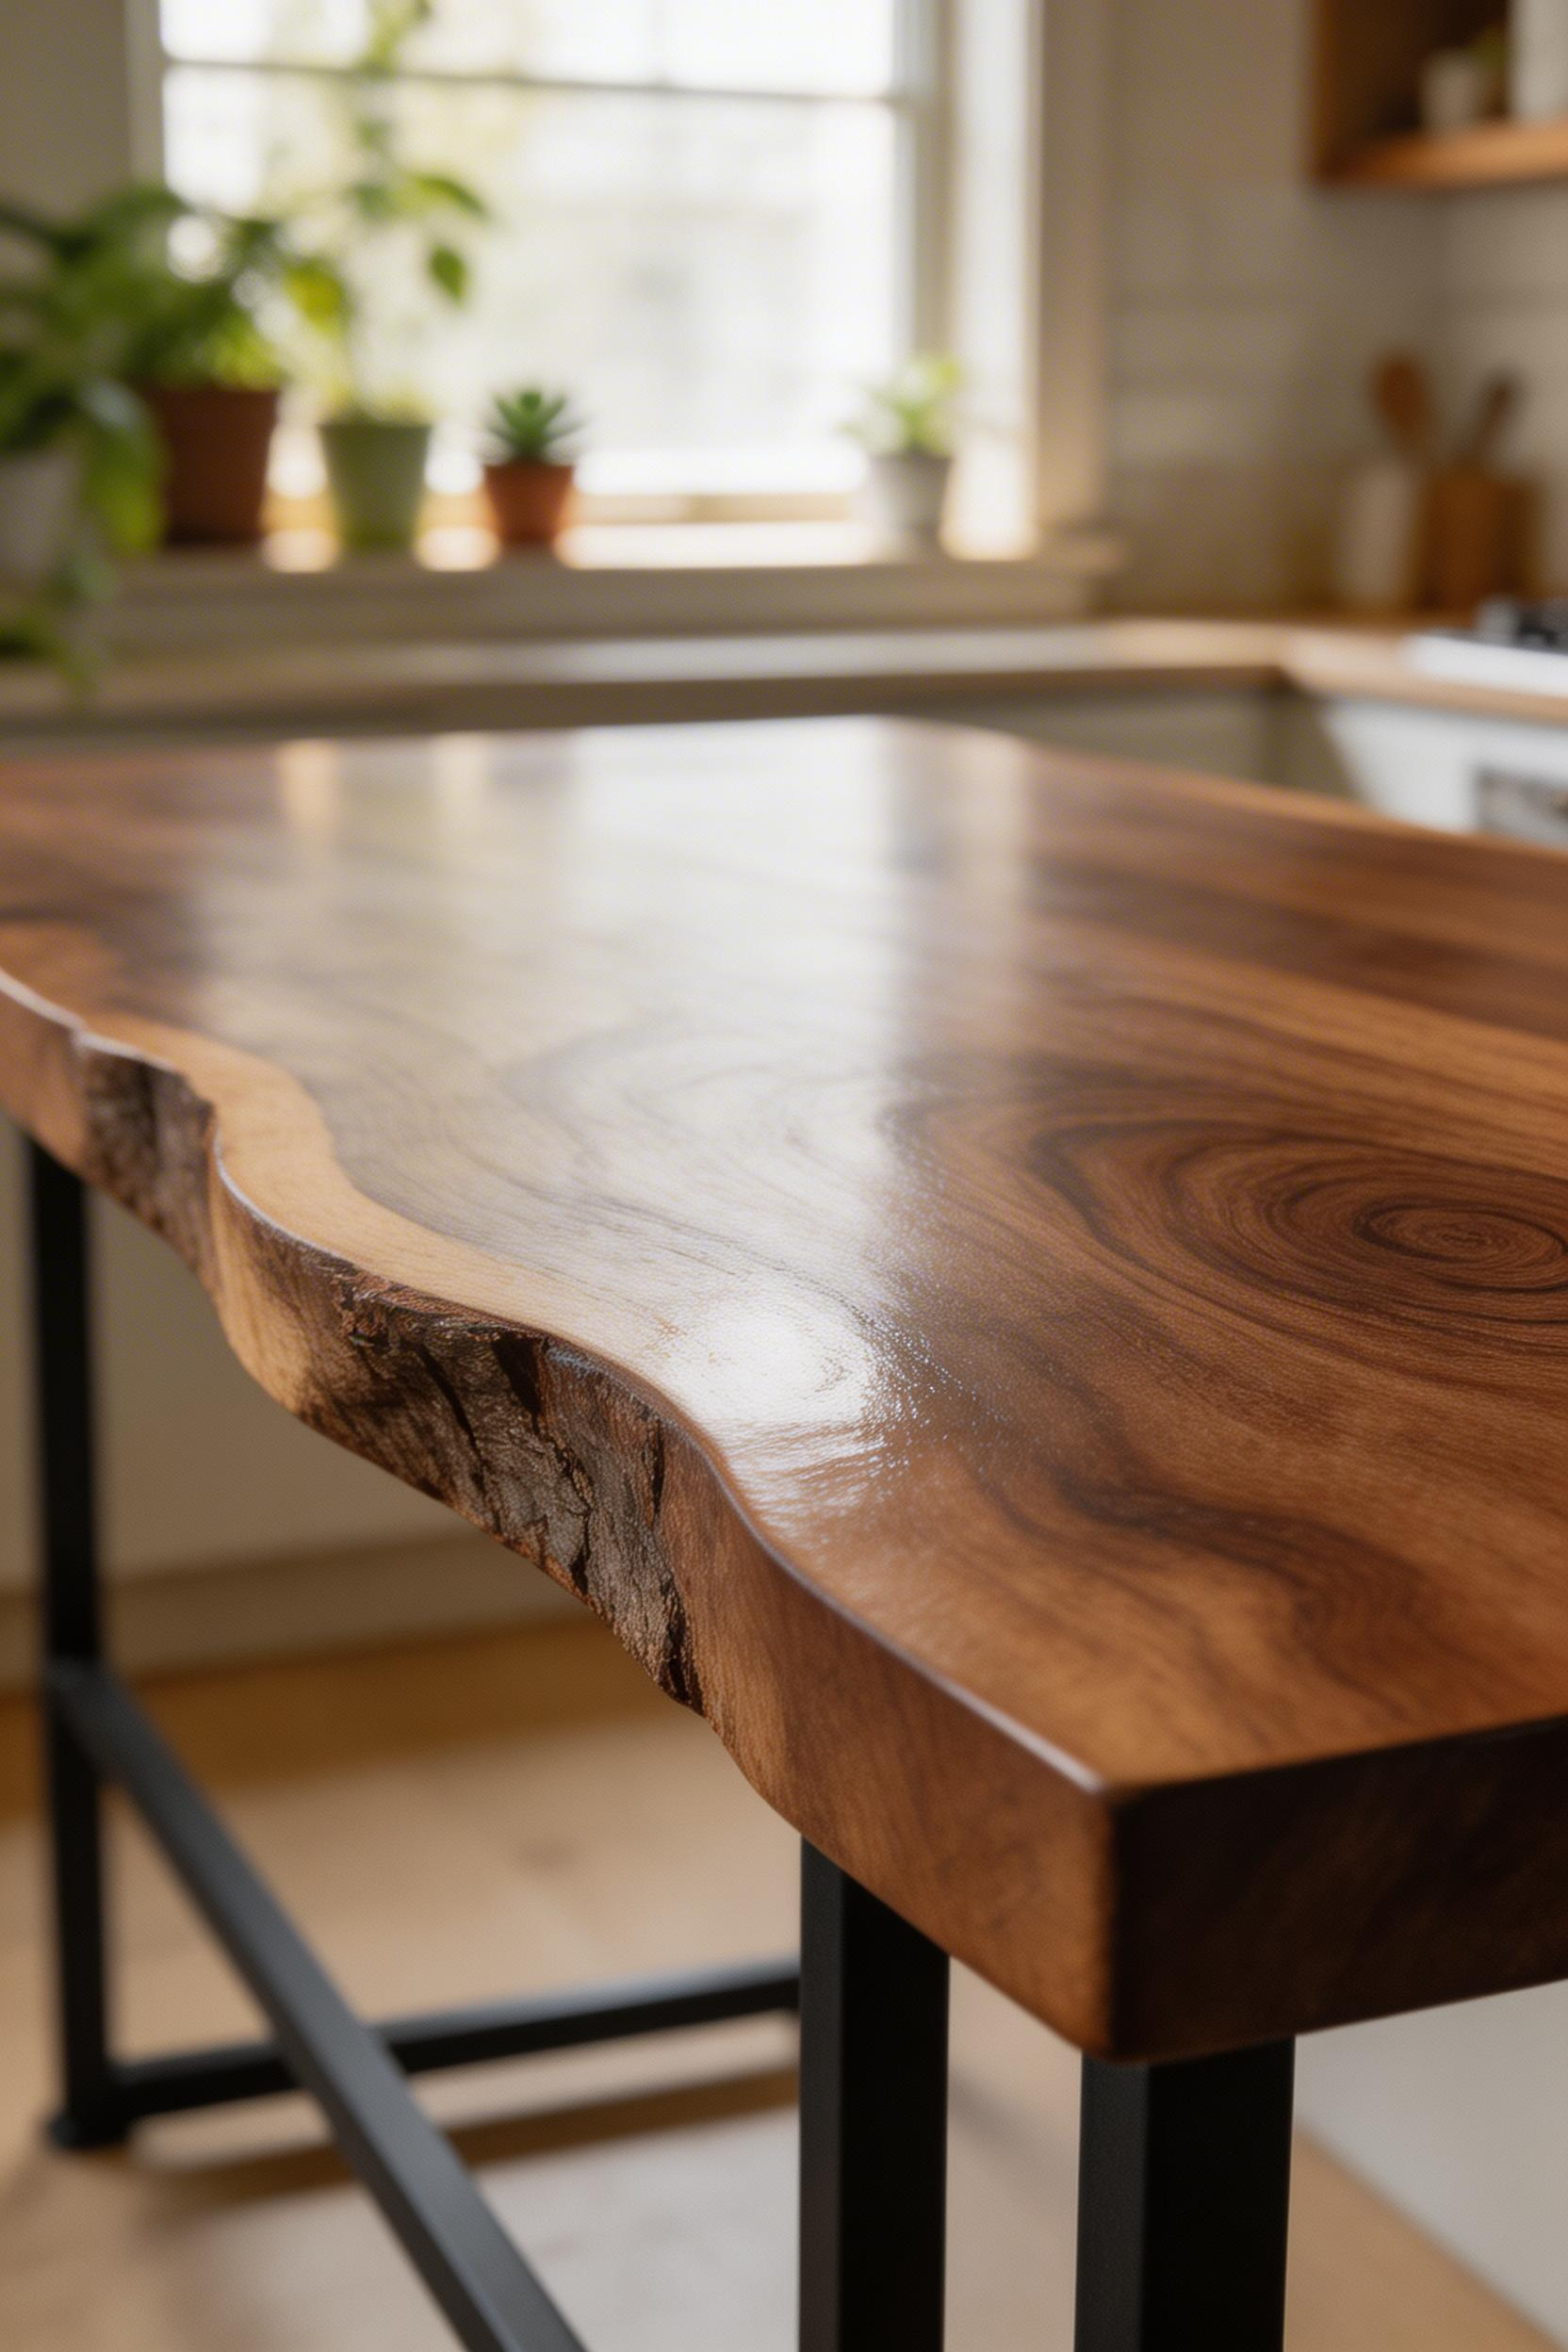
Walnut is the most practical choice for kitchen island applications. It has a Janka hardness of 1,010, consistent dark-to-light grain, and an oil finish that develops warmth over time rather than fading. Black cherry and white oak are strong alternatives. Cherry has a warm reddish-brown tone; oak a neutral grey-gold that works well in lighter, more contemporary kitchens.
Sourcing and Finishing a Slab
A kiln-dried walnut live edge slab measuring 3″ × 24″ × 72″ costs $1,800–$4,500 from a local hardwood dealer or reputable Etsy seller. The price variation is driven by width — wider slabs are exponentially rarer. When buying, always ask for the moisture content certificate. Kiln-dried to 6%–8% is the target. Anything higher will move when installed indoors.
For finishing, Rubio Monocoat Oil Plus 2C ($80–$110 per 400ml) is the best option for a kitchen surface. It penetrates the wood rather than sitting on top. Because of this, it won’t peel or show wear lines. It is also food-safe once cured and far more durable than the mineral oil that most tutorials recommend.
One counterintuitive sourcing tip: buy the slab before you design the base. The slab’s natural curves determine where legs and supports must go. Trying to fit a live edge piece to a pre-built frame nearly always results in a gap or cantilever that looks wrong. Buy the slab, measure carefully, then build the base around it.
Live edge furniture sales grew 28% year-on-year from 2019 to 2023 according to the American Home Furnishings Alliance, with kitchen applications being the fastest-growing segment.
6. Industrial Metal and Reclaimed Wood Combo
The rustic-industrial combination — raw steel or iron paired with rough-sawn or reclaimed timber — is among the most popular kitchen island styles of the past decade. It ranked as the second most-searched interior style on Pinterest in 2023. The appeal is in the deliberate contrast: precision metal against imprecise wood. But it only works when both materials are genuinely themselves — not a simulation.
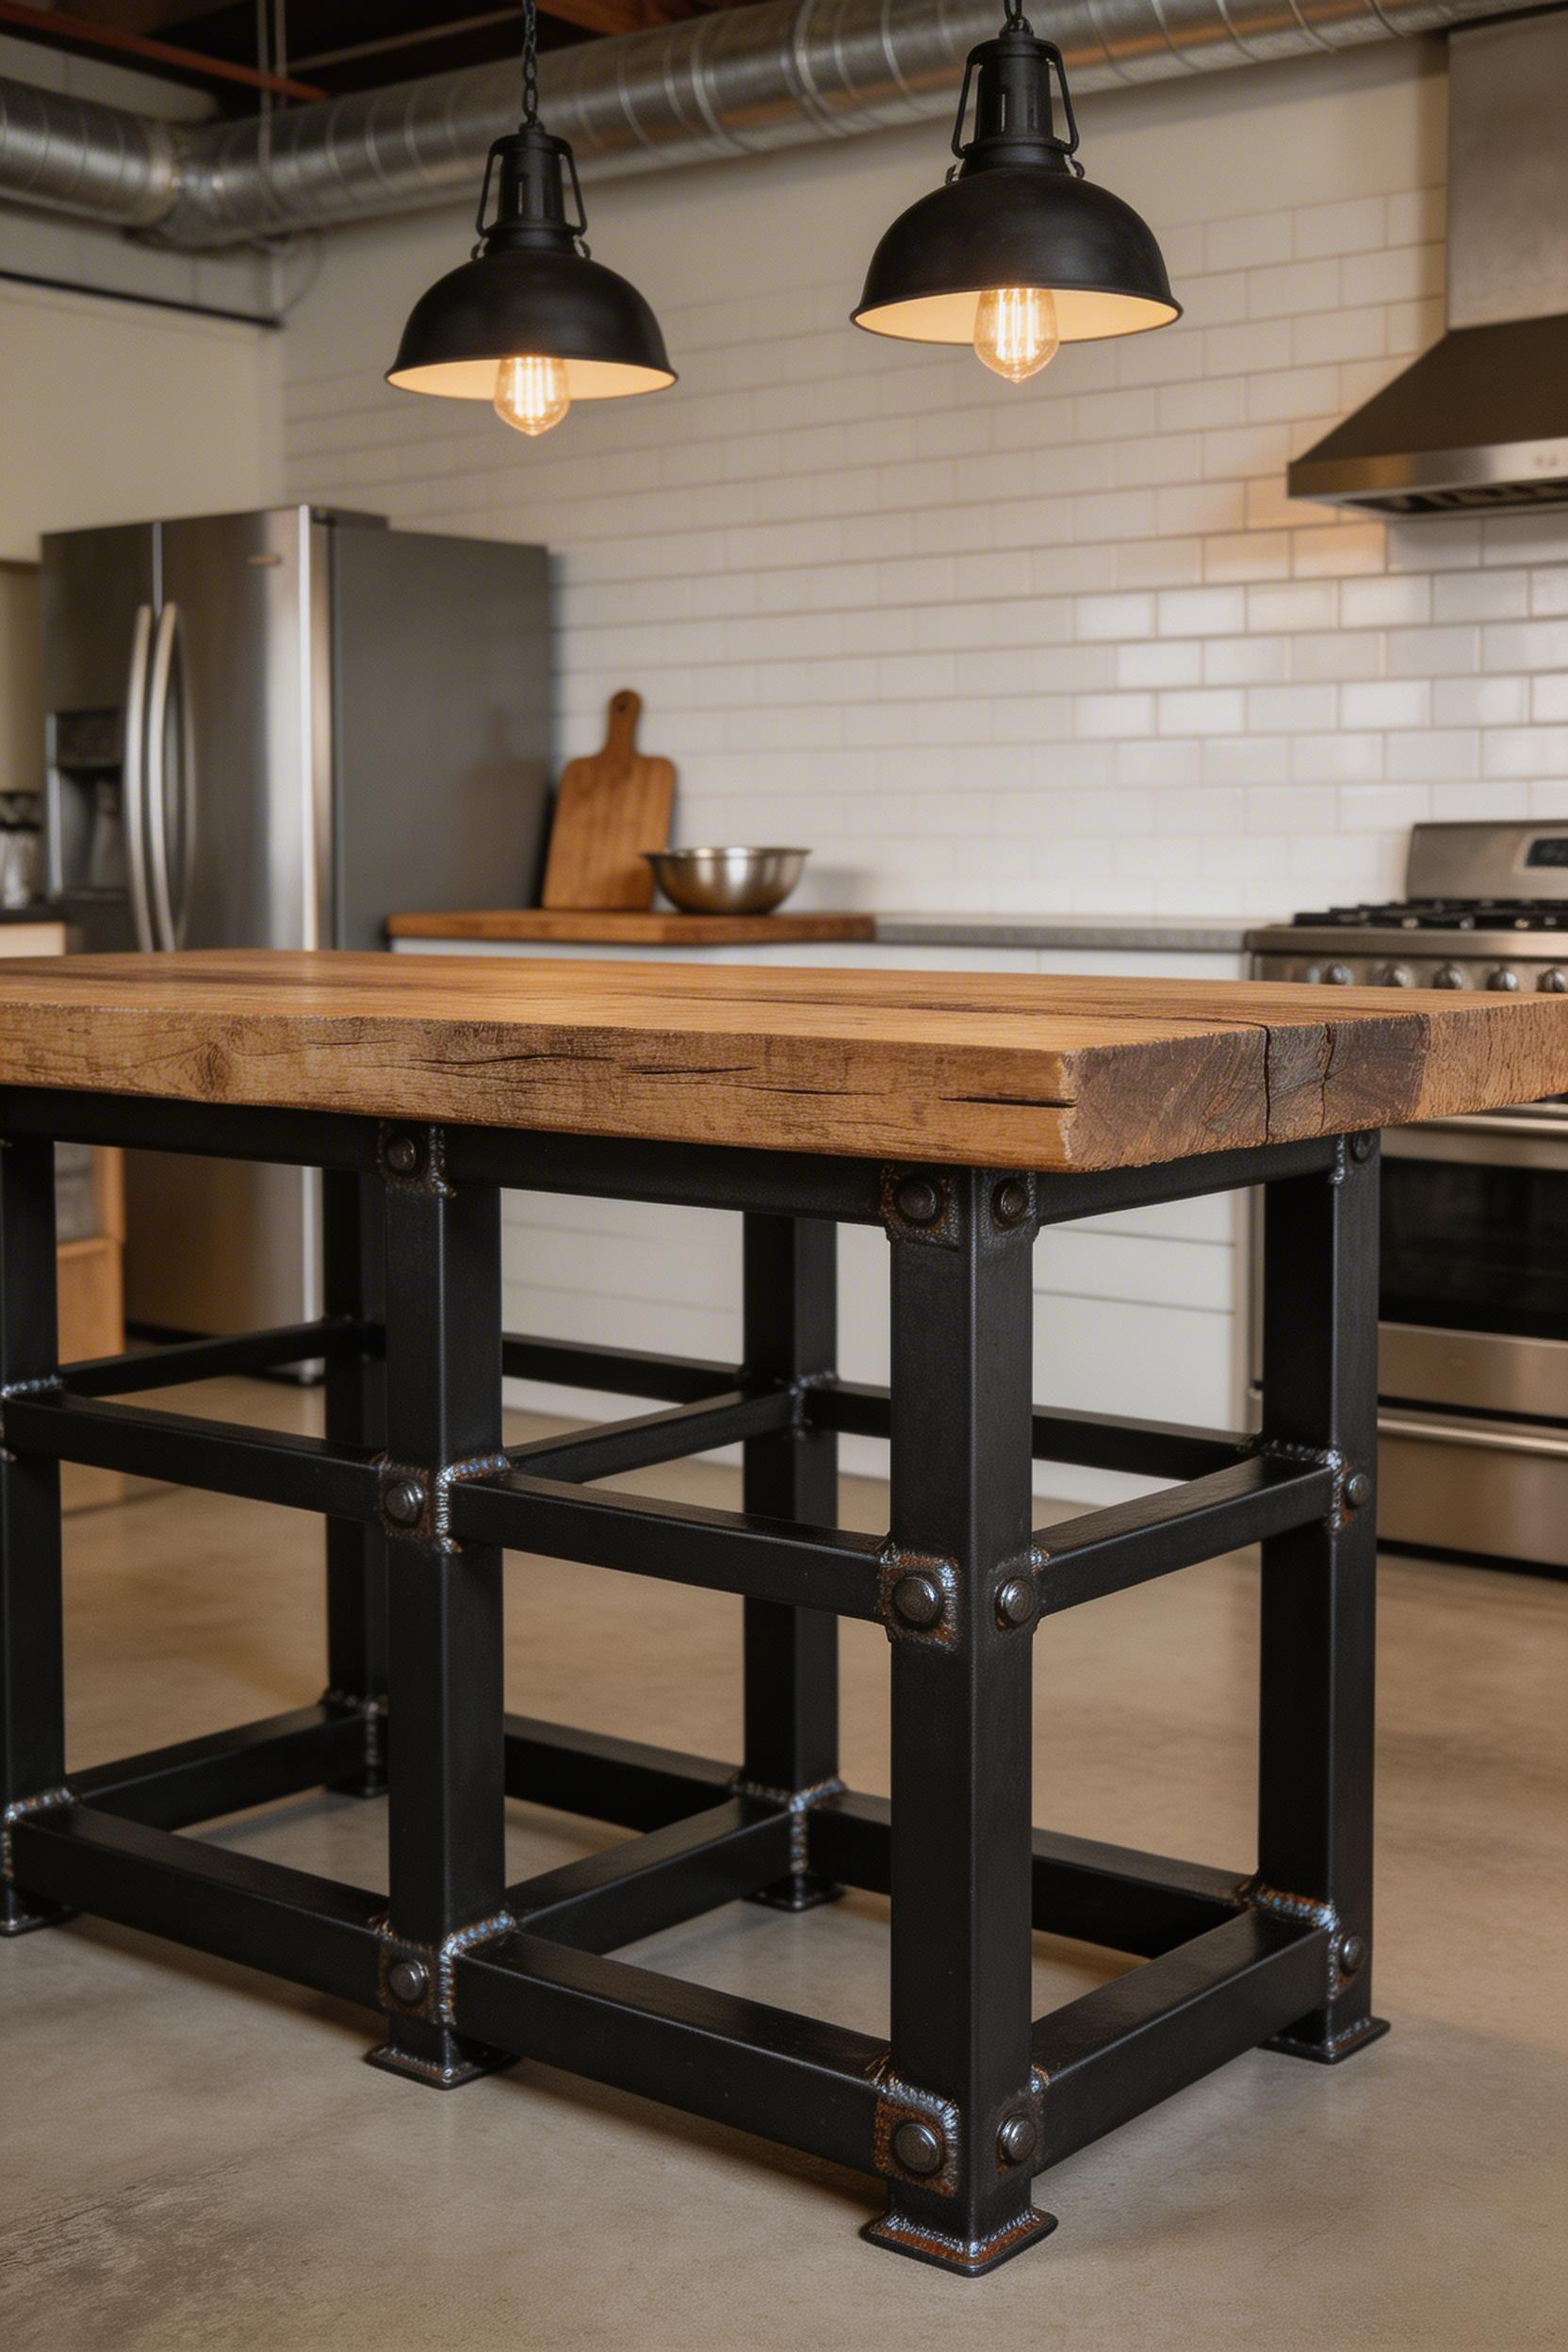
Steel hairpin legs from Legs By PIPE (28″ height, flat black, set of four, $85–$120) are the most accessible entry point. They are rated to 600 lbs and pre-drilled for bolt-on attachment. For a more substantial look, a 2″ square steel tubing frame welded by a local fabricator costs $200–$500. That gives the island a heavier, more industrial presence.
The Right Wood Top for This Combination
The timber top should be rough-sawn, not fine-sanded. Rough-sawn 2″ oak or pine with minimal finishing contrasts correctly with the precision of the steel frame. Sand it too smooth and the wood starts to read as a commercial countertop. That undermines the whole effect.
One detail that separates a well-executed version from a rough attempt: leave a small amount of visible weld bead on the steel frame. The handmade quality of a visible weld is what makes this aesthetic honest. Grind everything perfectly flat and the steel looks manufactured, not made.
For a ready-made version, Restoration Hardware’s Salvaged Wood and Steel Kitchen Island ($2,400–$3,200) uses solid mango wood and a hand-forged iron frame. It is expensive but well-executed and built to last.
7. Repurposed Old Door as Island Top
A salvaged solid wood exterior door — typically 1.75″ thick and 36″ wide, made from old-growth fir, pine, or oak — has more mass than most kitchen island tops sold commercially. It also has a story. That is partly what a rustic kitchen island is about.
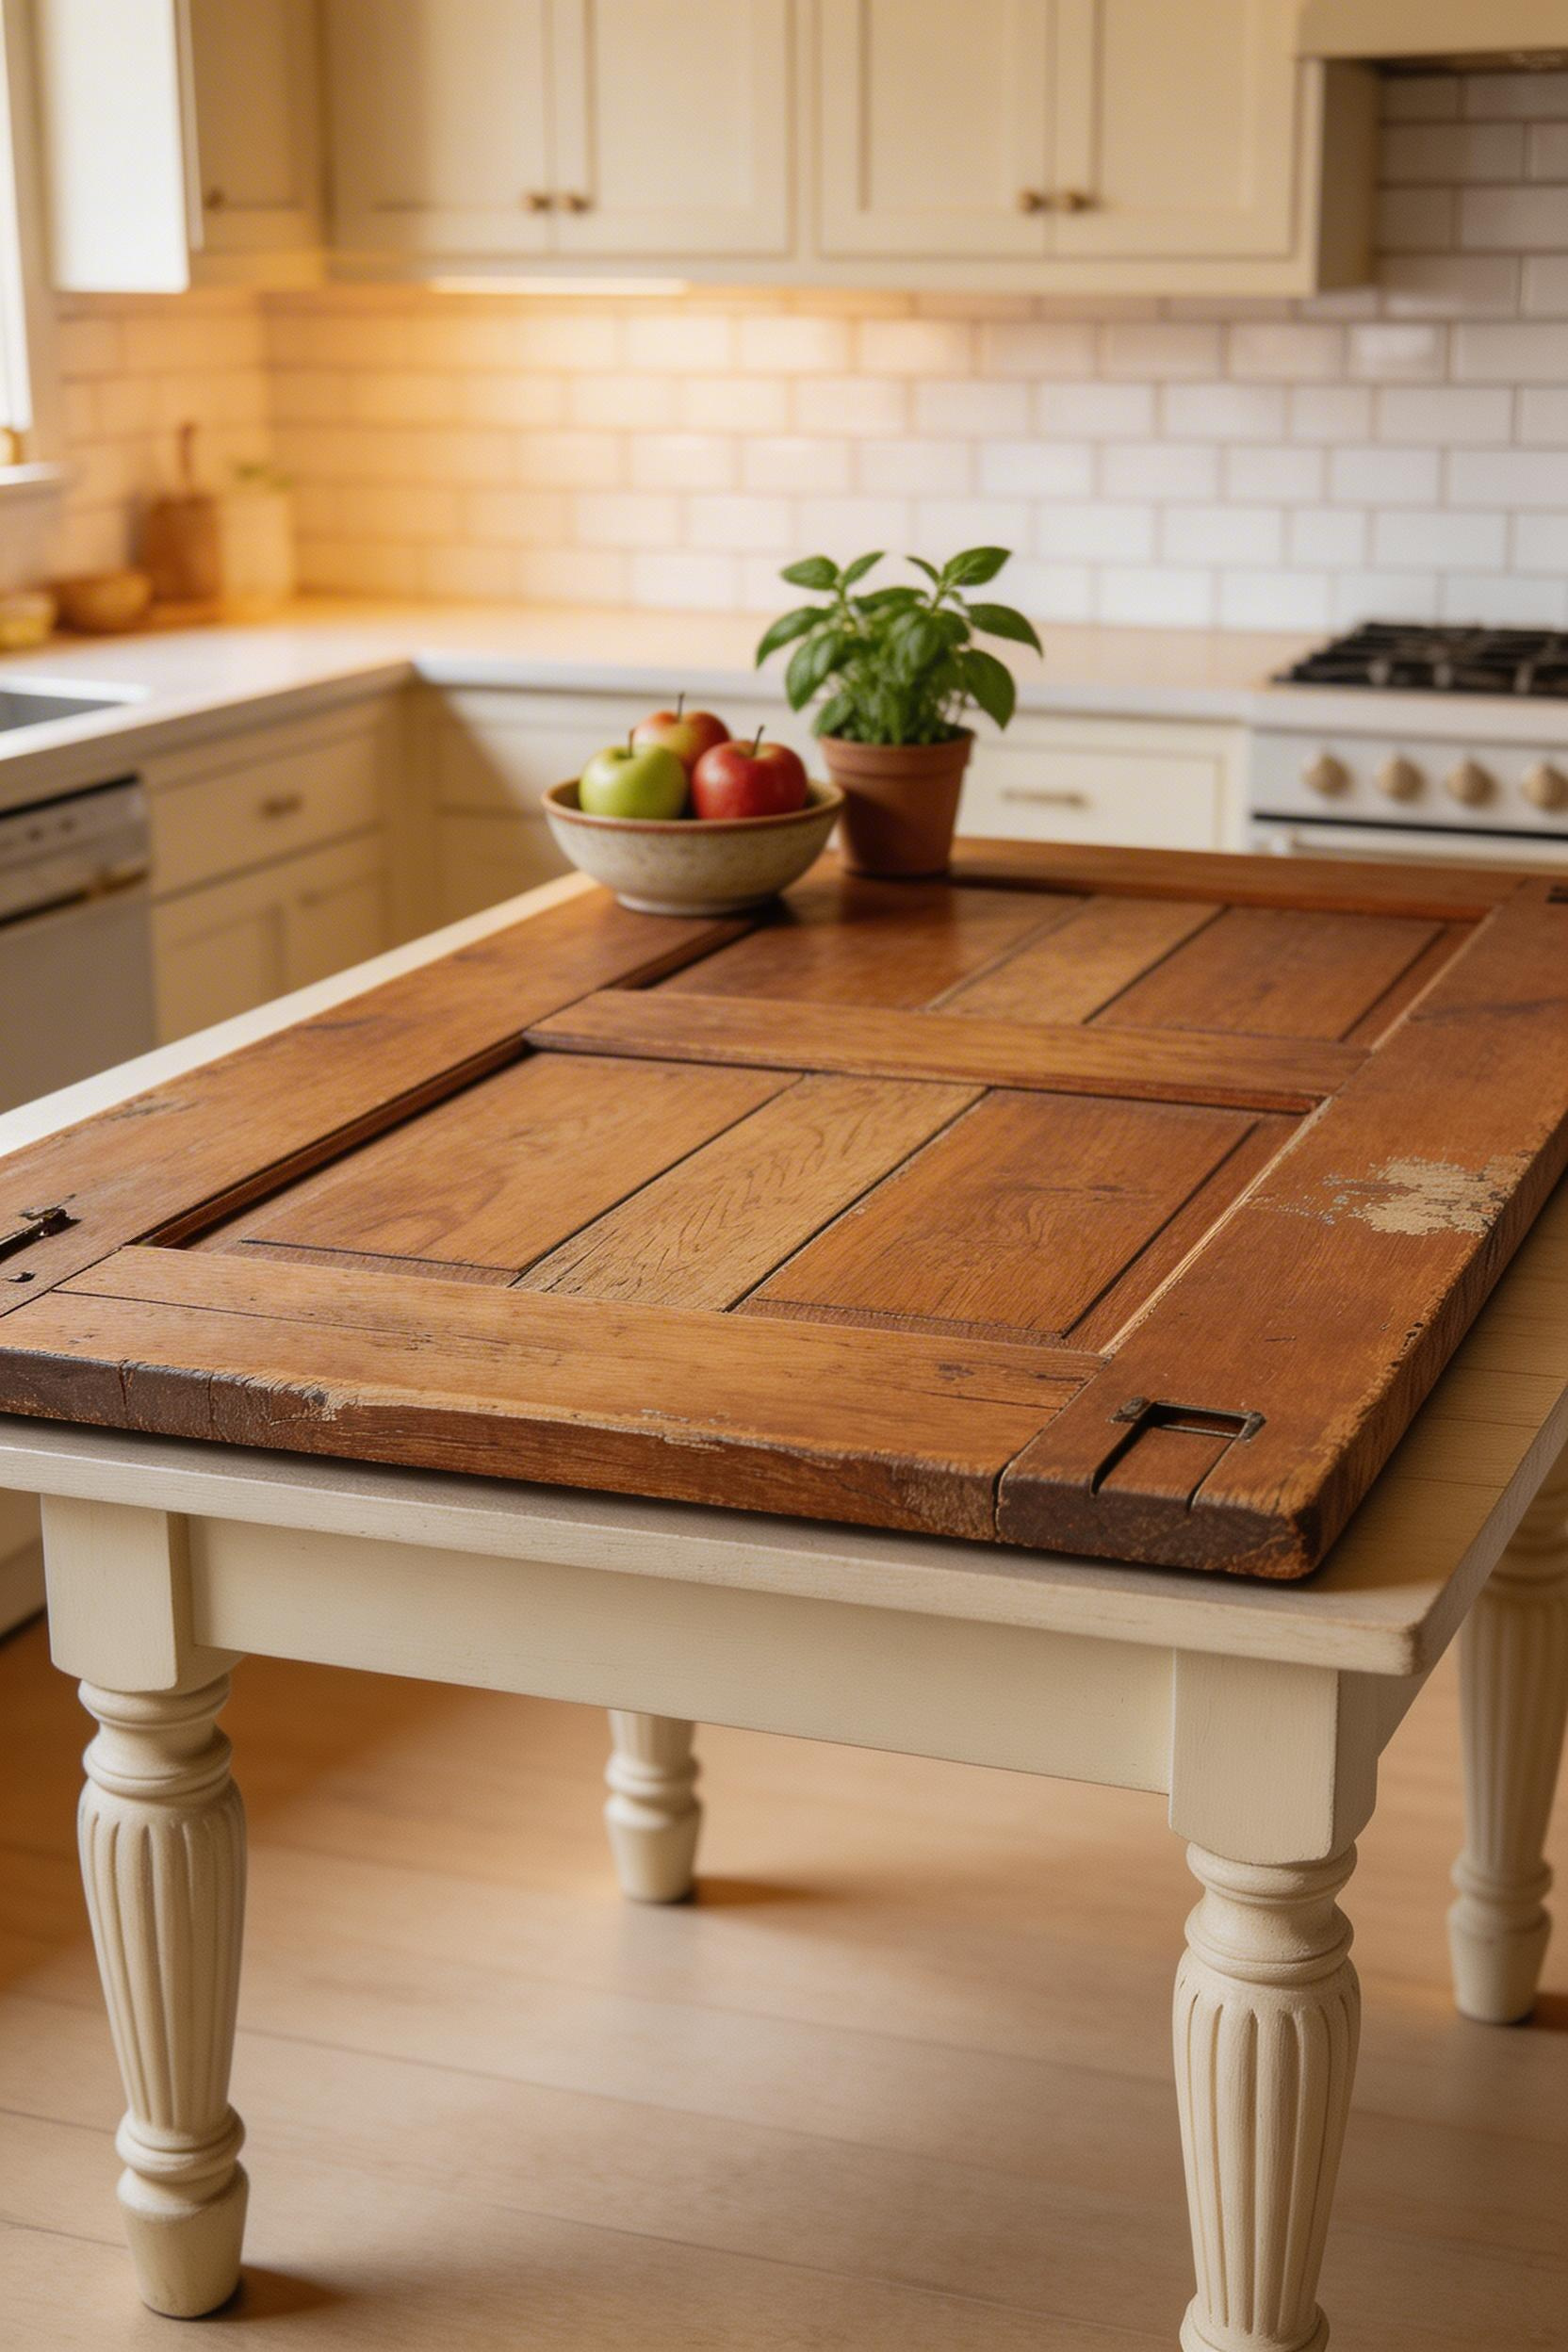
Architectural salvage shops, Habitat for Humanity ReStores, and Craigslist are the most consistent sources for solid wood exterior doors. Expect to pay $50–$200 for a door in workable condition. The important distinction is construction. Hollow-core doors — typical of interior doors post-1980 — are useless for this purpose. Solid wood exterior doors, especially anything pre-1970, are typically old-growth fir or oak, 1.75″ thick, and extremely heavy. The weight is a feature.
Preparing the Door for Kitchen Use
The conversion requires stripping any paint. Use a heat gun and Citristrip Gel ($20–$28 per quart), applied for 30+ minutes before scraping. Fill any mortise cutouts from old hardware with wood filler or routed wood plugs. Sand to 180 grit before finishing.
For the top surface, run your hand across both faces before buying. The back of an old door is often smoother than the painted front face. The front may have been painted over nails and old repairs. That back face usually makes the better prep surface.
Seal with Waterlox Original Sealer/Finish ($60–$80 per quart). It is a tung oil resin that penetrates, hardens, and is food-safe once fully cured. It provides a more durable seal than plain mineral oil while maintaining a natural matte sheen.
The Building Materials Reuse Association estimates salvage architecture materials generate $3.5 billion in annual US sales, with doors among the two most commonly repurposed categories alongside flooring.
8. Distressed White-Painted Island with Open Shelving
White appears in approximately 43% of renovated kitchens according to the National Kitchen and Bath Association in 2023. But there is a significant difference between a flat-panel white island from a kitchen showroom and a distressed white island with open shelving and black iron hardware. The former does not belong in the rustic category. The latter does.
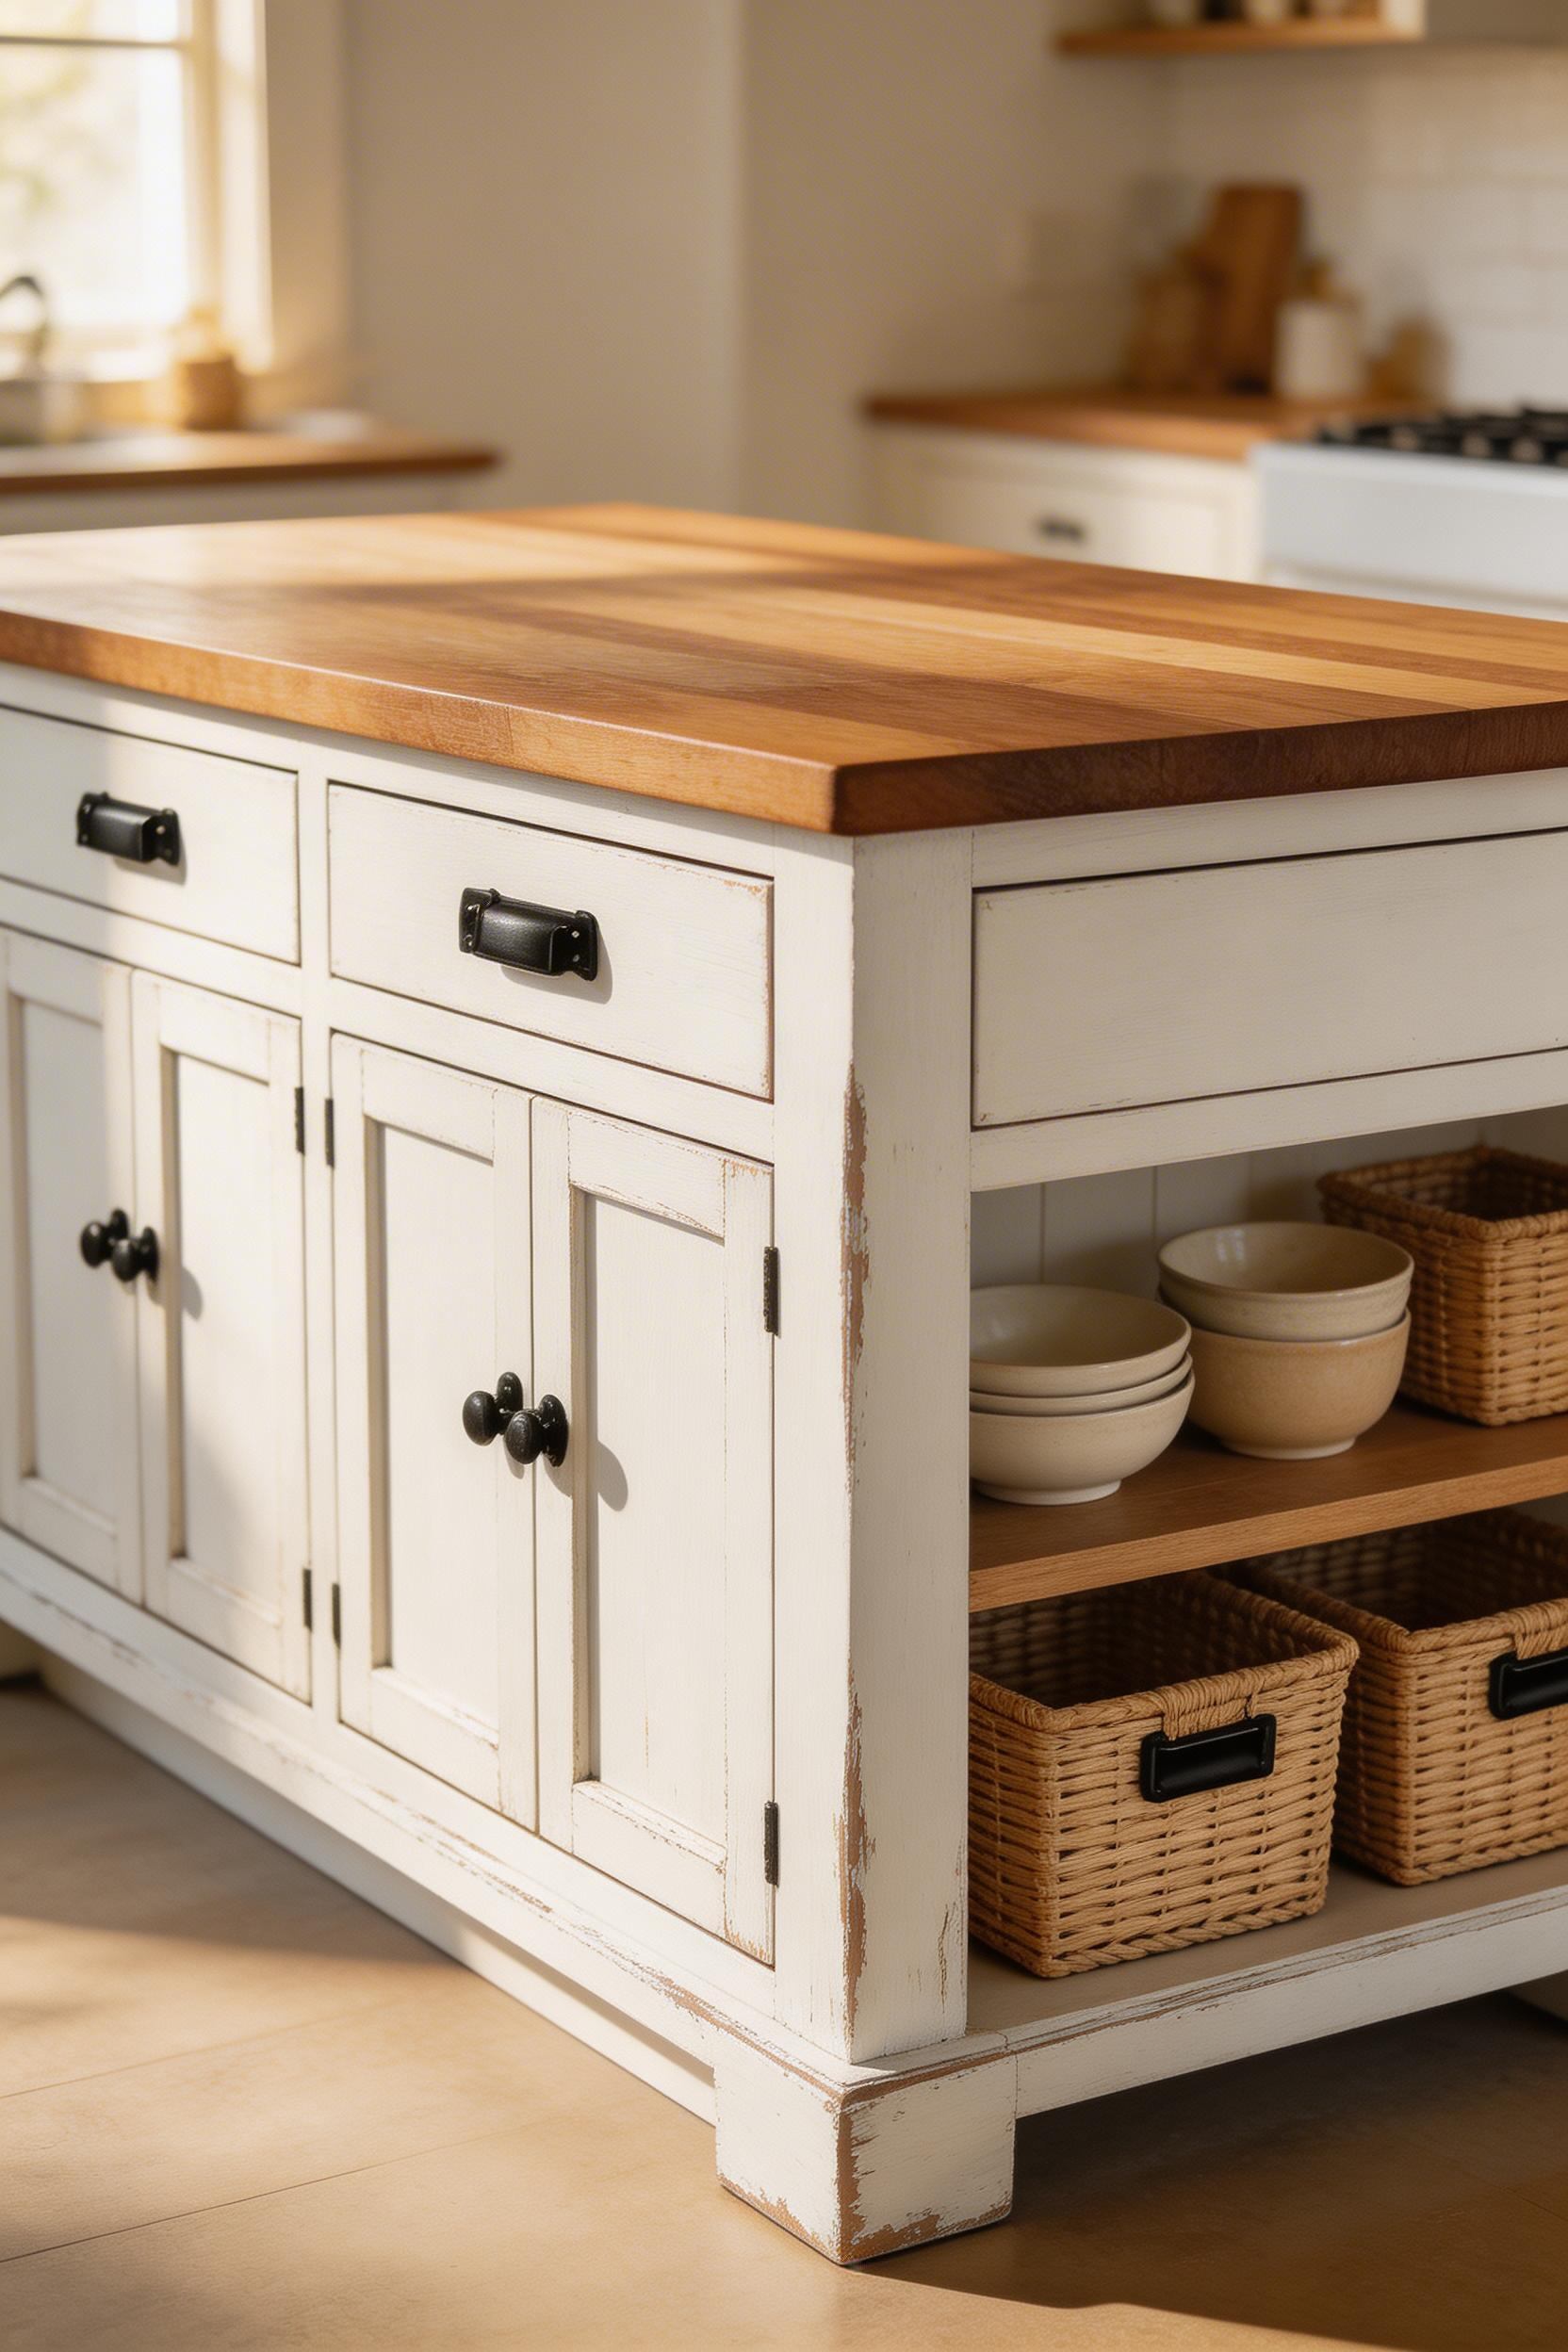
The distressed finish is achieved by layering. Apply a dark undercoat first — raw wood or charcoal grey. Then add the white or cream topcoat in chalk paint. Then sand through the top layer at wear points — corners, edges, and around hardware holes — to reveal the base colour below. Annie Sloan Old White ($45 per quart) is the benchmark for this look. It has the right matte, chalky finish that reads as genuinely aged.
Getting the Distressing Right
The most common mistake is over-distressing. You want the island to look like 40 years of kitchen use — subtle wear, not sandblasted. Apply 120-grit paper at corners with 5–10 sanding strokes per area, then stop. You can always do more; you cannot undo it.
Black iron hardware grounds the white island and prevents it reading as too precious. Anthropologie’s Banded Pull in Iron ($22 each) and Rejuvenation’s bin pulls in oil-rubbed bronze ($18–$28 each) are both well-made options with the right visual weight.
For the open lower shelving, IKEA’s VADHOLMA kitchen island ($549–$699) is a popular base for this conversion. It comes with a lower open shelf designed for basket use. Its flat surfaces take chalk paint well after light sanding. Fill each shelf bay with consistent rattan or seagrass baskets for storage that is also part of the composition.
For a related approach in tighter spaces, the ideas in kitchen island ideas for small kitchens show how to balance open storage with clear floor space in smaller layouts.
9. Galvanized Steel Trough Base Island
A galvanized stock tank — originally made for livestock watering — is 2-gauge steel, rust-resistant, and structurally strong enough to hold a countertop and a person sitting on the edge at the same time. In a farmhouse or rural kitchen, it reads as authentic. In a modern urban loft, it tends to look like it arrived by accident. Context matters with this one.
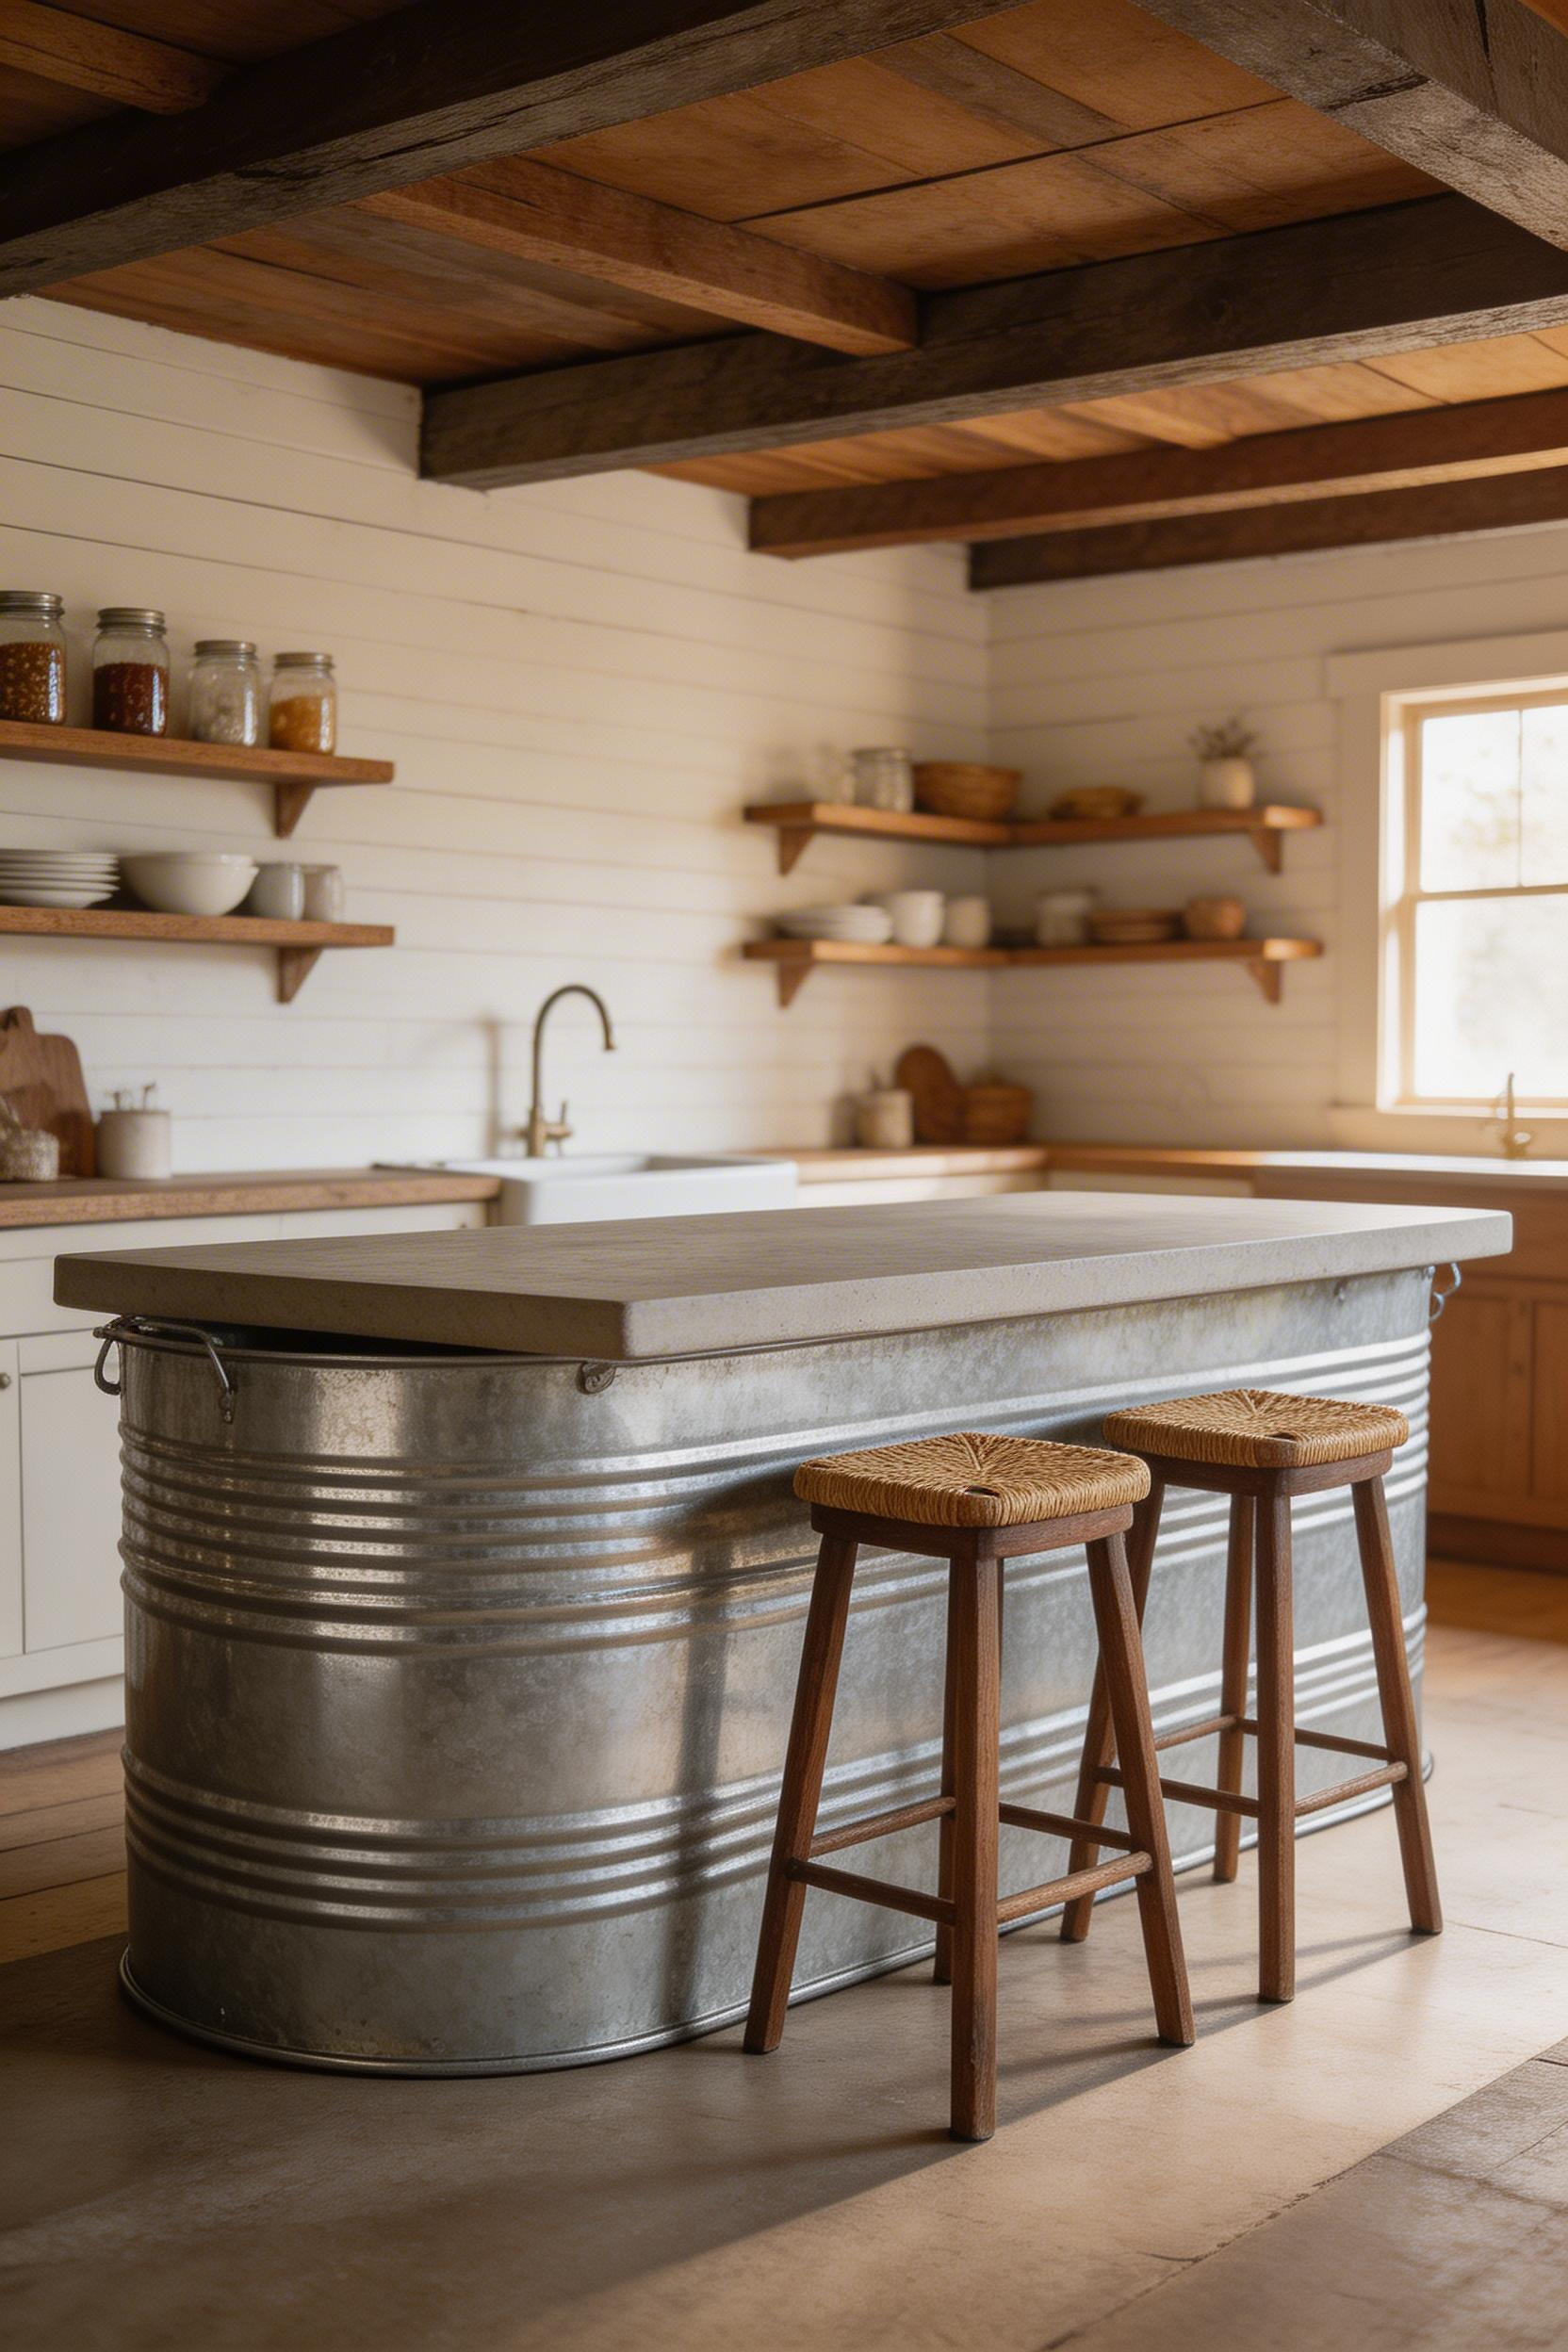
Standard oval stock tanks from Tractor Supply or Rural King measure 2 ft × 6 ft × 2 ft deep. That is large enough to use as an island base with seating along one long side. The interior is useable storage: a plywood shelf cut inside at mid-height creates two tiers for oversize pans or seasonal platters. Add 4″ locking plate casters bolted through the tank base and the island becomes mobile. Drill 3/8″ holes and use large-flange fender washers inside to spread the load.
The Top and the Finish
A concrete lid or pre-cut butcher block top sits on the rim and overhangs by 2″–3″ on all sides. For DIY concrete, Quikrete 5000 ($12–$16 per 80 lb bag) poured into a melamine form produces a 2″ thick top. Add fibreglass mesh reinforcement before the pour. Seal before use with Ghostshield Lithi-Tek 4500 — unsealed concrete stains from oil within hours.
The galvanized exterior can be painted with Rust-Oleum Chalked Ultra Matte in Country Grey ($14 per quart). It adheres to clean, dry galvanized metal without primer. Or leave the raw silver finish. It develops a soft white-grey patina in kitchen humidity over time.
The total cost of a DIY trough island runs $250–$550. That is among the lowest of any rustic kitchen island option with genuine material character.
10. Butcher Block Rustic Kitchen Island with Deep Drawer Storage
Pure function, executed in the best material for it. A butcher block island with deep drawers is the working cook’s rustic kitchen island — not decorative, not a showpiece, but genuinely useful every single day.
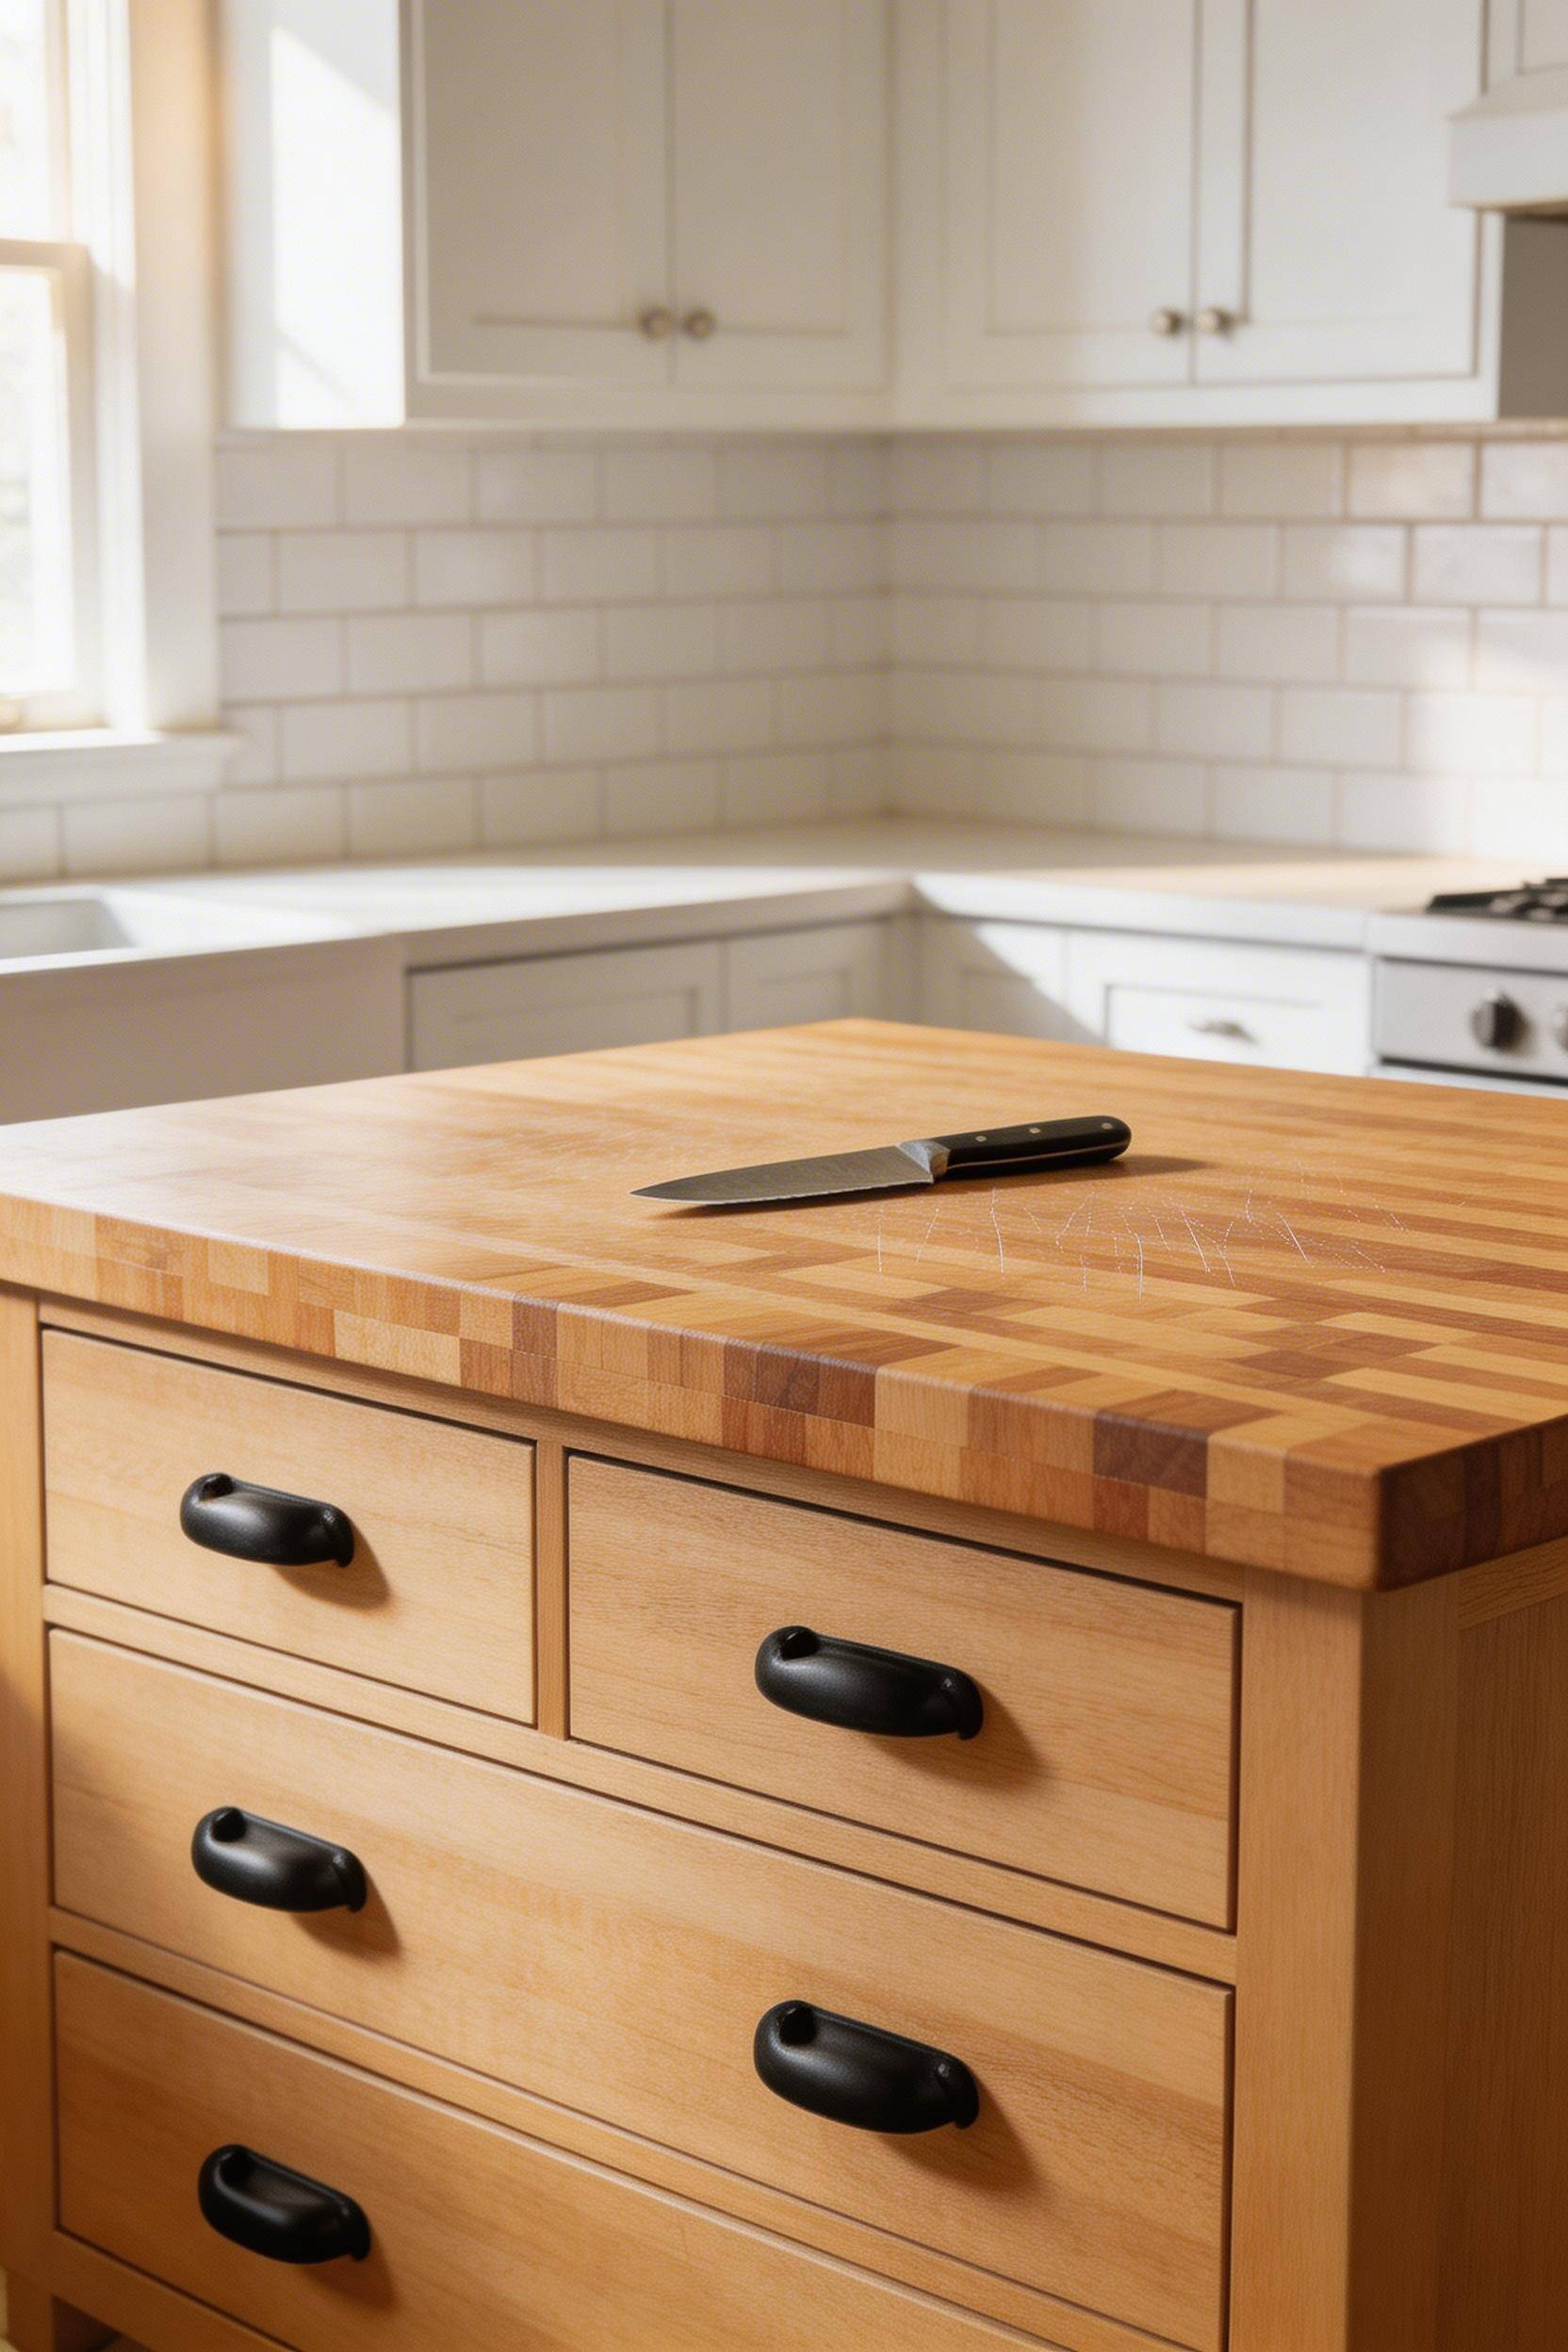
End-grain butcher block — where the fibres run vertically, showing the tree rings on the surface — is harder and more resistant to knife marks than face-grain configurations. Maple is the professional chef’s standard: Janka hardness of 1,450, tight grain, and minimal odour absorption. John Boos has been making it since 1887, the oldest butcher block manufacturer in North America and the industry reference.
Deep Drawers: Why Size Matters
A deep drawer interior — minimum 8″–10″ — accommodates full-size mixing bowls, large pasta pots, and cast iron skillets. These are the items that typically pile up in inconvenient spots. The difference between an 8″ drawer and a standard 5″ drawer seems small until you’re trying to fit a 12″ cast iron pan somewhere logical.
Drawer slide specification matters: full-extension, 100 lb rated slides allow you to pull the drawer fully out to access items at the back. They also survive the weight of cookware that would destroy standard slides within a year.
A John Boos walnut end-grain block (4″ thick, custom sizes, $900–$2,800) is the premium option. For a ready-built version, the Crate & Barrel Belmont Butcher Block Kitchen Island ($1,699–$2,499) includes four deep drawers and a solid butcher block top.
Oil a new end-grain top daily for the first week, then weekly for a month. That level of conditioning sounds excessive; it isn’t. The saturation it builds in those first weeks is what prevents cracking over the following 20 years.
11. Chalkboard Panel Island Side
A chalkboard panel on an island side turns a functional piece of kitchen furniture into a planning surface. Meal plans, shopping lists, children’s drawings, weekend menus — all of it on the island, within arm’s reach. The rustic kitchen island context suits a chalkboard well: the matte black surface reads as intentional alongside aged wood and iron hardware.
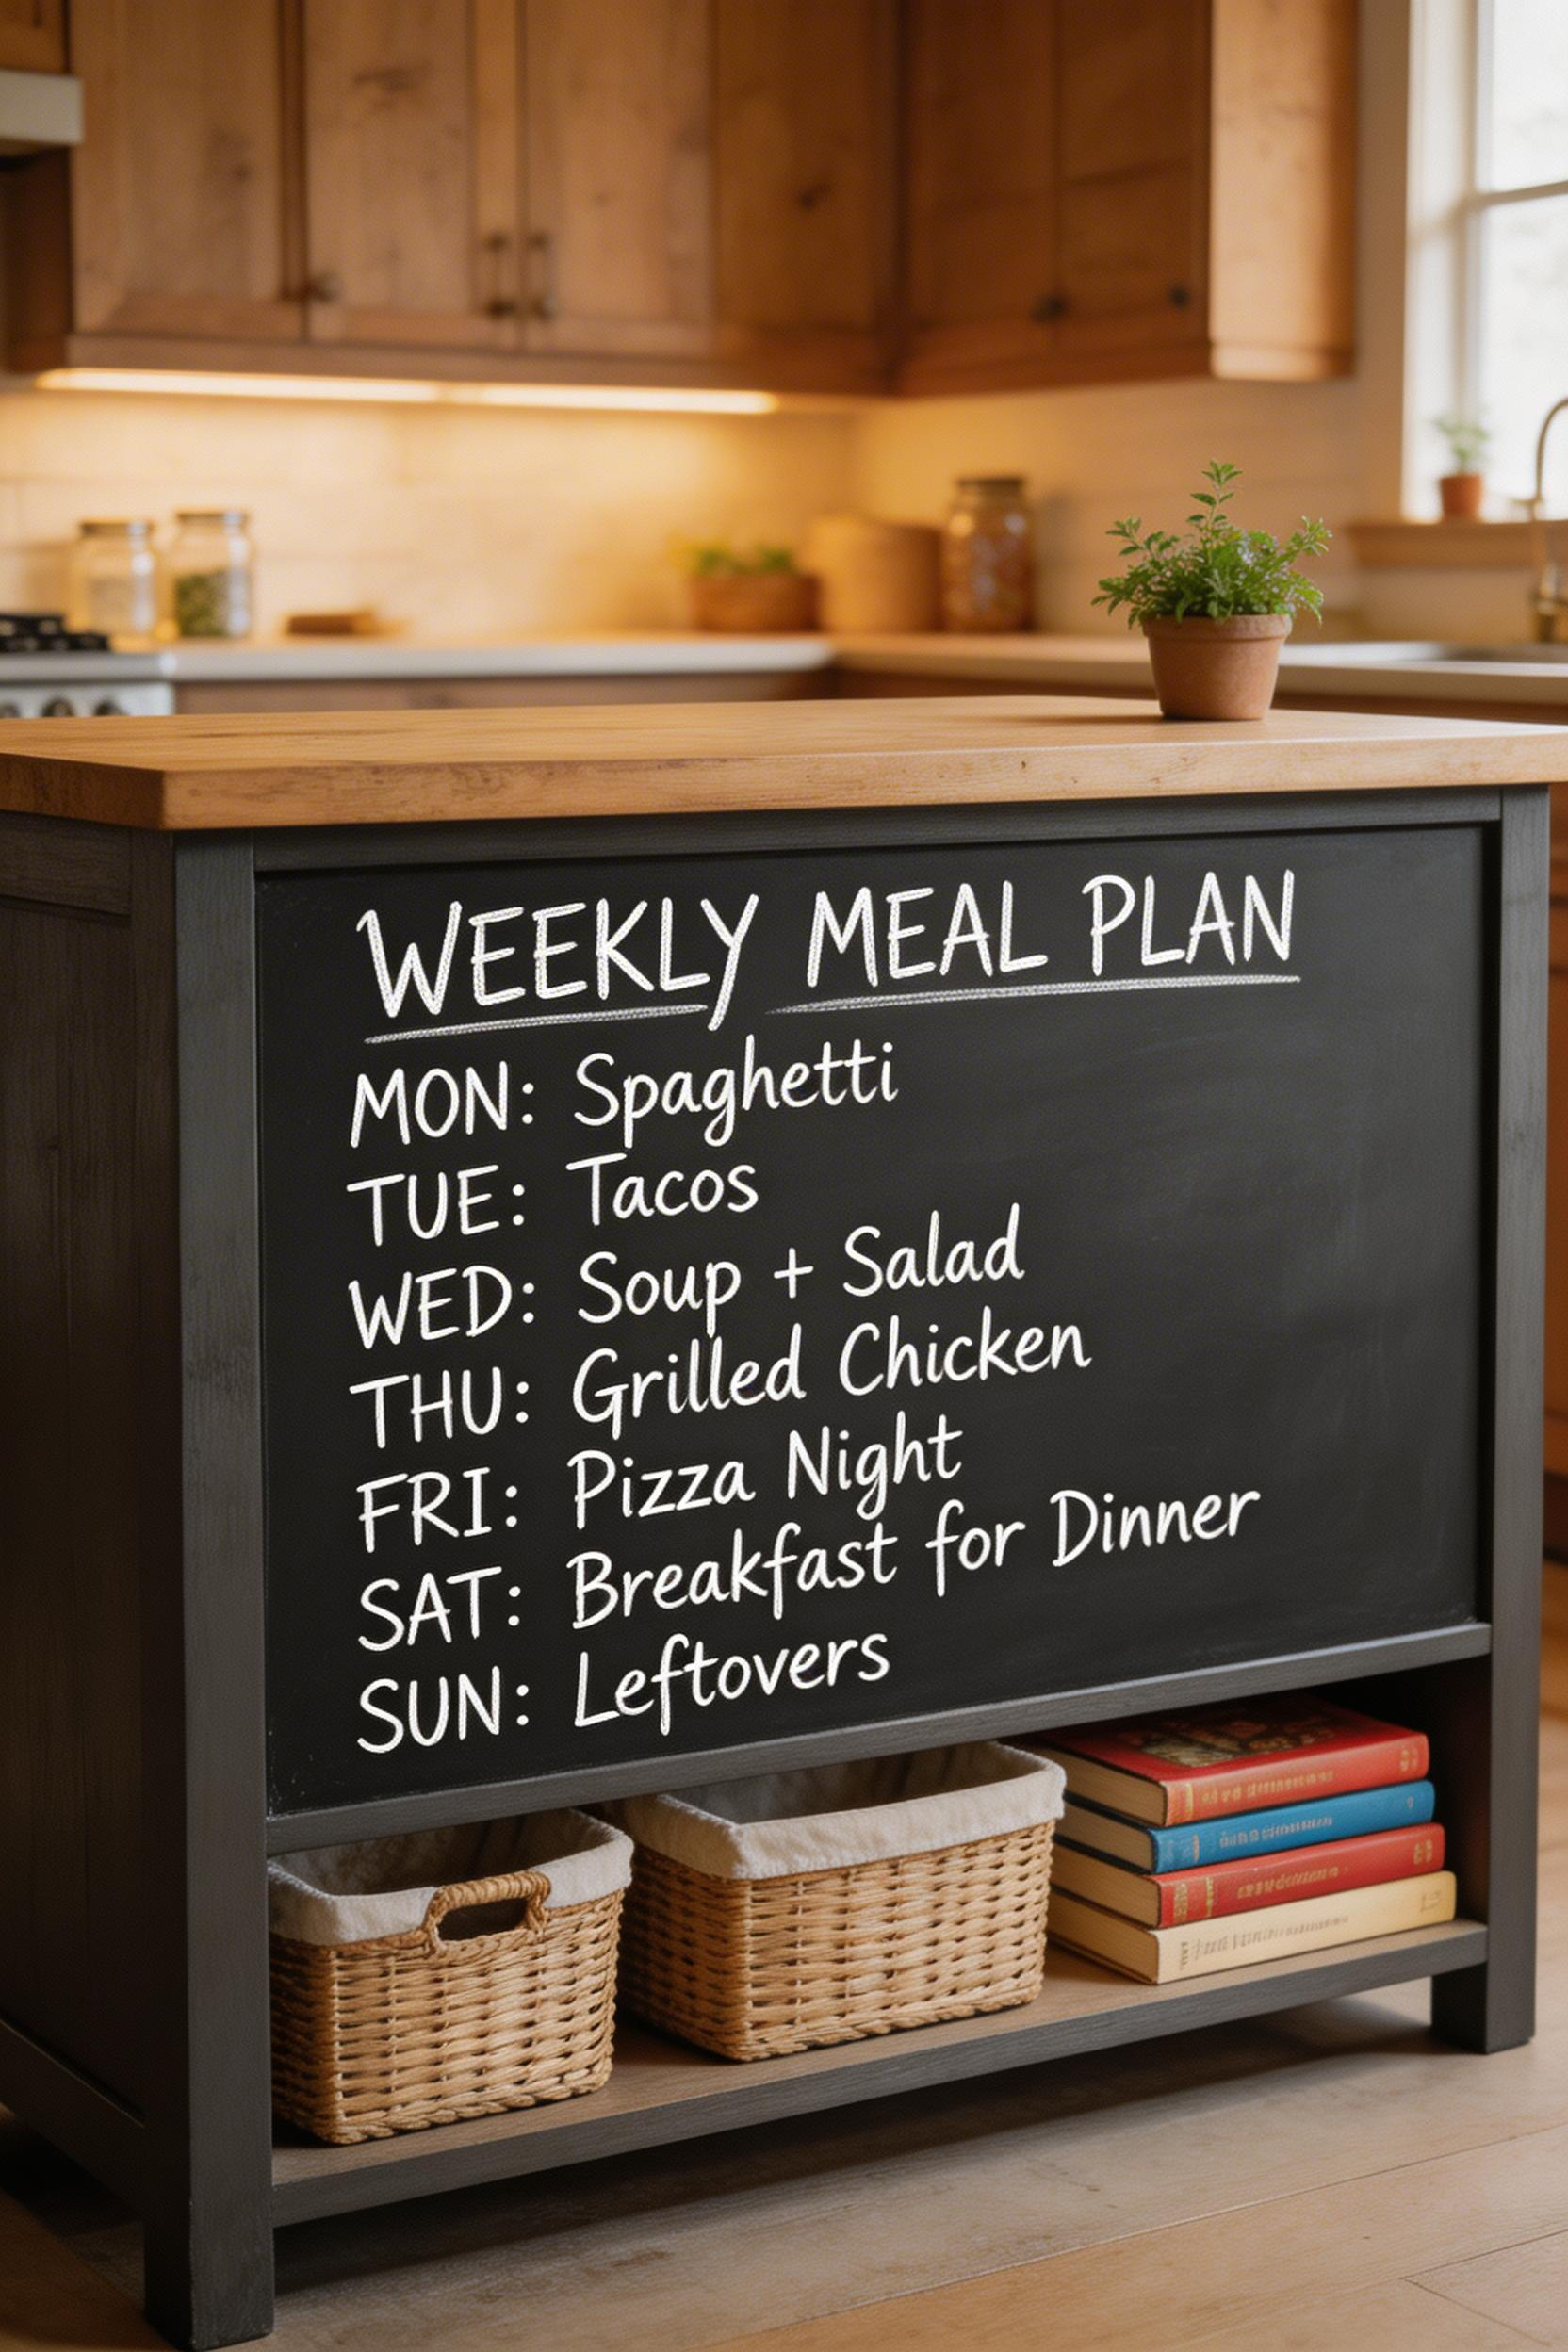
Chalkboard paint is a flat latex or oil-based paint with unsanded grout mixed in. The grit creates the rough texture needed for chalk to adhere and wipe off cleanly. Rust-Oleum Chalkboard Spray Paint ($8–$12 per 11 oz can) gives the most even application — three light coats at 20-minute intervals over a primed MDF surface.
The Seasoning Step Everyone Skips
After painting, the surface must be seasoned. Rub the flat side of a chalk stick across the entire panel, then wipe off with a dry cloth. This fills the tooth of the surface and prevents permanent ghosting from the first writing. Skip this step and whatever you write first will be faintly visible forever.
Liquid chalk markers (Chalktastic, $18–$25 for a set of 8) produce far cleaner writing than regular chalk. They wipe off completely with a damp cloth and are significantly better for regular use.
Position the chalkboard panel on the side that faces the kitchen entrance or the highest-traffic path. A chalkboard facing a wall where nobody walks is a feature nobody uses. Also, Zillow’s 2021 analysis found chalkboard panels cited as a desirable feature by 31% of buyers under 40 — functional and a modest selling point.
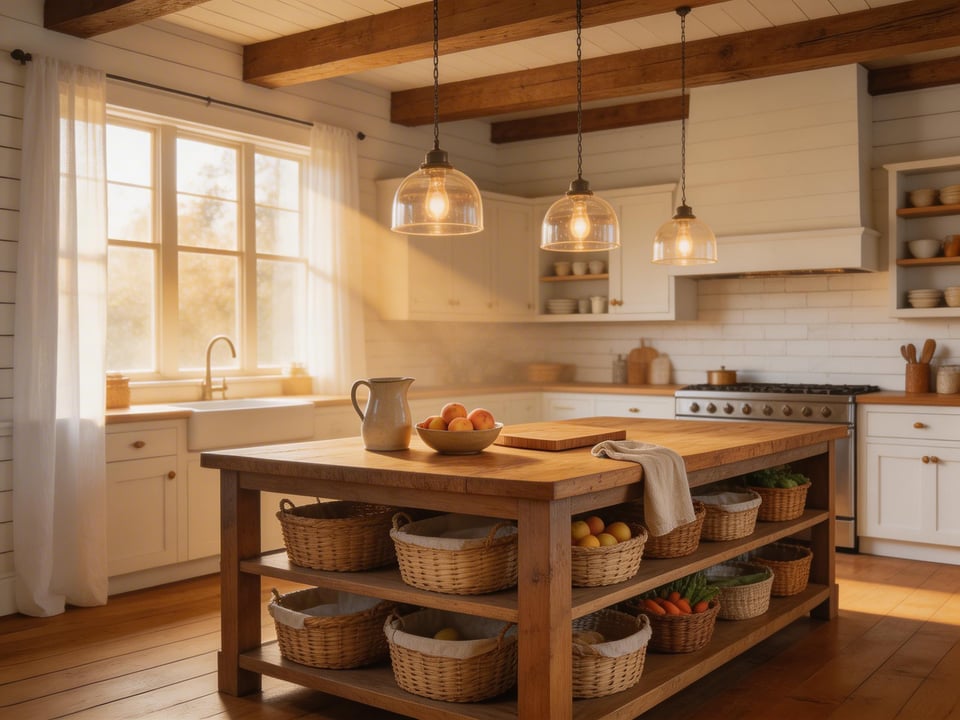
12. Open-Shelf Rustic Island with Woven Basket Storage
Open lower shelving reduces the visual bulk of a kitchen island and makes tight kitchens feel less boxed in. However, it requires deliberate styling to avoid looking like a storage pile. Woven baskets solve both problems: they contain the clutter and contribute a warm, natural texture that reinforces the rustic kitchen island aesthetic.
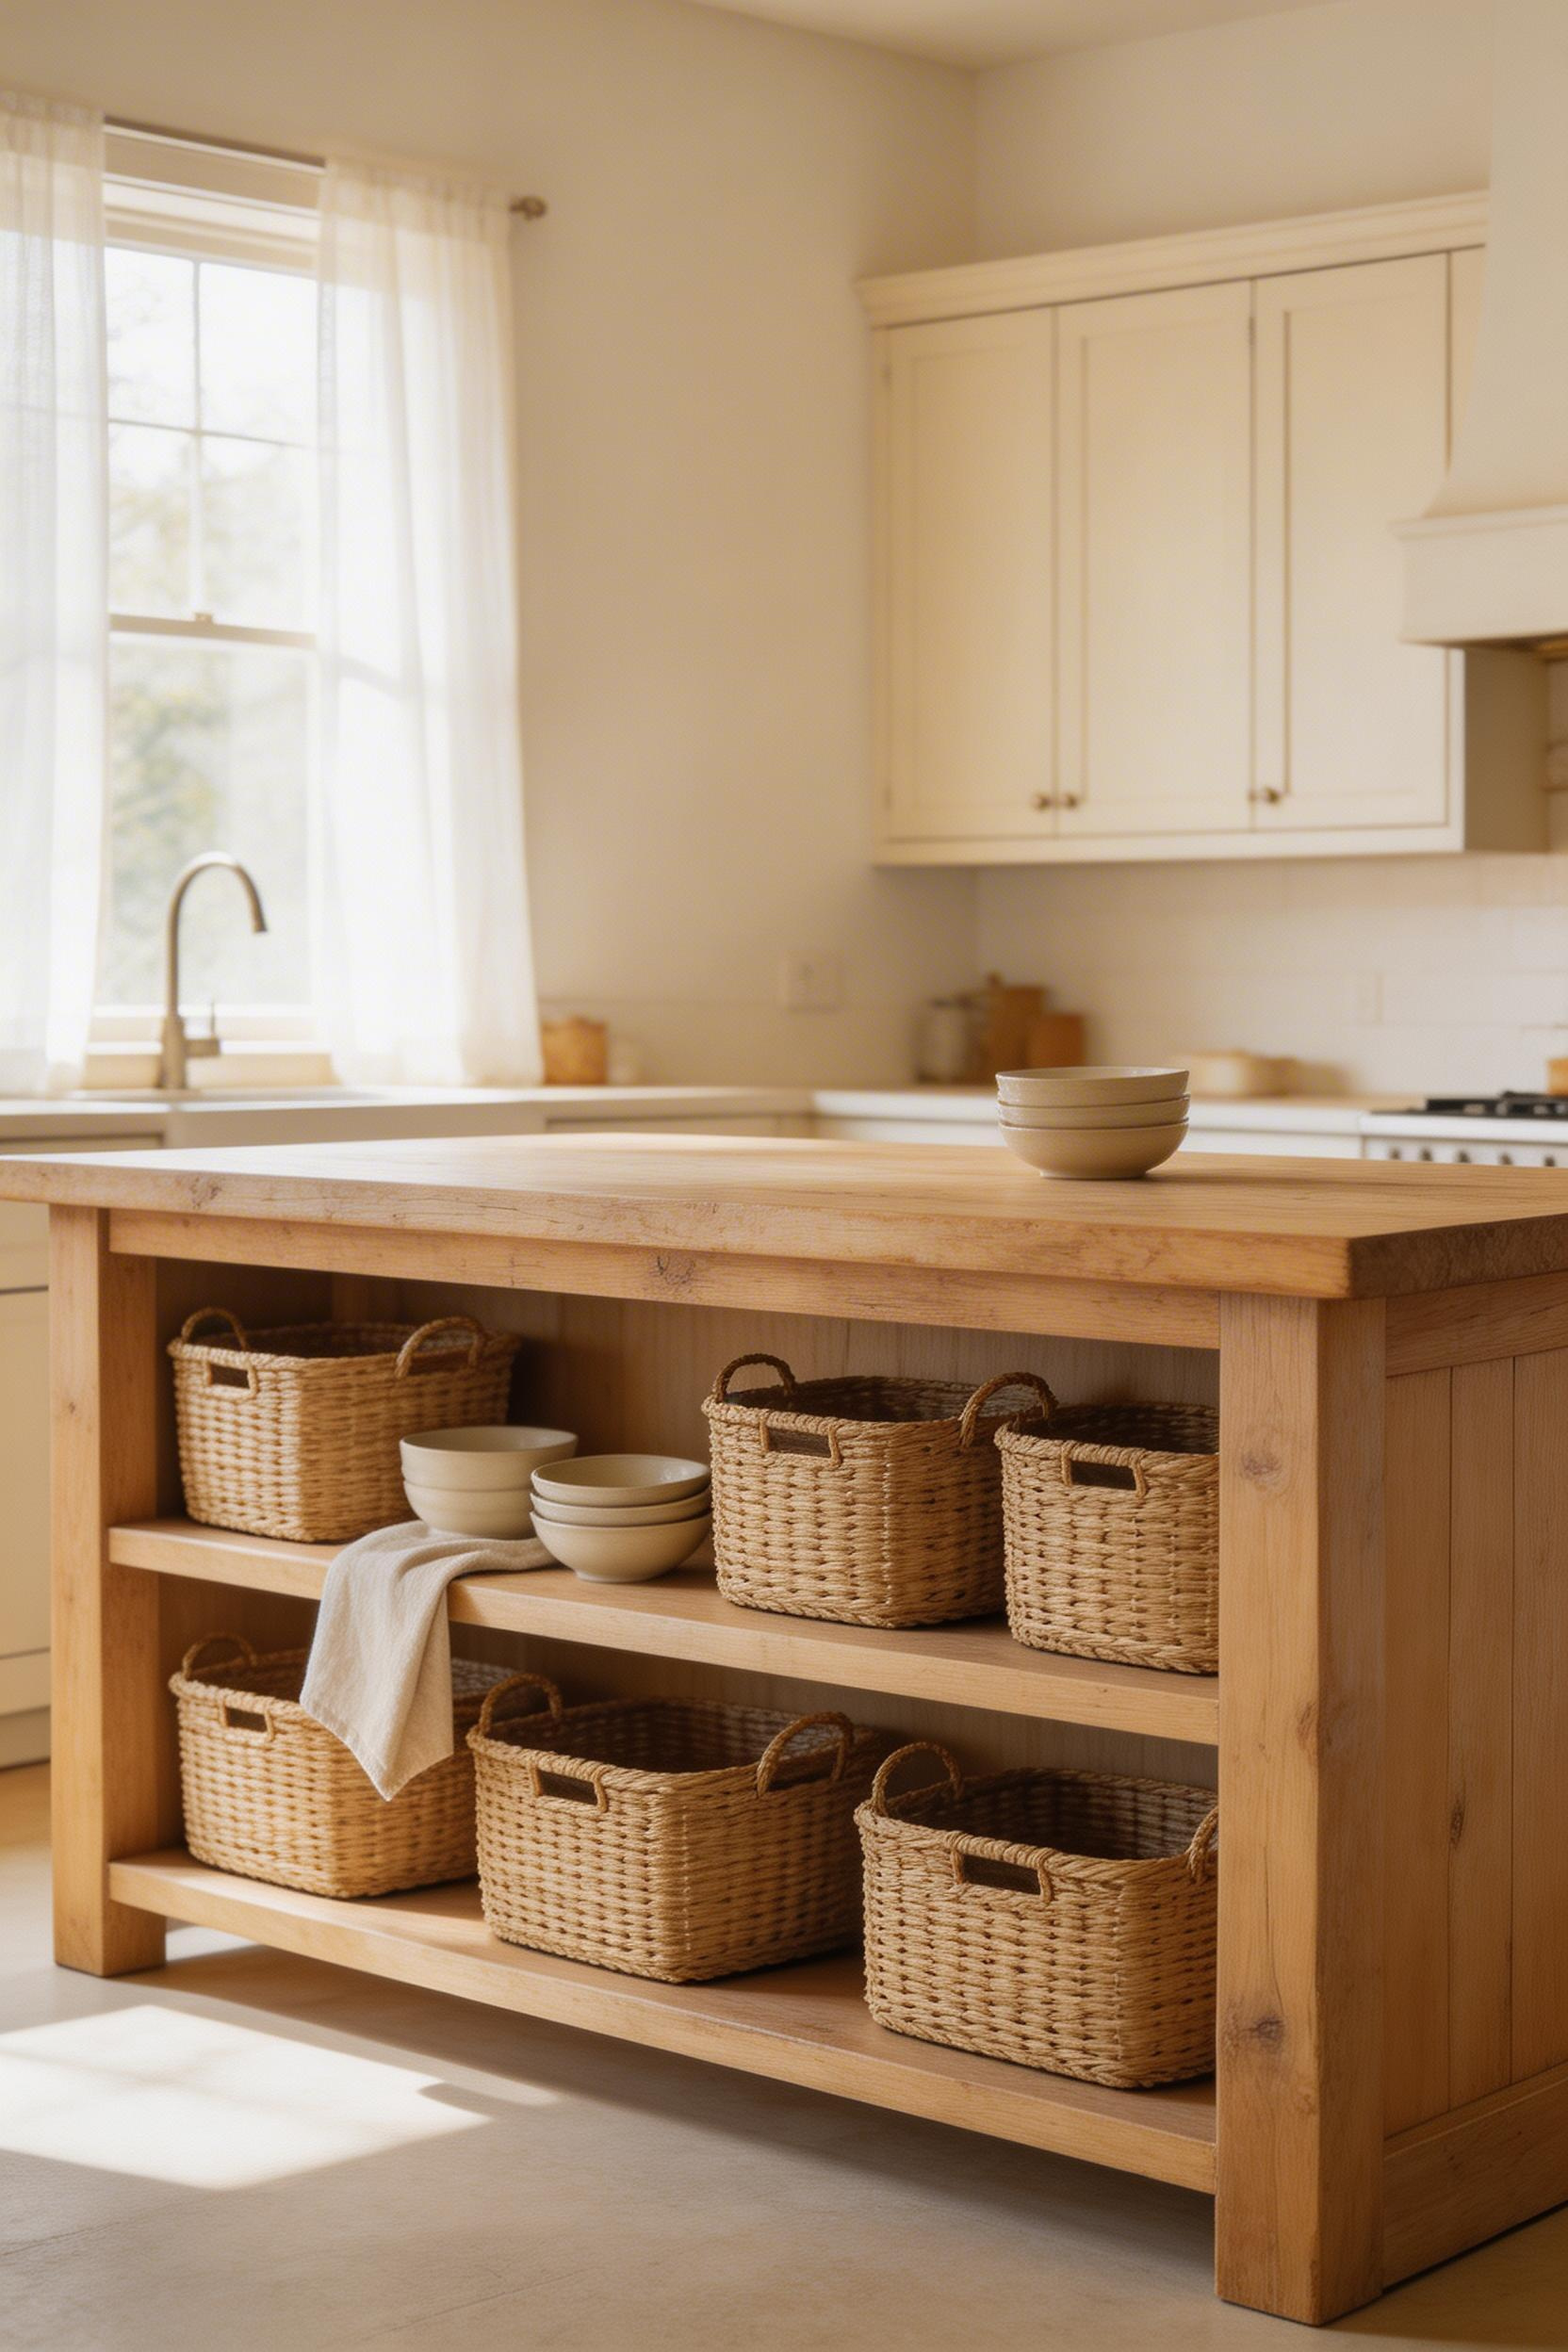
Rattan, seagrass, and water hyacinth baskets are the best materials for this application. They breathe (no humidity trap), are lightweight when loaded, and have enough visual softness to work alongside wood and iron without competing. IKEA’s LUSTIGKURRE seagrass basket ($10–$15, 13″ × 9.75″ × 8.25″) is the best budget option — it fits most 14″ deep island shelves with a clean 1″ reveal. Serena & Lily’s Capri woven basket ($88–$128, large, with handles) doubles as a serving vessel you can carry from island to table.
Shelf Depth and Basket Sizing
The basket-to-shelf ratio matters more than either measurement alone. A 14″ deep shelf with a 13″ deep basket leaves 1″ at the front — clean and intentional. A 14″ shelf with a 10″ basket looks unfinished. When buying baskets, measure the shelf depth first, then buy baskets 1″ shallower.
For styling the open shelves, limit the visible items to a single visual category: natural fibre baskets, ceramic serving bowls, and linen napkin rolls work together. Brightly coloured or mismatched items break the composition. Houzz research found open kitchen shelving chosen in 38% of renovations under $25,000 — partly for cost, partly because open shelving forces a visual discipline that makes the kitchen feel more curated.
The broader application of rustic design across the dining space is worth considering alongside the island. Rustic dining room decor explores how to carry the same natural materials and warm tones through into the adjoining room.
13. Vintage Farmhouse Table Repurposed as Island
An antique farm table — trestle base or turned-leg style, 30″–36″ wide, solid and scarred from decades of actual use — converted to kitchen island duty is a rustic kitchen island with the most authentic pedigree possible. It has lived a working life already. It is built for more.
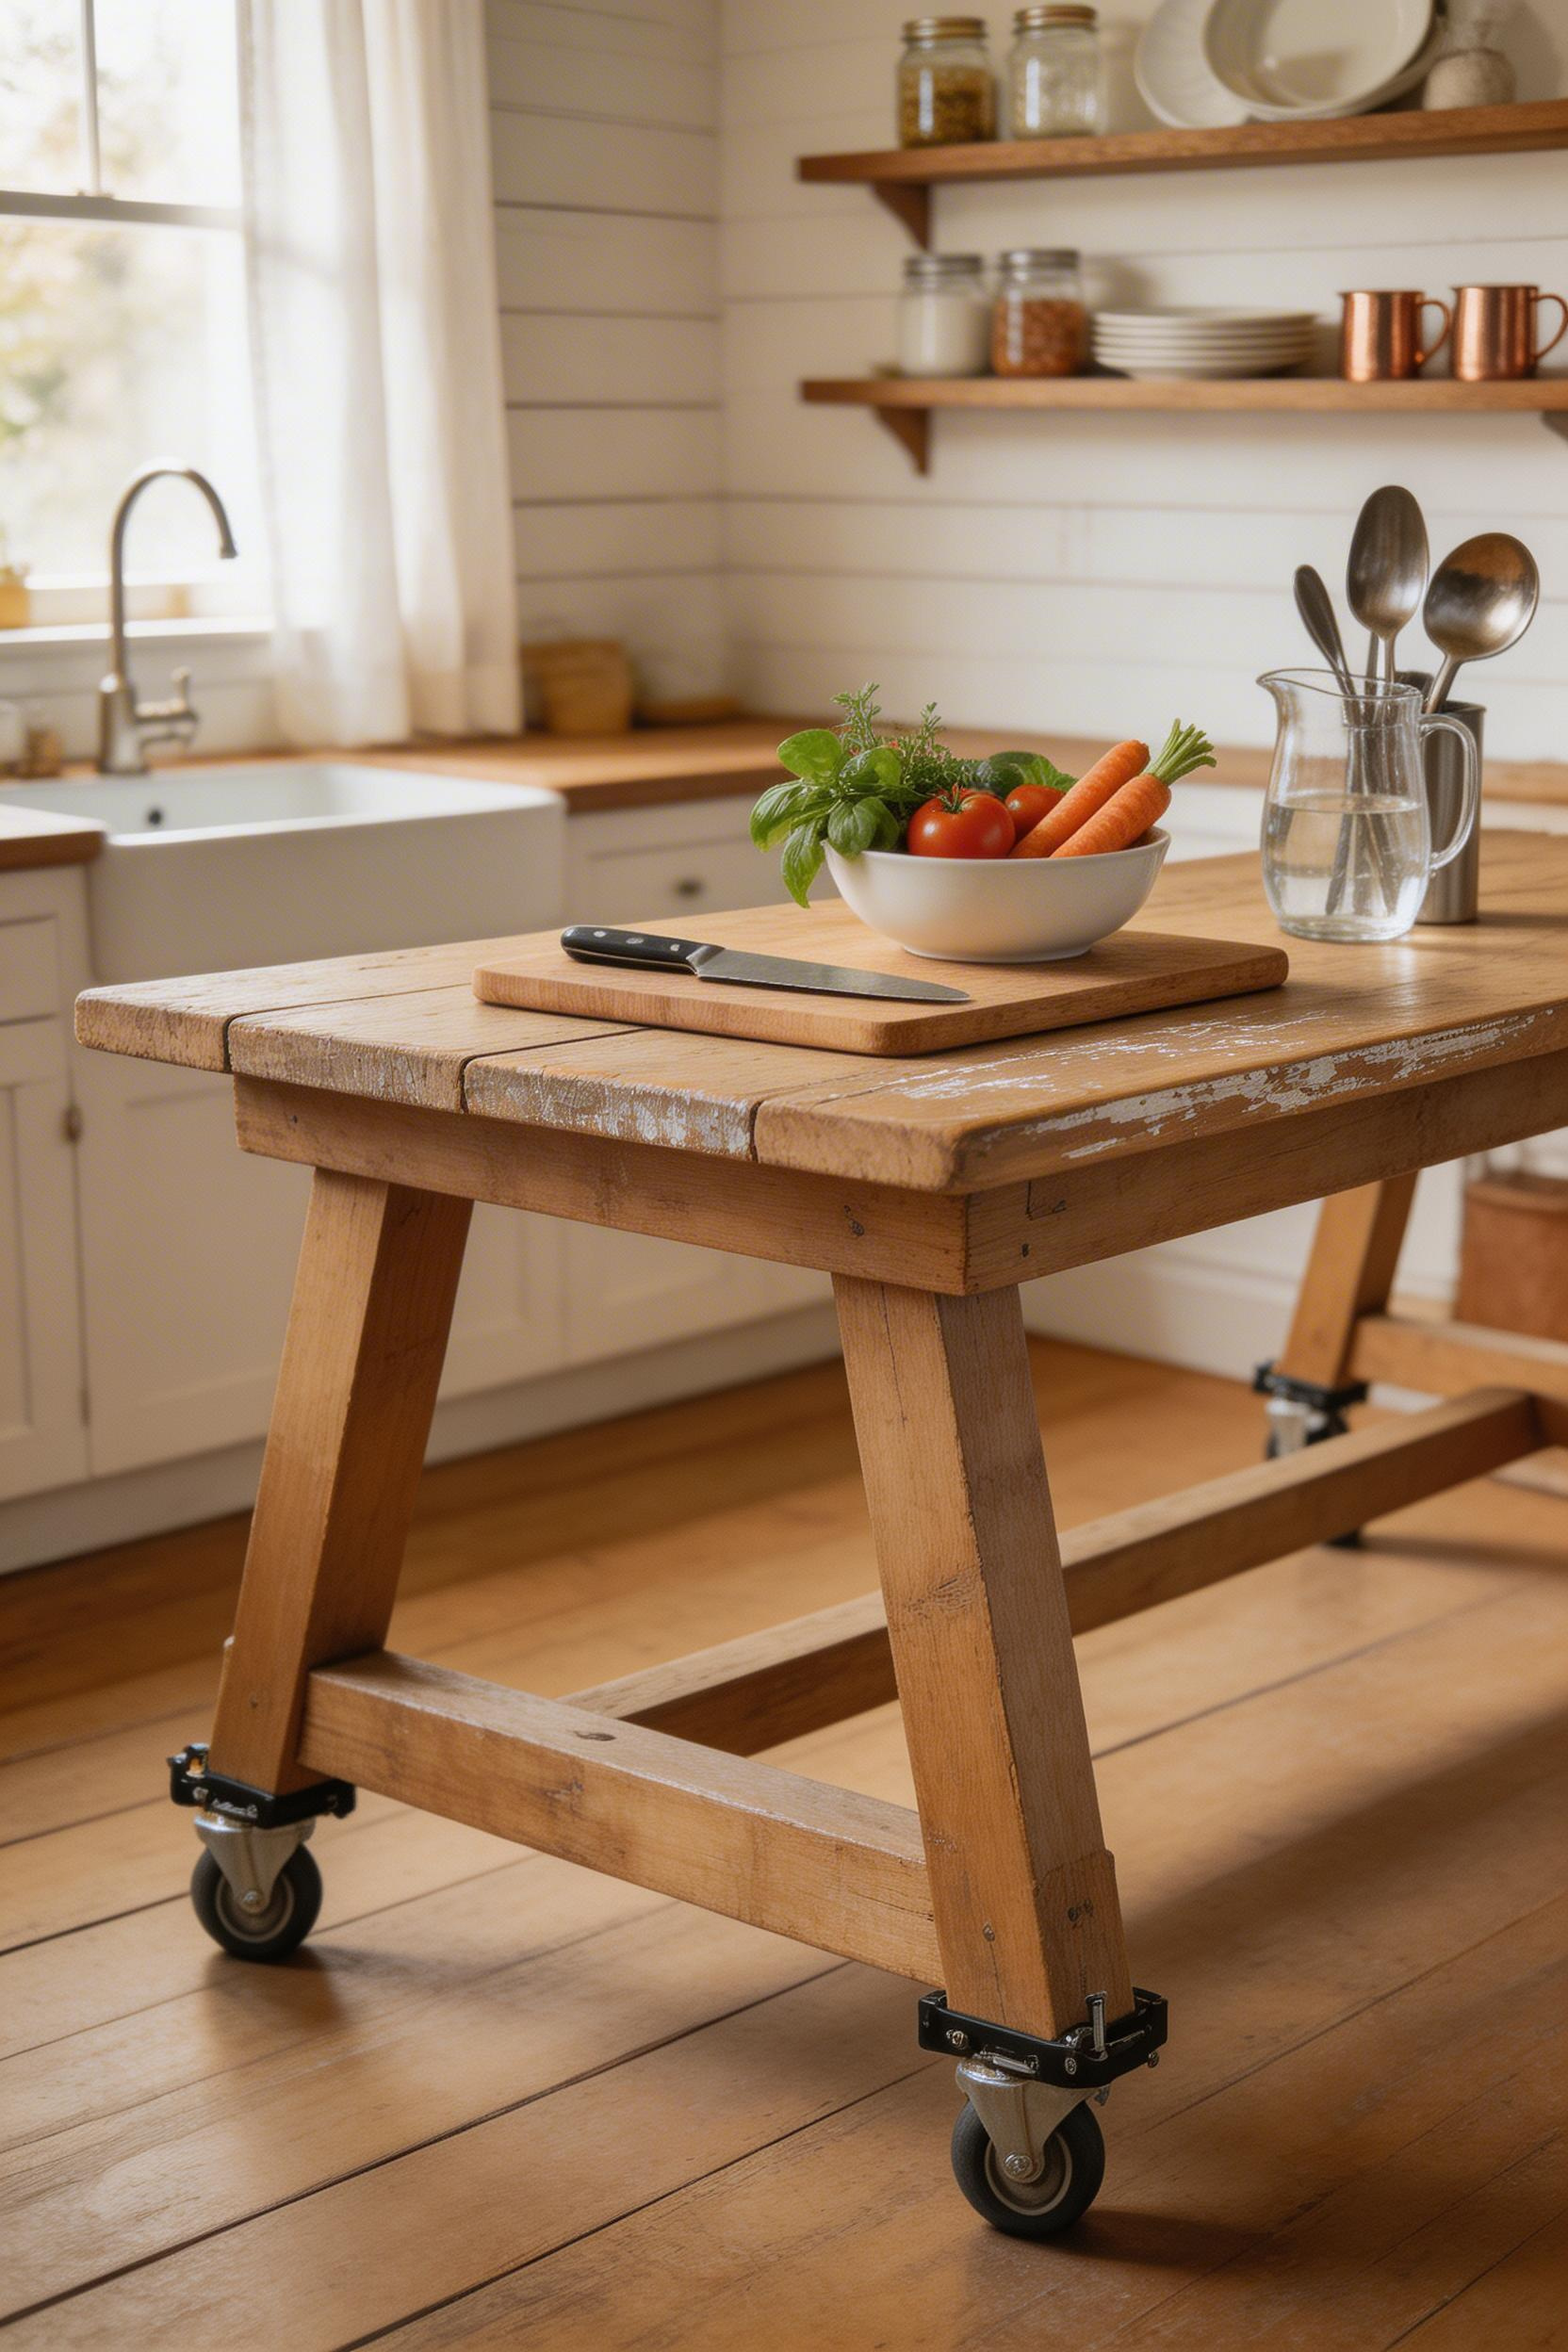
The best tables for kitchen conversion are painted pine trestle tables from the 1920s–1950s, typically found at rural estate sales for $150–$600. Their dining-height legs (30″–32″) need just 3″–4″ of added height to reach standard counter height (34.5″). Shepherd Hardware 3″ locking plate casters ($28–$45 for a set of four, rated 200 lbs each) do the job and add mobility as a bonus.
Testing Before Buying
The biggest red flag with an old farm table is when every joint wiggles. Put your palms flat on the top and push hard in each direction. If the table moves more than a quarter inch laterally, the joints need re-gluing before kitchen service. Prep use stresses joints far more than dining use ever did. Titebond III waterproof wood glue ($10–$14 per 8 oz bottle) and clamps for 24 hours will fix most loose joints. A completely collapsed joint may need a furniture restorer.
Refinishing for Kitchen Use
The tabletop may need stripping if it has been painted over multiple times. Citristrip Paint and Varnish Stripping Gel ($20–$28 per quart) applied for 30+ minutes and then scraped with a plastic scraper is effective without damaging the wood. Once stripped, sand to 180 grit and finish with Minwax Early American Stain (215) for a classic warm farmhouse tone. Seal with polyurethane for kitchen-surface durability.
Antique farm tables on Chairish and 1stDibs saw US sales increase 54% from 2020 to 2022, driven by demand for kitchen pieces with genuine history. For related ideas on building a cohesive traditional kitchen around this style, traditional kitchen cabinets covers cabinetry choices that pair naturally with repurposed and antique furniture.
14. Stone or Concrete Top on a Rustic Kitchen Island Base
The contrast between a smooth, cool-toned stone or concrete top and a rough timber base is intentional design tension — not a mismatch. Done well, it reads as thoughtful and resolved. Done poorly, it looks like two unrelated projects collided. The key is that both materials must be fully themselves: rough wood rough, smooth stone smooth.
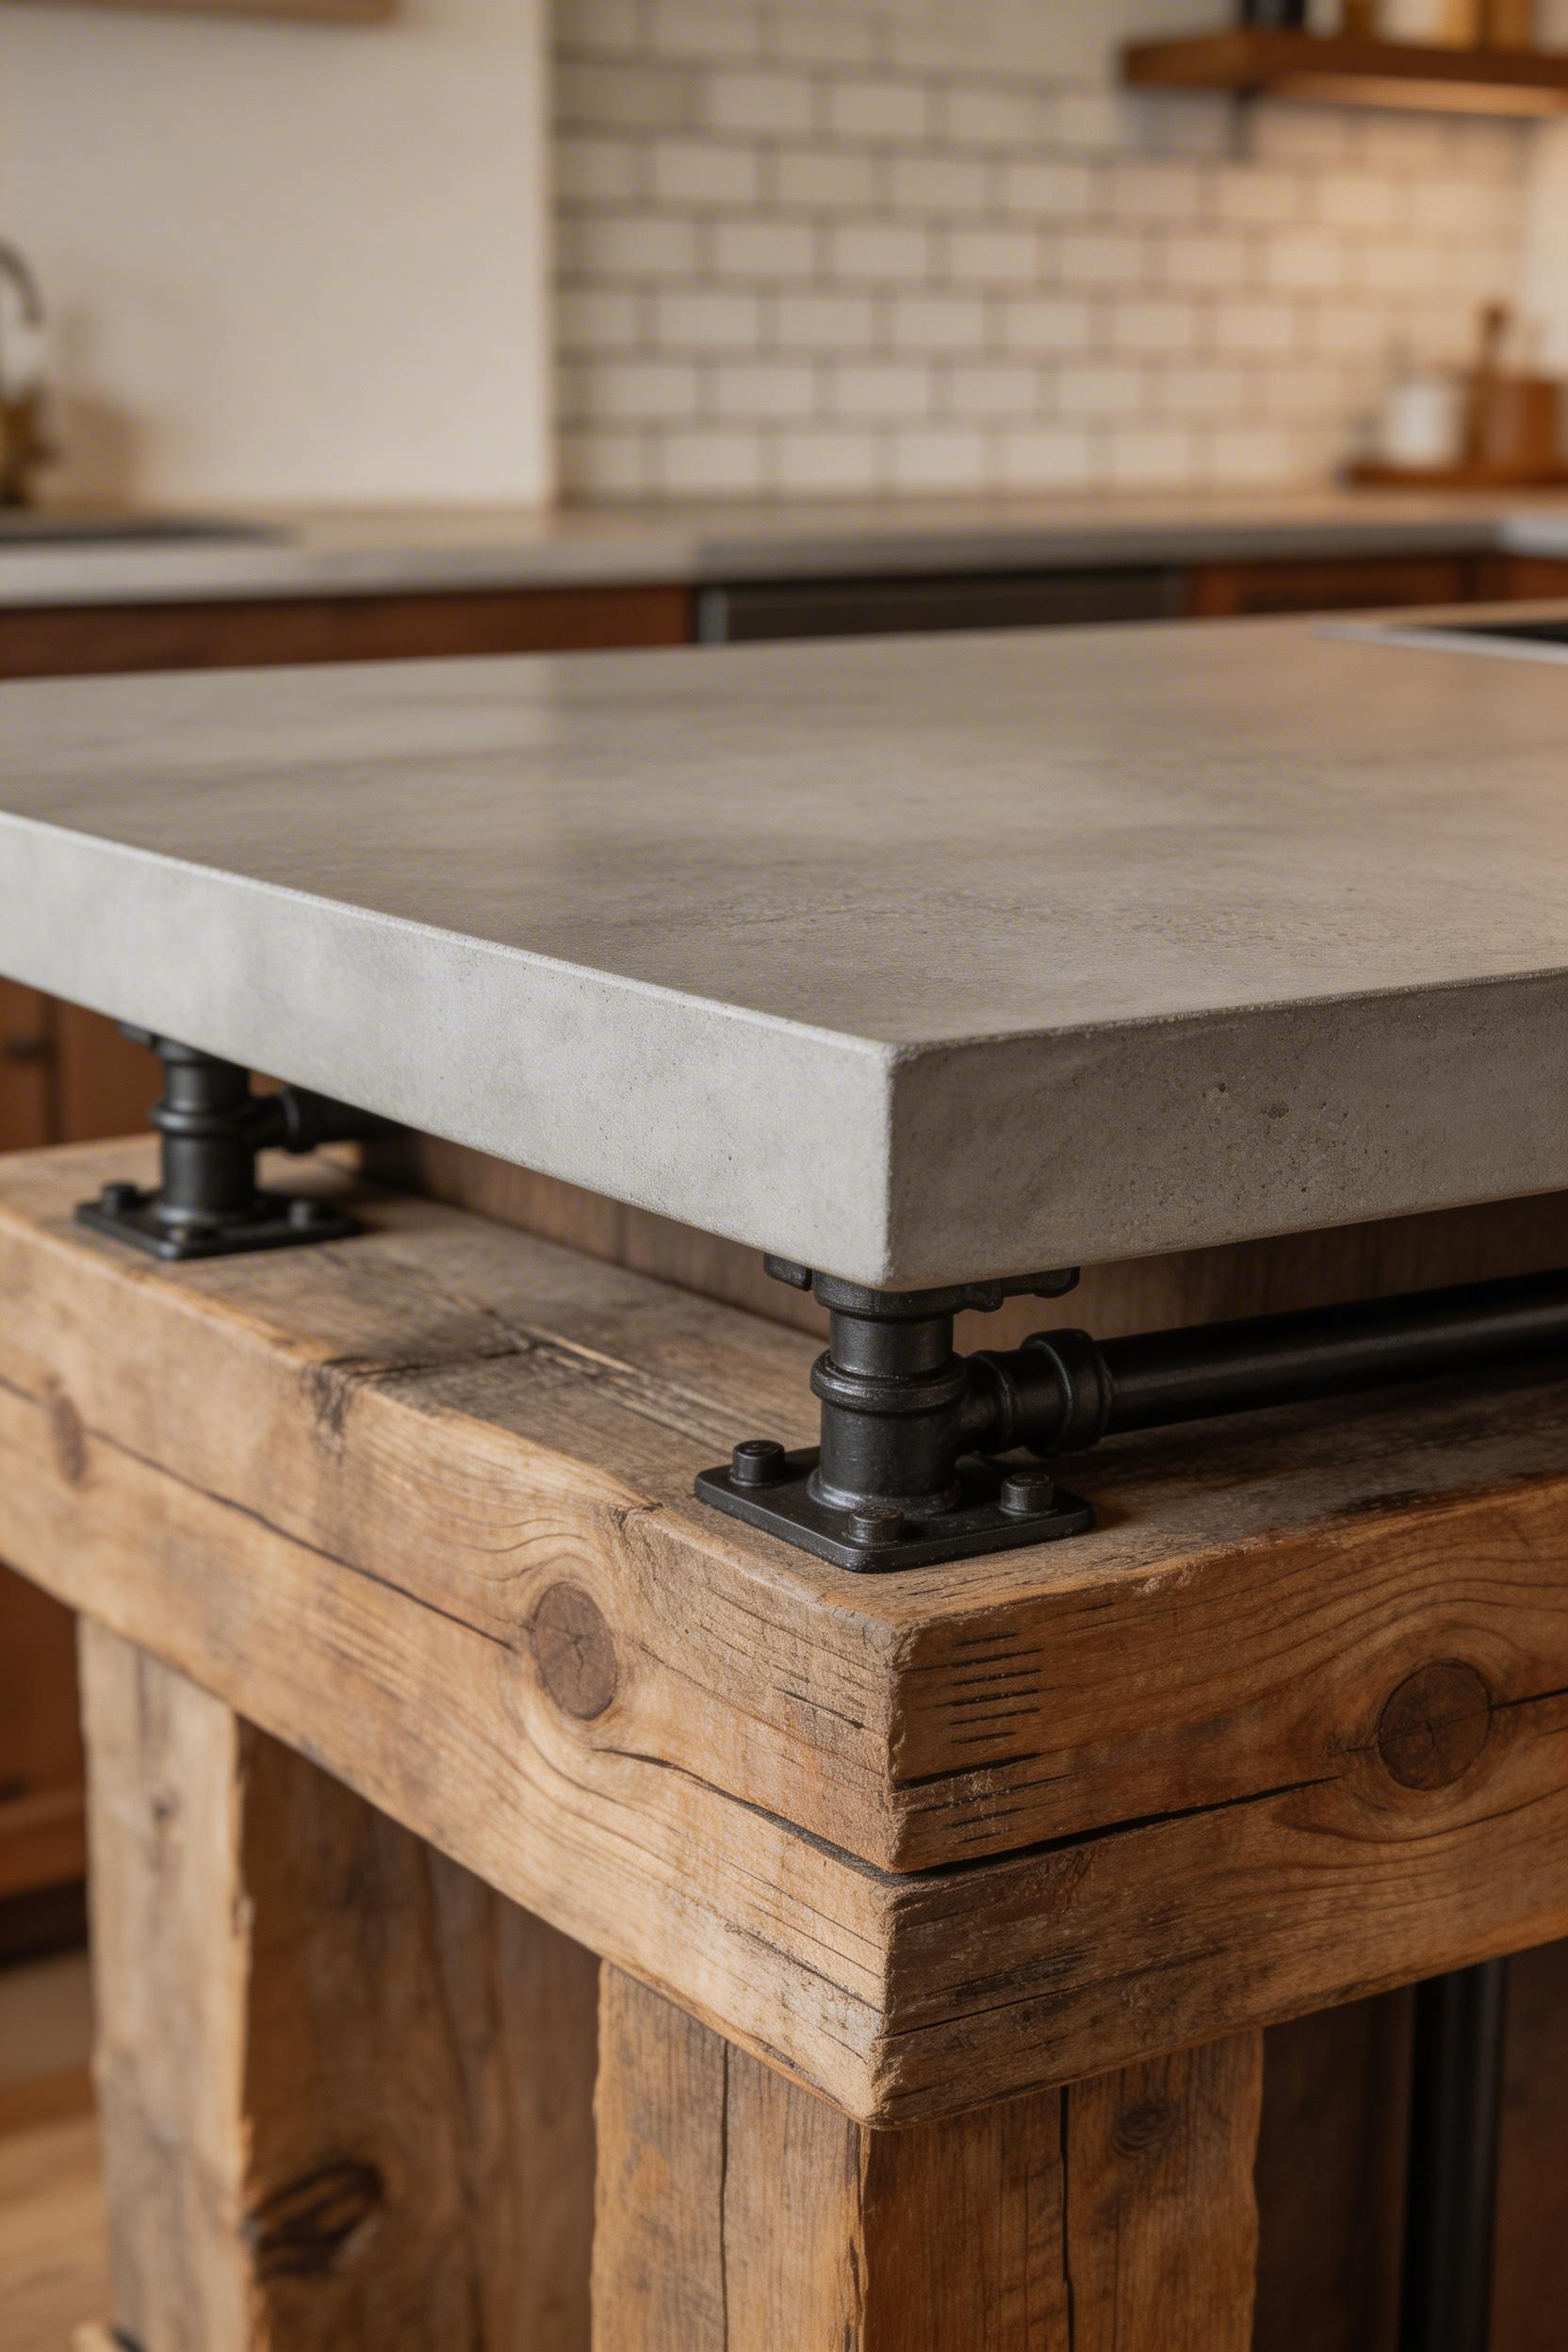
Honed concrete and honed natural stone are the two most effective top choices for this combination. Honed slate (very dark, matte), honed limestone (warm grey, soft texture), leathered granite (tactile, durable), and soapstone (grey-green, self-healing for minor scratches) all work well over a timber base.
Concrete vs. Stone: The Practical Choice
DIY cast concrete is the lowest-cost option at $8–$15 per square foot for materials — Quikrete 5000, a melamine form, and fibreglass mesh reinforcement. But pre-cast from a concrete studio is significantly easier and more dimensionally accurate at $75–$150 per square foot installed. The deciding factor is usually precision. A DIY pour has more character variation. However, it can’t achieve the flat, even surface that professional pre-cast provides.
For natural stone, soapstone from M. Teixeira Soapstone ($80–$120 per square foot installed) is the most maintenance-friendly choice. It is dense, requires little to no sealing, and can be sanded to remove deep scratches. Apply food-grade mineral oil periodically to deepen the grey-green colour.
One critical detail: seal the timber where it meets the stone overhang with 3 coats of Bona Hardwood Floor Polish. Stone allows condensation to pool at the joint. Unsealed wood at that point will swell and distort over time.
Concrete countertops grew from a niche product to a $1.2 billion US market segment between 2010 and 2023 according to IBISWorld, with rustic and industrial kitchen applications leading residential adoption.
15. Pendant Lighting to Complete the Rustic Island Look
Pendant lighting over a kitchen island is both task lighting and the single most visible design statement in the kitchen. The wrong pendant style undermines even a carefully chosen island below it. So this decision deserves the same attention as the island itself — possibly more, since it is visible from further away.
Standard pendant height is 30″–36″ from countertop surface to the bottom of the fixture. For islands under 48″ long, two pendants spaced evenly. For 60″–72″ islands, three pendants at equal intervals from each island end. The spacing matters. Pendants too close to the ends look unbalanced; pendants clustered in the middle leave the island edges in shadow.
Style and Bulb Temperature
Styles that reinforce the rustic kitchen island aesthetic include mason jar pendants (Ballard Designs Cluster in oil-rubbed bronze, $249–$319 for a three-jar set), rattan or wicker dome pendants (Serena & Lily, 18″ diameter, $248–$298 each), wrought iron cage pendants, and hand-blown amber glass.
Bulb warmth is the detail most people get wrong. Use 2700K–3000K colour temperature for rustic kitchens. Anything cooler (4000K and above) fights the warm tones of wood, stone, and iron. It makes the space feel clinical. The Lighting Research Center at Rensselaer Polytechnic found that task areas lit at 2700K–3000K scored 18% higher in user satisfaction surveys than identical spaces at 4000K. Warm tones read as more comfortable in wood-heavy environments.
A Lutron Caseta Wireless Smart Dimmer ($59–$75) allows the pendants to serve double duty: bright task lighting during prep, warm ambient light during meals. It doesn’t require a neutral wire and works with most LED bulbs.
One last, practical tip: buy the pendant lighting before you confirm the island height. Chain length and ceiling height both determine the final drop. If you finalise the island dimensions first and then discover the pendant doesn’t have enough chain to hang at the right height, you’re looking at a rewire. Get the lights, measure the drop, then lock in the island dimensions.
For more context on how lighting fits into full kitchen renovation planning, kitchen remodel ideas covers the sequencing of decisions from structural changes through to finishing details.
The Right Rustic Kitchen Island for Your Kitchen
A rustic kitchen island earns its place by doing two things at once: functioning as the most-used workspace in the room and contributing something visually honest to the space around it. The fifteen ideas here cover different budgets and skill levels — from a DIY dresser conversion for under $300 to a live edge slab on a custom steel frame for several thousand dollars.
If you are starting from nothing, the converted farmhouse table or vintage dresser island gives you the most character per pound spent. If you are building for the long term, a butcher block island with deep drawers or a live edge slab top is worth the investment. Both improve with age.
However, there is one decision that cuts across all fifteen options and deserves to be made first: lighting. The pendant you hang above the island affects how every other material reads in the room. Choose it early, confirm the drop height, and let it inform the island dimensions rather than the other way around. It is a small reordering of steps that prevents the most common and most expensive mistake in kitchen island projects.
The rustic kitchen island that works is the one built from materials that suit your kitchen’s character, sized for how you actually cook, and finished to improve with daily contact. That is the one worth choosing.


